
Setup wizard
On this page
When you activate RestroPress for the first time, a setup wizard opens and takes you from an empty site to a store that can take orders. It has seven steps, shows a live phone preview of your storefront next to the form, and saves your progress as you go. Every step can be skipped and revisited.
The wizard opens once automatically after activation. To open it again, go to wp-admin/admin.php?page=rpress-setup, or use the Run the setup wizard button in the "RestroPress setup wizard" notice that shows on the Dashboard and RestroPress screens until you finish it. Save and finish later at the top right leaves the wizard without losing what you have entered. You can jump to any step in the left-hand list. Steps show a Done or Skipped mark and a progress bar ("2 of 7 done"). The buttons are Back, Skip for now and Save and continue (Finish setup on the last step). Everything you set here can be changed later under RestroPress › Settings.
The preview on the right is labelled "Live preview". It shows your restaurant name, the service, today's hours, your menu items by category with prices, dietary labels and Veg marks, and a "View cart" bar in your currency.
1. Store basics#
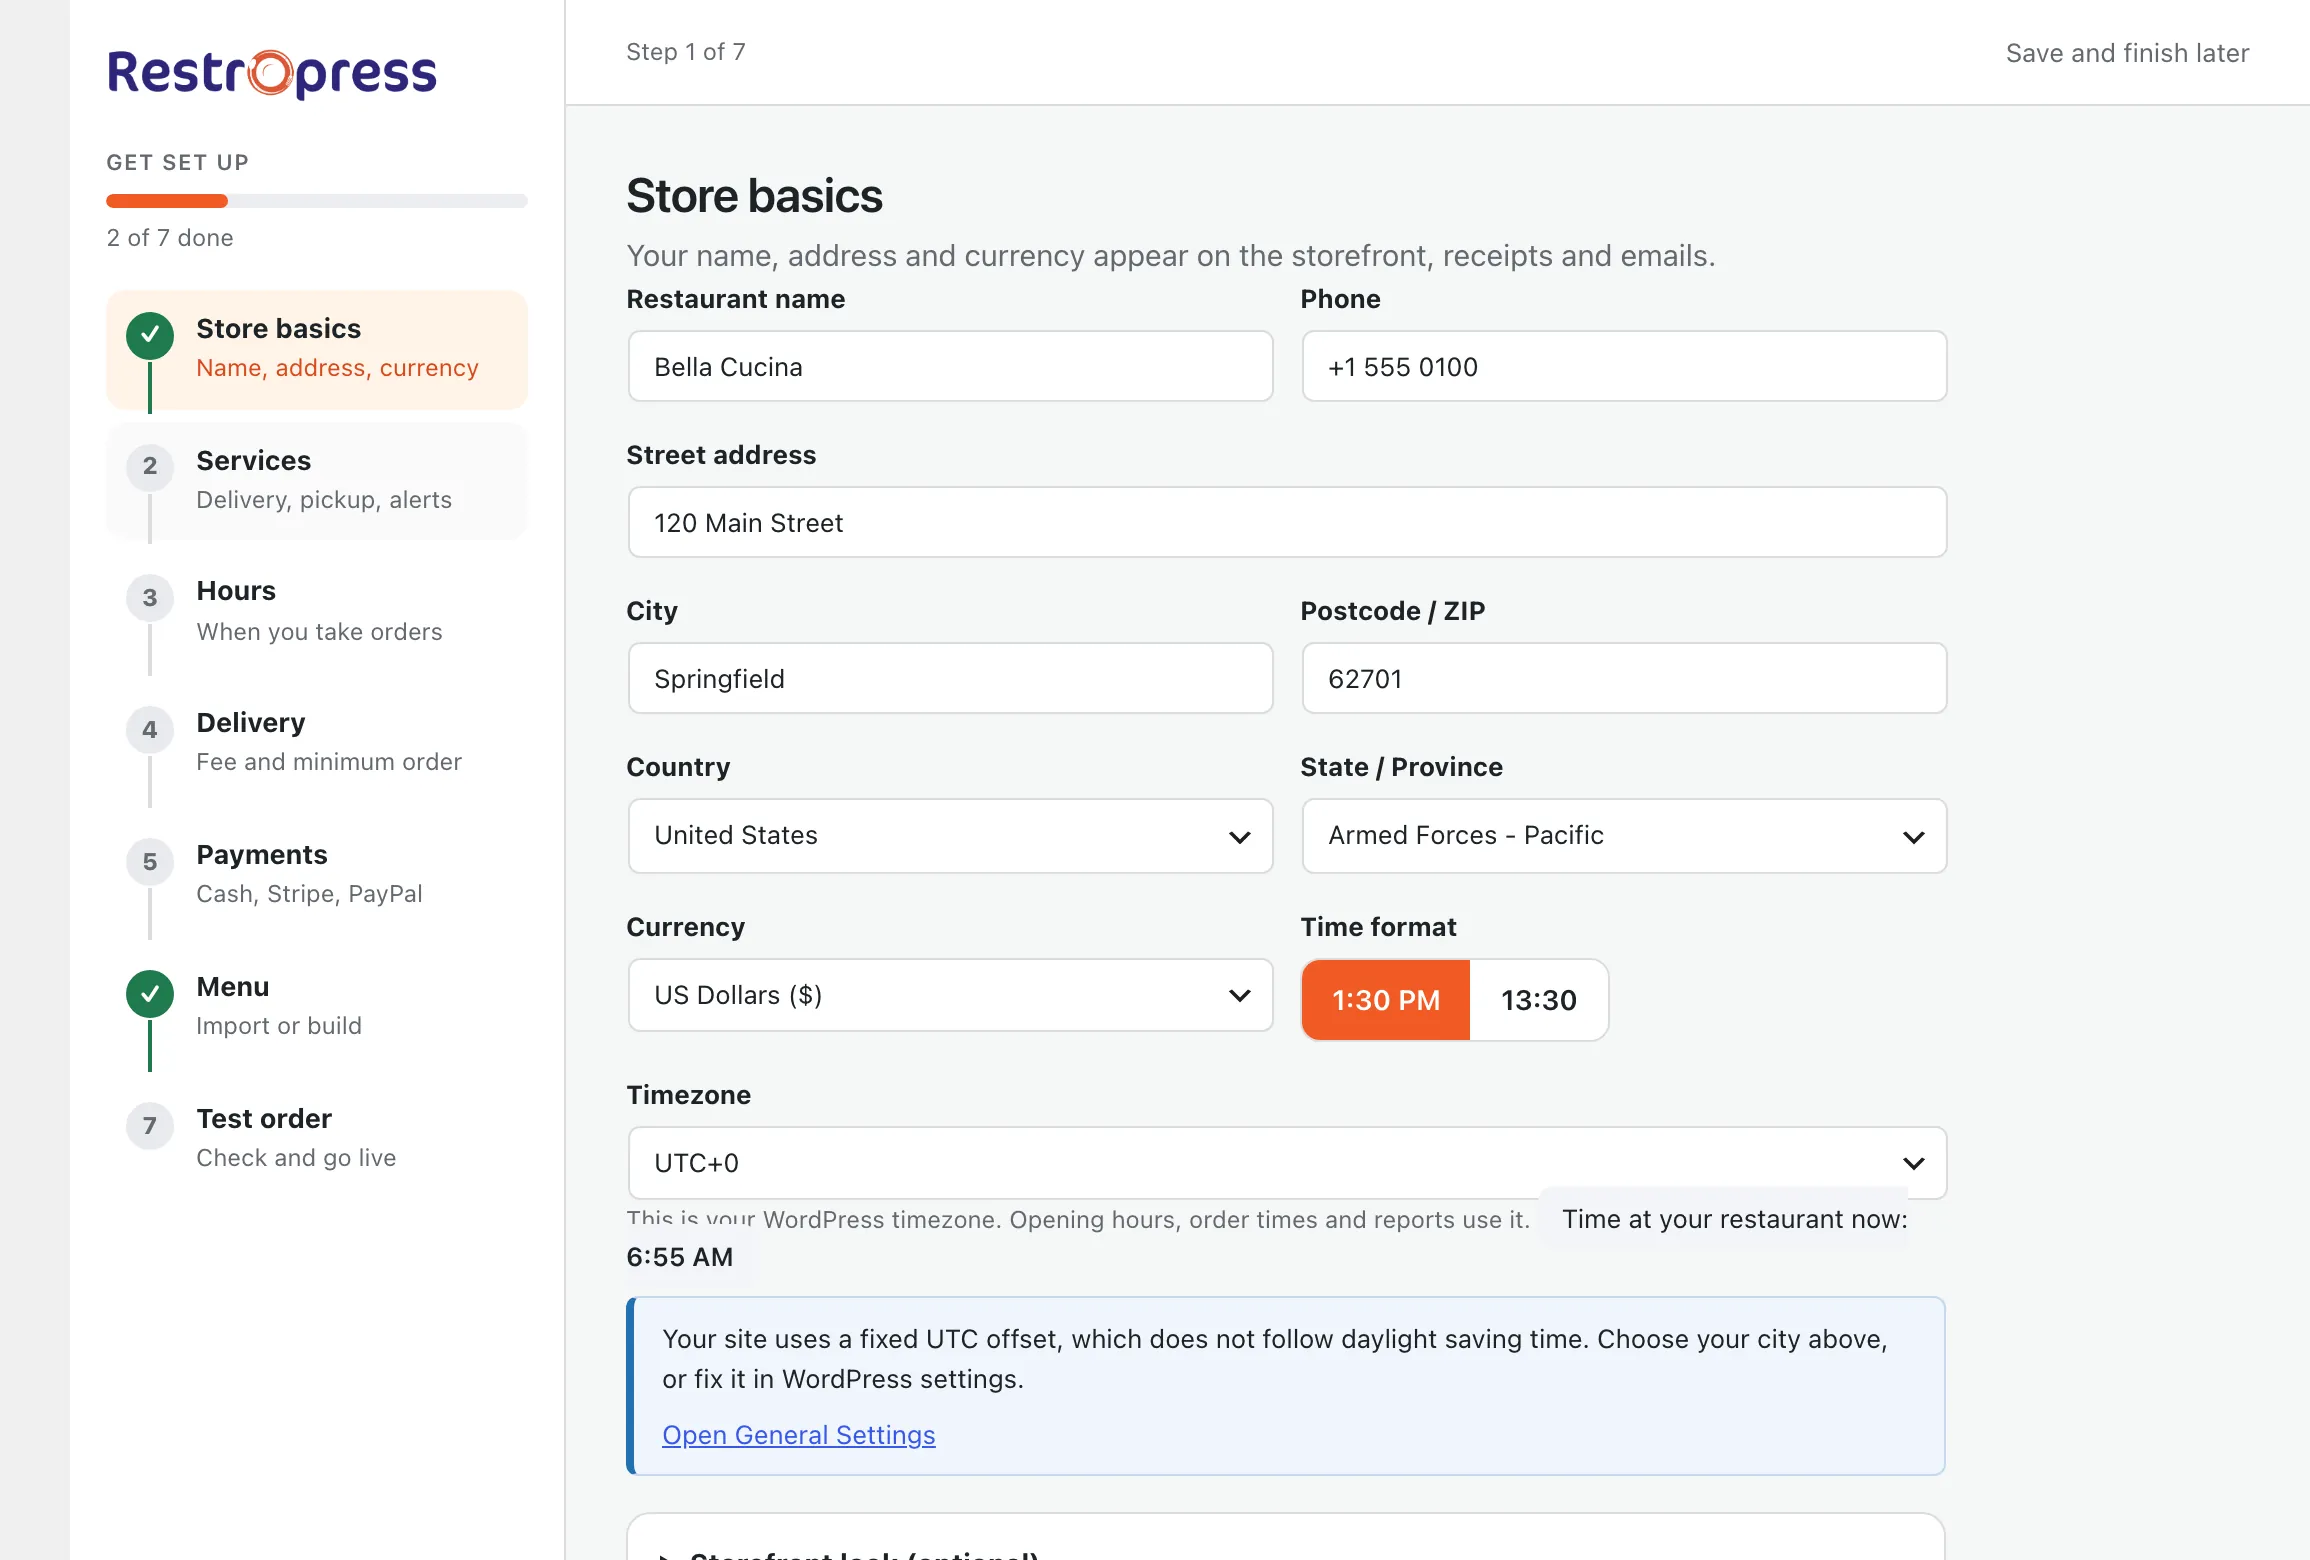
- Restaurant name: saved as the WordPress site title, and as the email From name if that is empty.
- Phone, Street address, City, Postcode / ZIP, Country and State / Province.
- Currency: the store currency.
- Time format (1:30 PM or 13:30) and Timezone. The wizard shows the current time at the restaurant, offers Use this timezone when your browser's timezone differs, and warns if the site uses a fixed UTC offset instead of a city. These are saved as your WordPress timezone and time format, so they apply across the whole site.
A collapsed Storefront look (optional) section at the bottom has the Template (Classic keeps the original look and inherits your theme; Modern is image-forward, like a food-delivery app), the Brand colour for buttons, links and highlights, and the Menu layout (List or Grid). You can change them later under Settings › Styles.
2. Services#
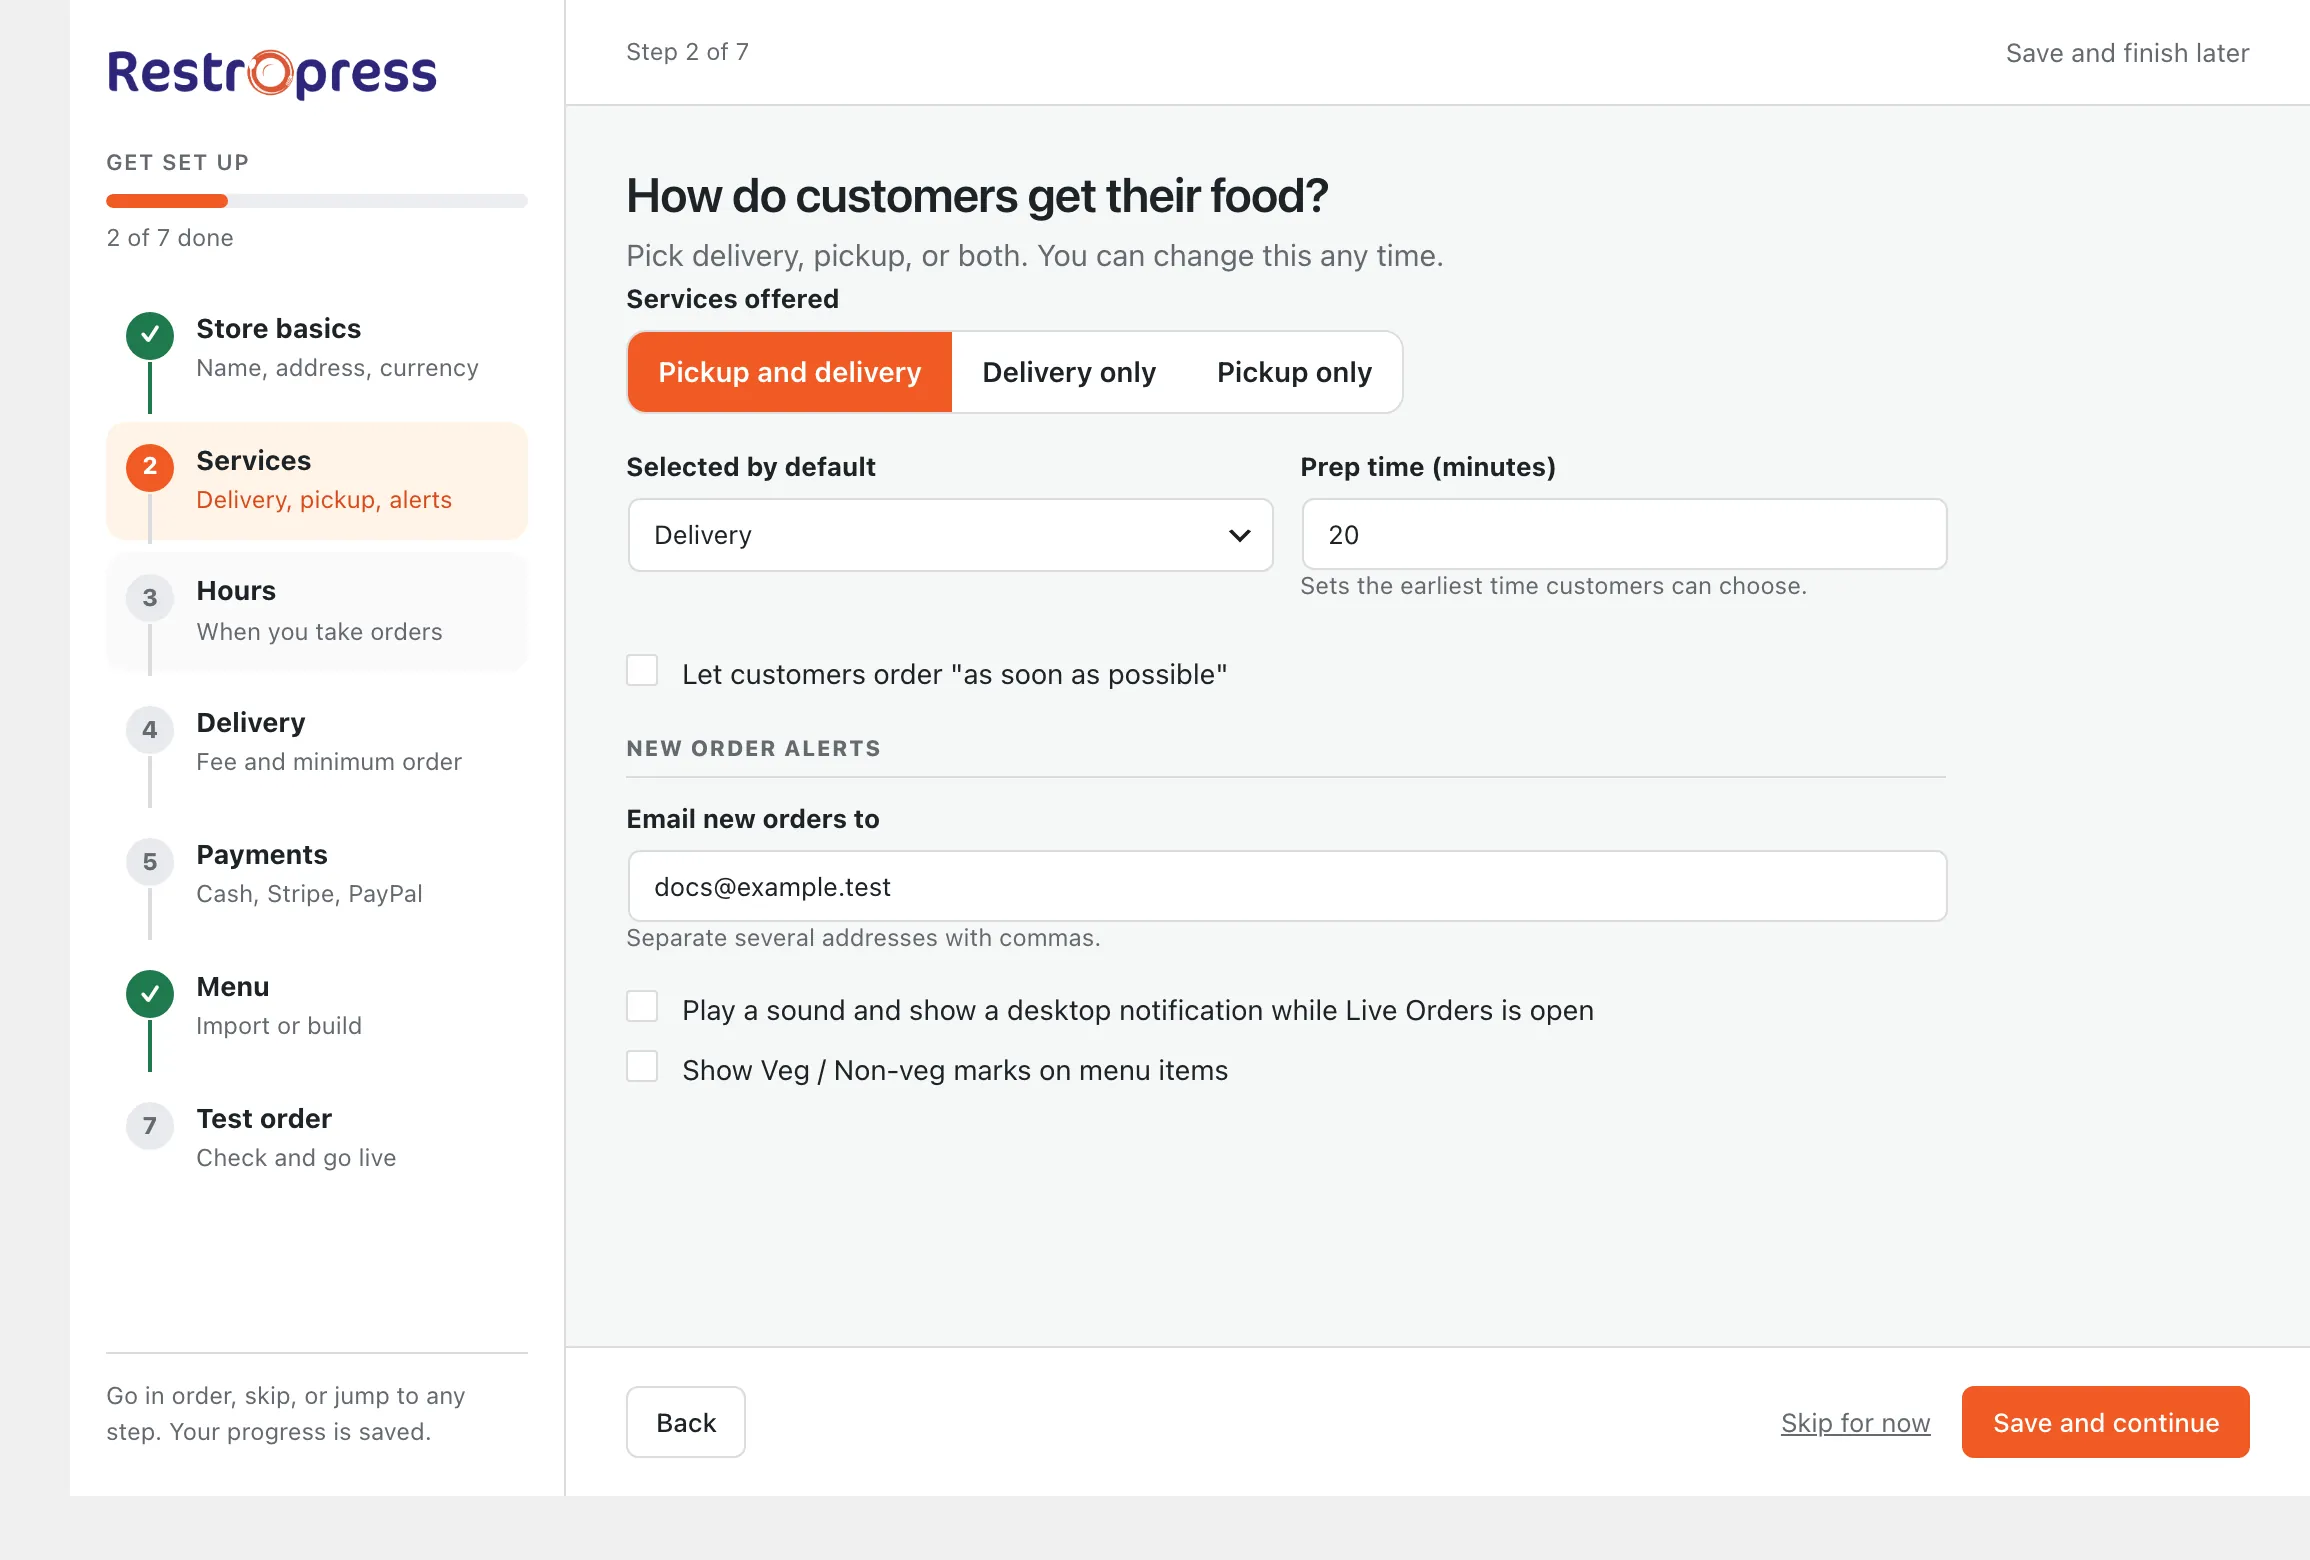
"How do customers get their food?"
- Services offered: Pickup and delivery, Delivery only or Pickup only.
- Selected by default: Delivery or Pickup (only when both are on).
- Prep time in minutes (0 to 1440), and Let customers order "as soon as possible". On a store that never set them, this box and the sound box below start unticked.
- Email new orders to: the address that receives new-order alerts.
- Play a sound and show a desktop notification while Live Orders is open.
- Show Veg / Non-veg marks on menu items, the green and red marks used in India and similar markets. Off by default.
3. Hours#
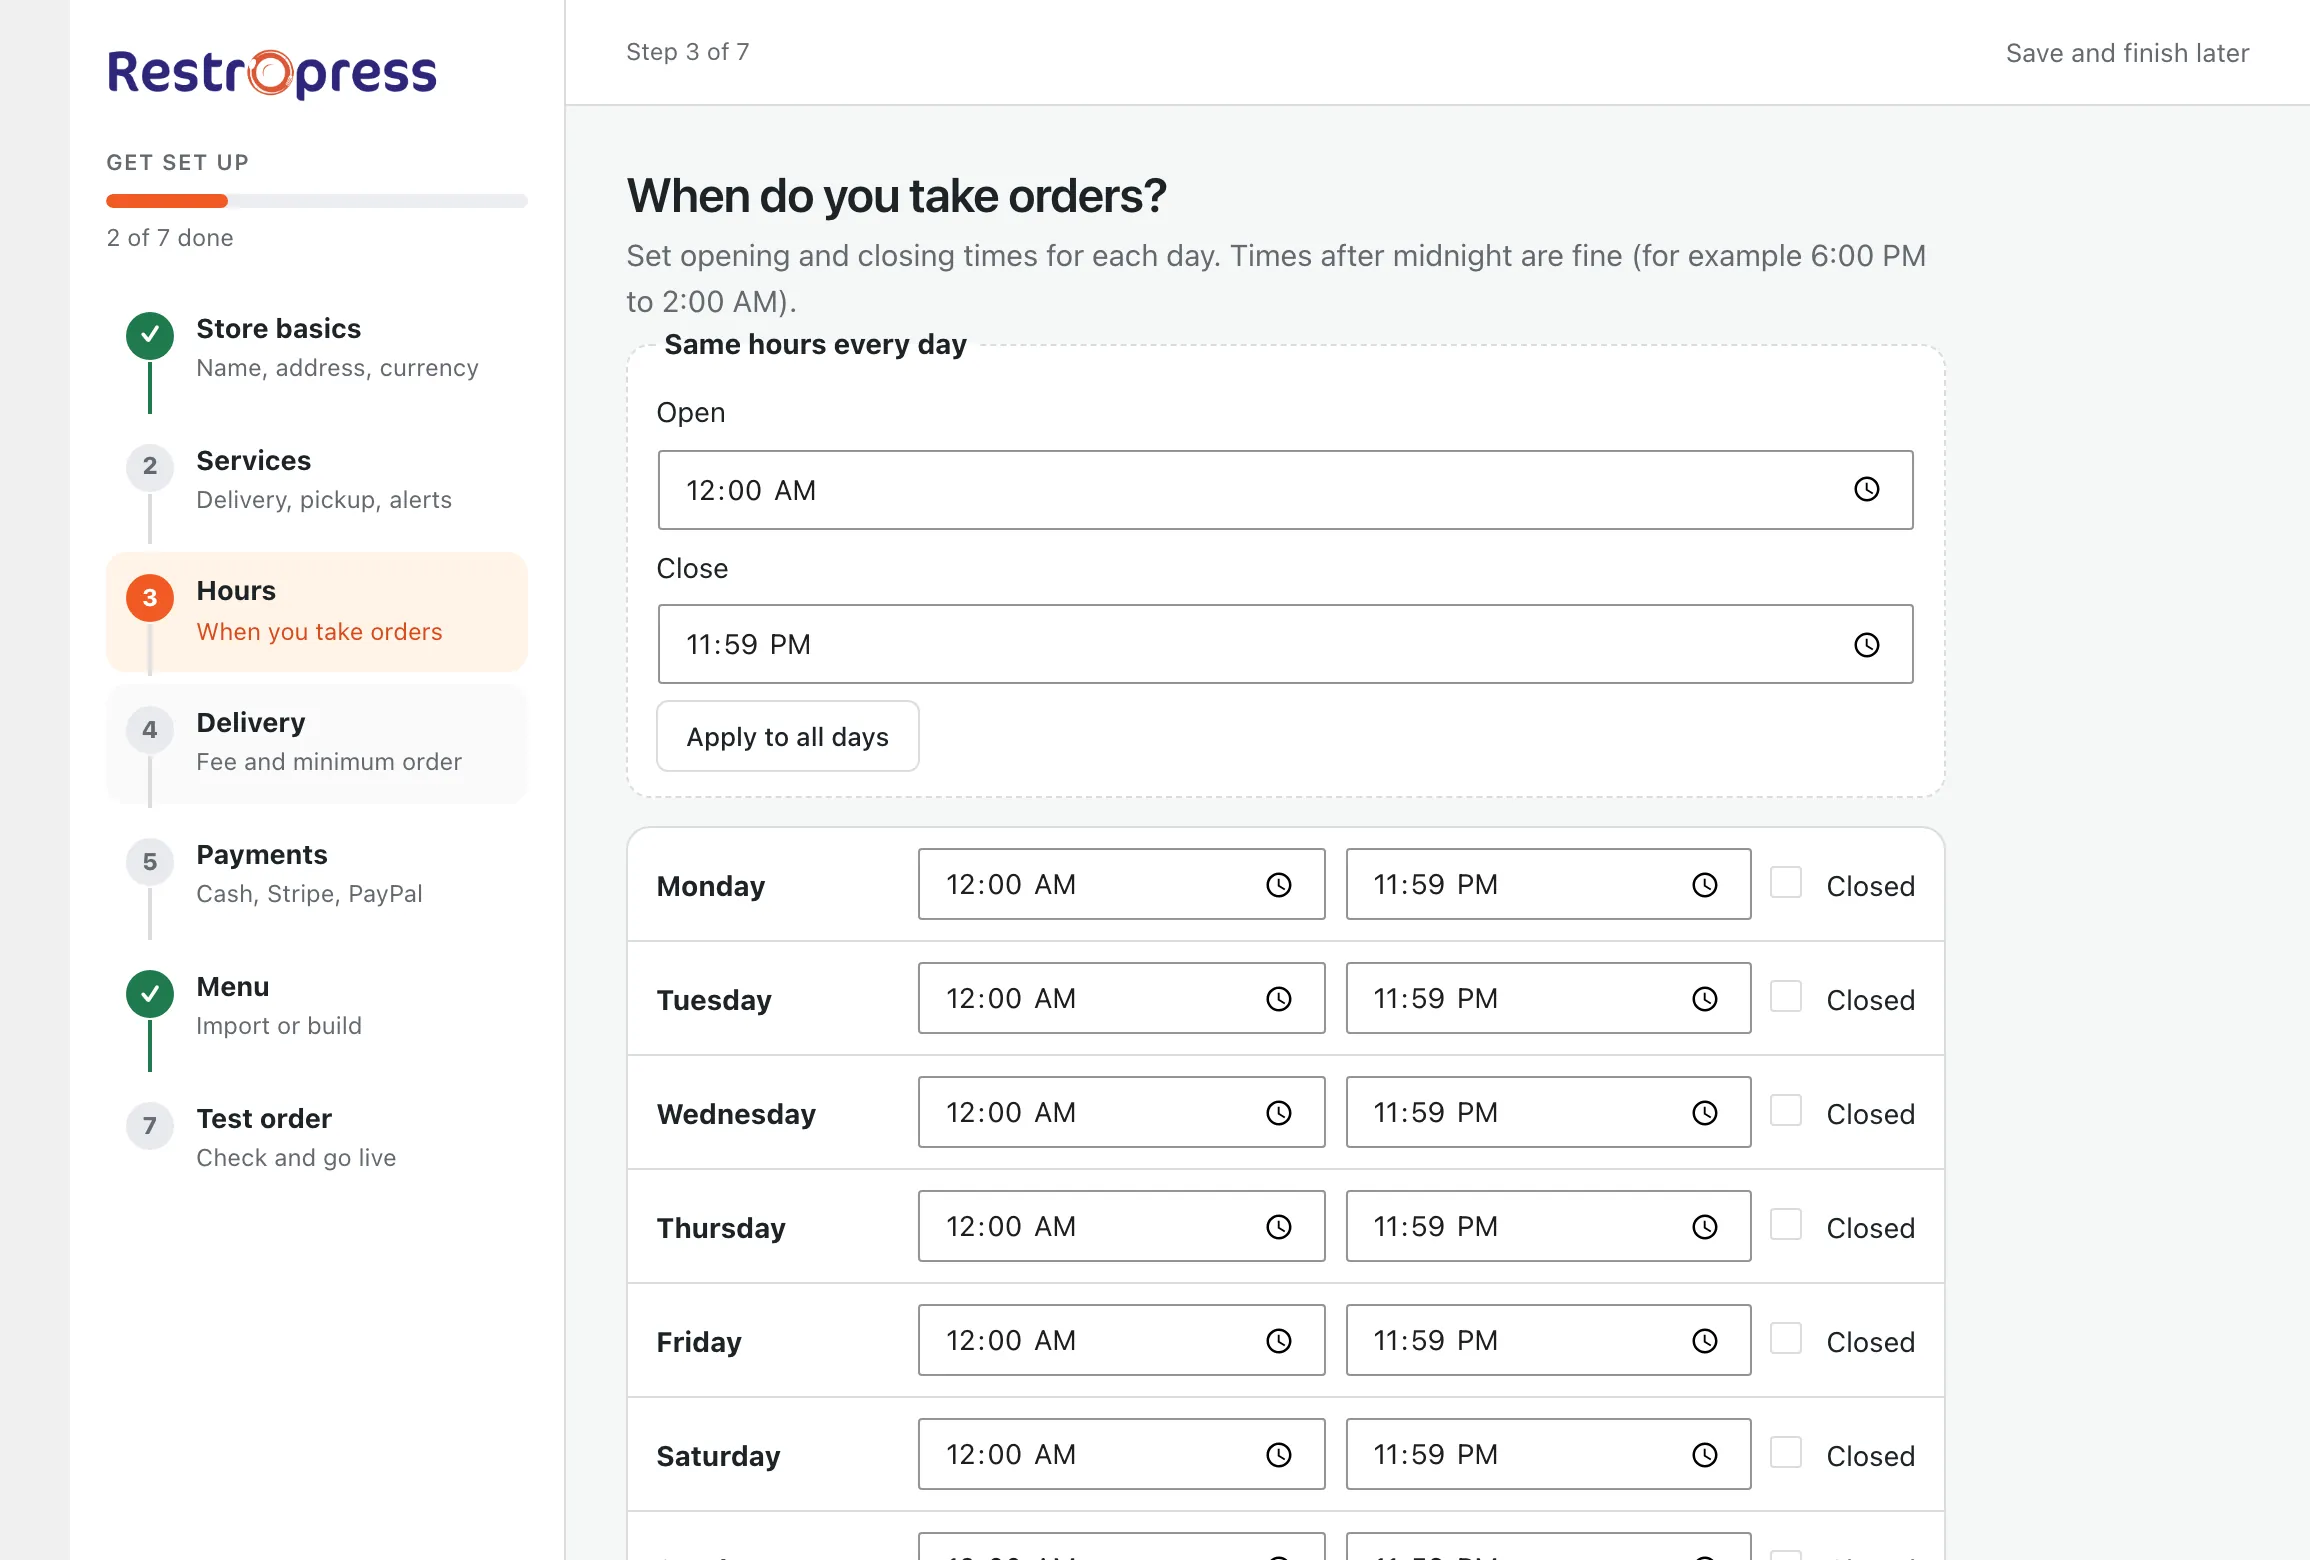
"When do you take orders?" Set Open and Close for each day, or use Same hours every day with Apply to all days. Tick Closed for a day off. Times after midnight are allowed (for example 6:00 PM to 2:00 AM). Holidays, the time slot interval and the "always open" option stay under Settings › General › Service & Hours. If the Store Timing & Delivery Cutoff extension is active, this step only points to it.
4. Delivery#
"Delivery fee and minimum order": a Flat delivery fee, a Minimum order for delivery and a Minimum order for pickup. Leave a field empty for none. Pickup-only stores see no delivery fee. With the Delivery Fee extension the fee field is replaced by a note and a link.
5. Payments#
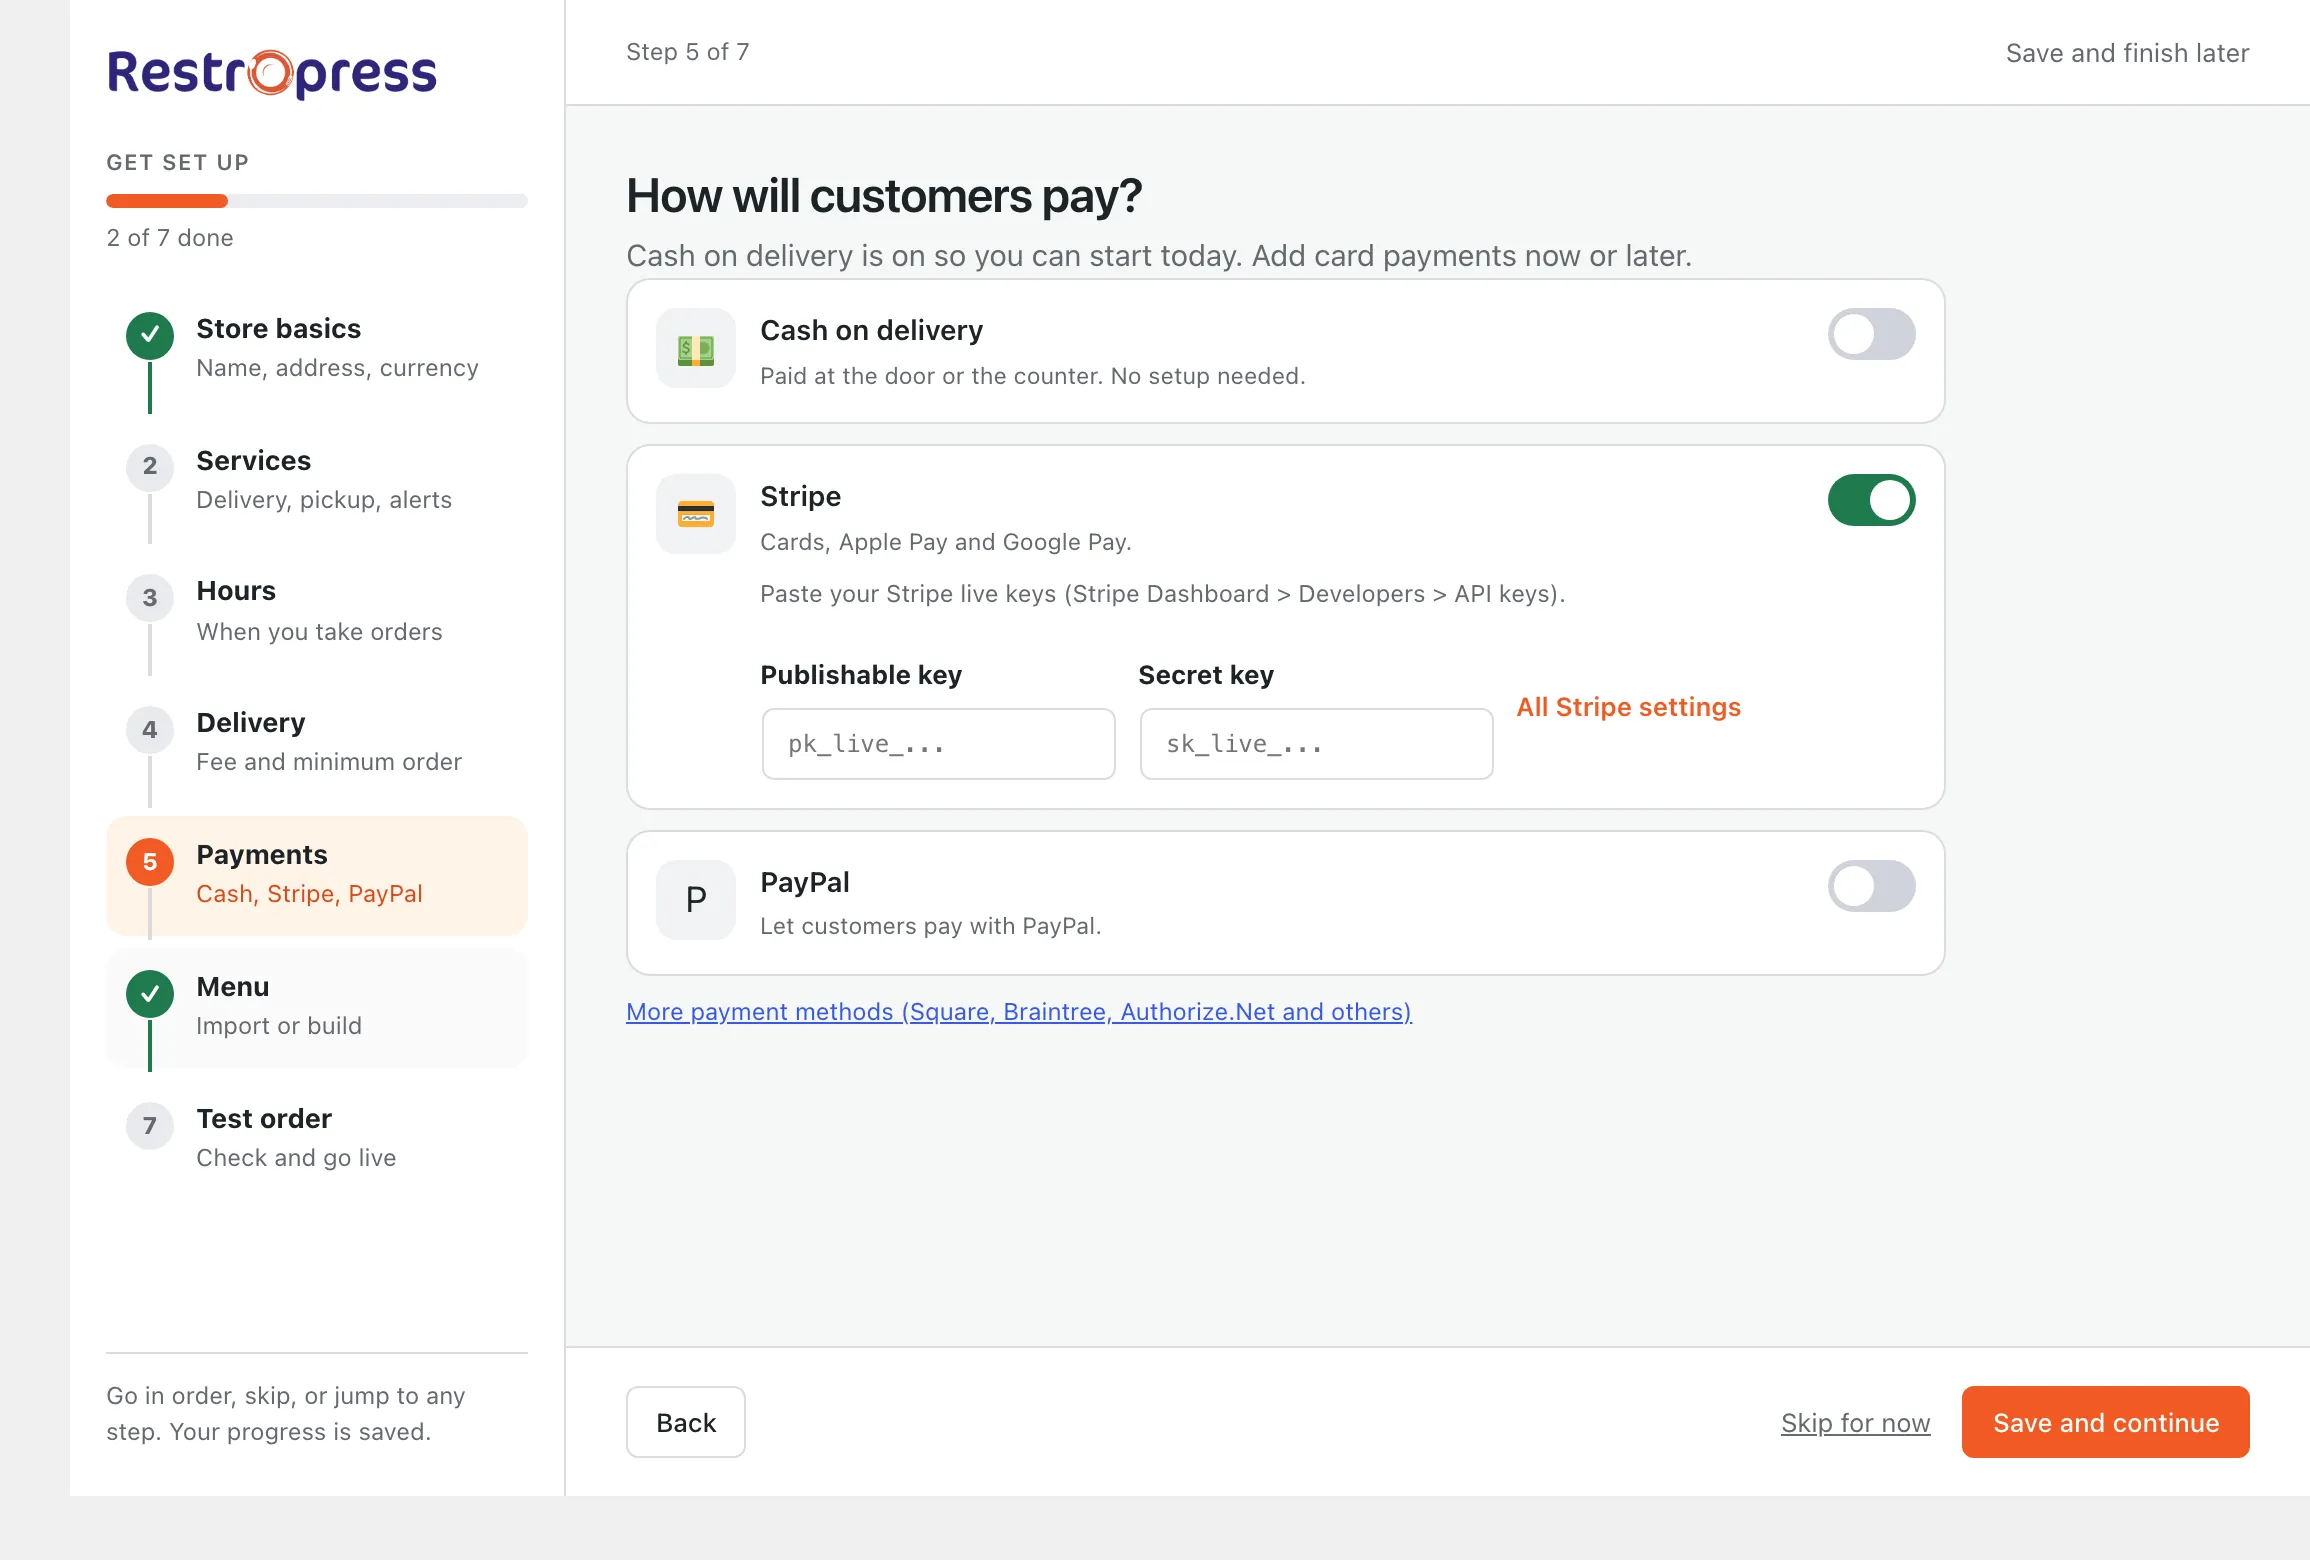
- Cash on delivery: "Paid at the door or the counter. No setup needed." It is switched on by default for a store with no payment method yet.
- Stripe: enter the Publishable key and Secret key (test keys when test mode is on, live keys otherwise). The saved secret key is never shown back, and keys from the wrong mode are rejected. A Stripe switch left on without keys appears on the launch checklist as "Stripe API keys".
- PayPal: Connect PayPal or Edit PayPal settings links. PayPal is configured outside the wizard.
- More payment methods opens a search for payment gateway extensions. A warning shows when test mode is on.
See Payment gateways.
6. Menu#
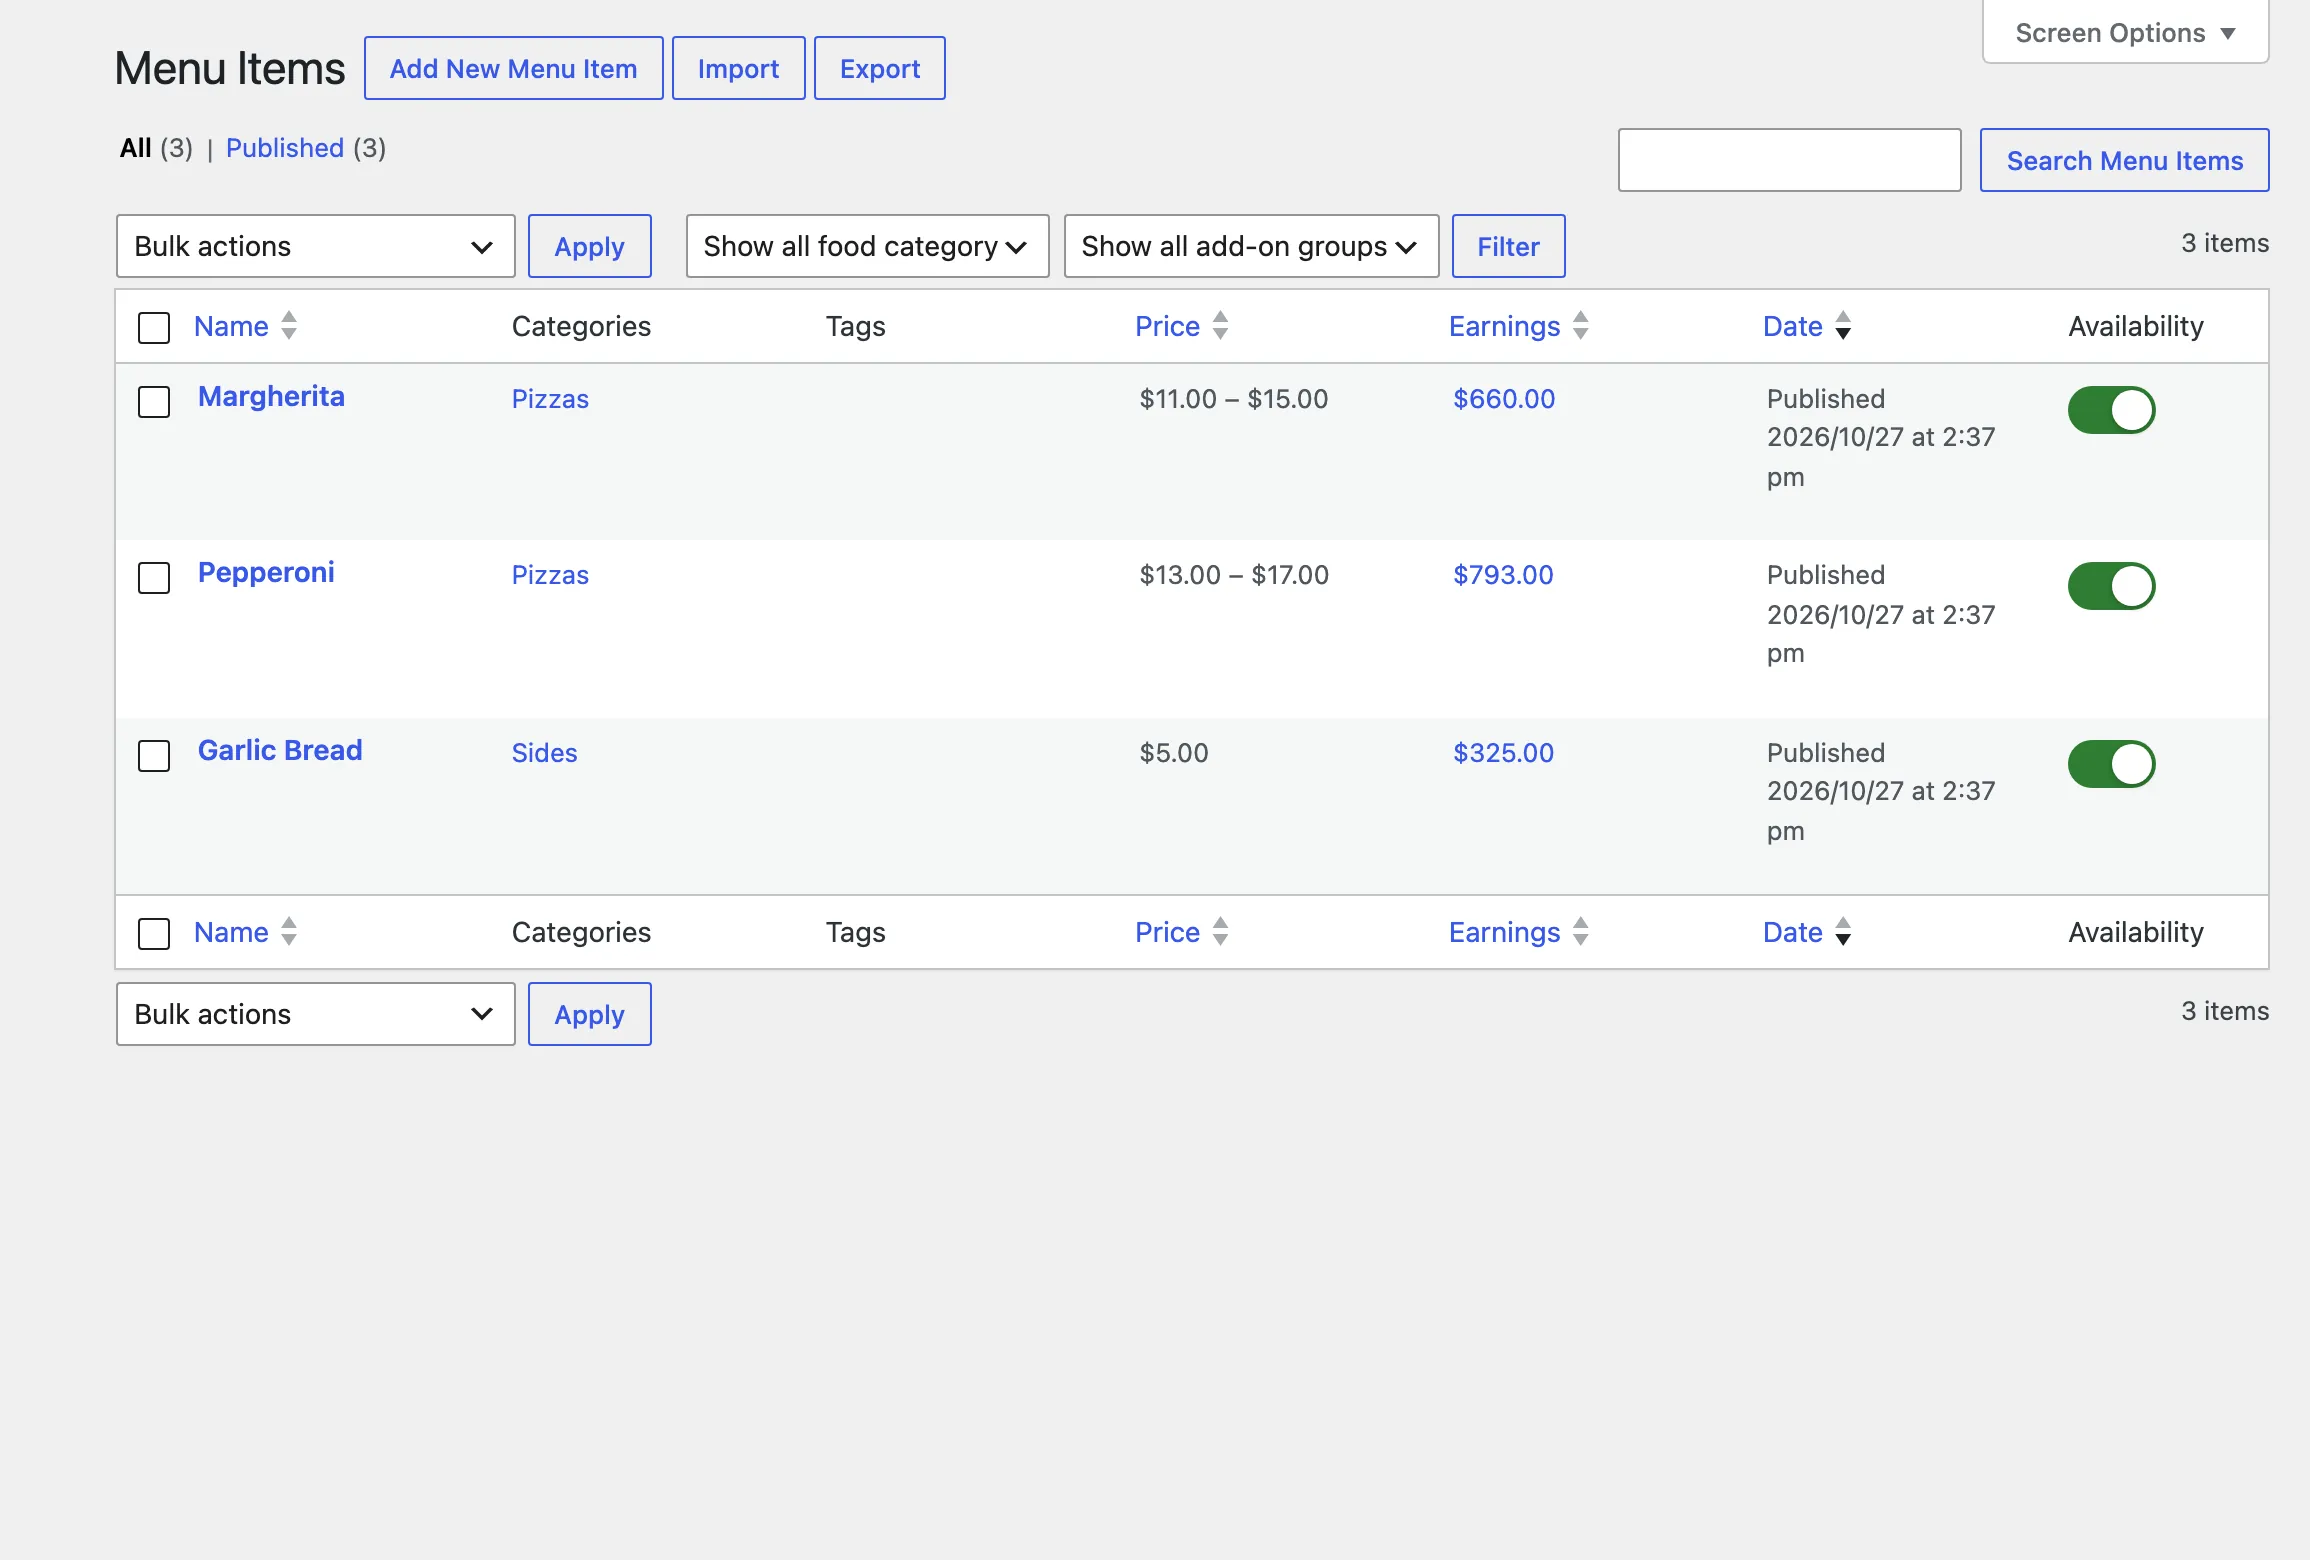
- AI import reads a PDF, a photo or a messy file into items, prices, sizes and add-ons.
- Spreadsheet reads a clean CSV or XLSX file directly, with no AI.
- Sample menu loads a ready-made menu so you can see RestroPress working straight away.
- Start from scratch skips the import, and Add your first item in the full editor opens the menu item editor.
- Switching from another system? opens the Switch to RestroPress importer.
- AI settings opens the AI assistant settings, and Write menu descriptions with AI follows the AI Assistant setting by default.
Nothing goes live until you approve it. See Add menu items.
7. Test order#
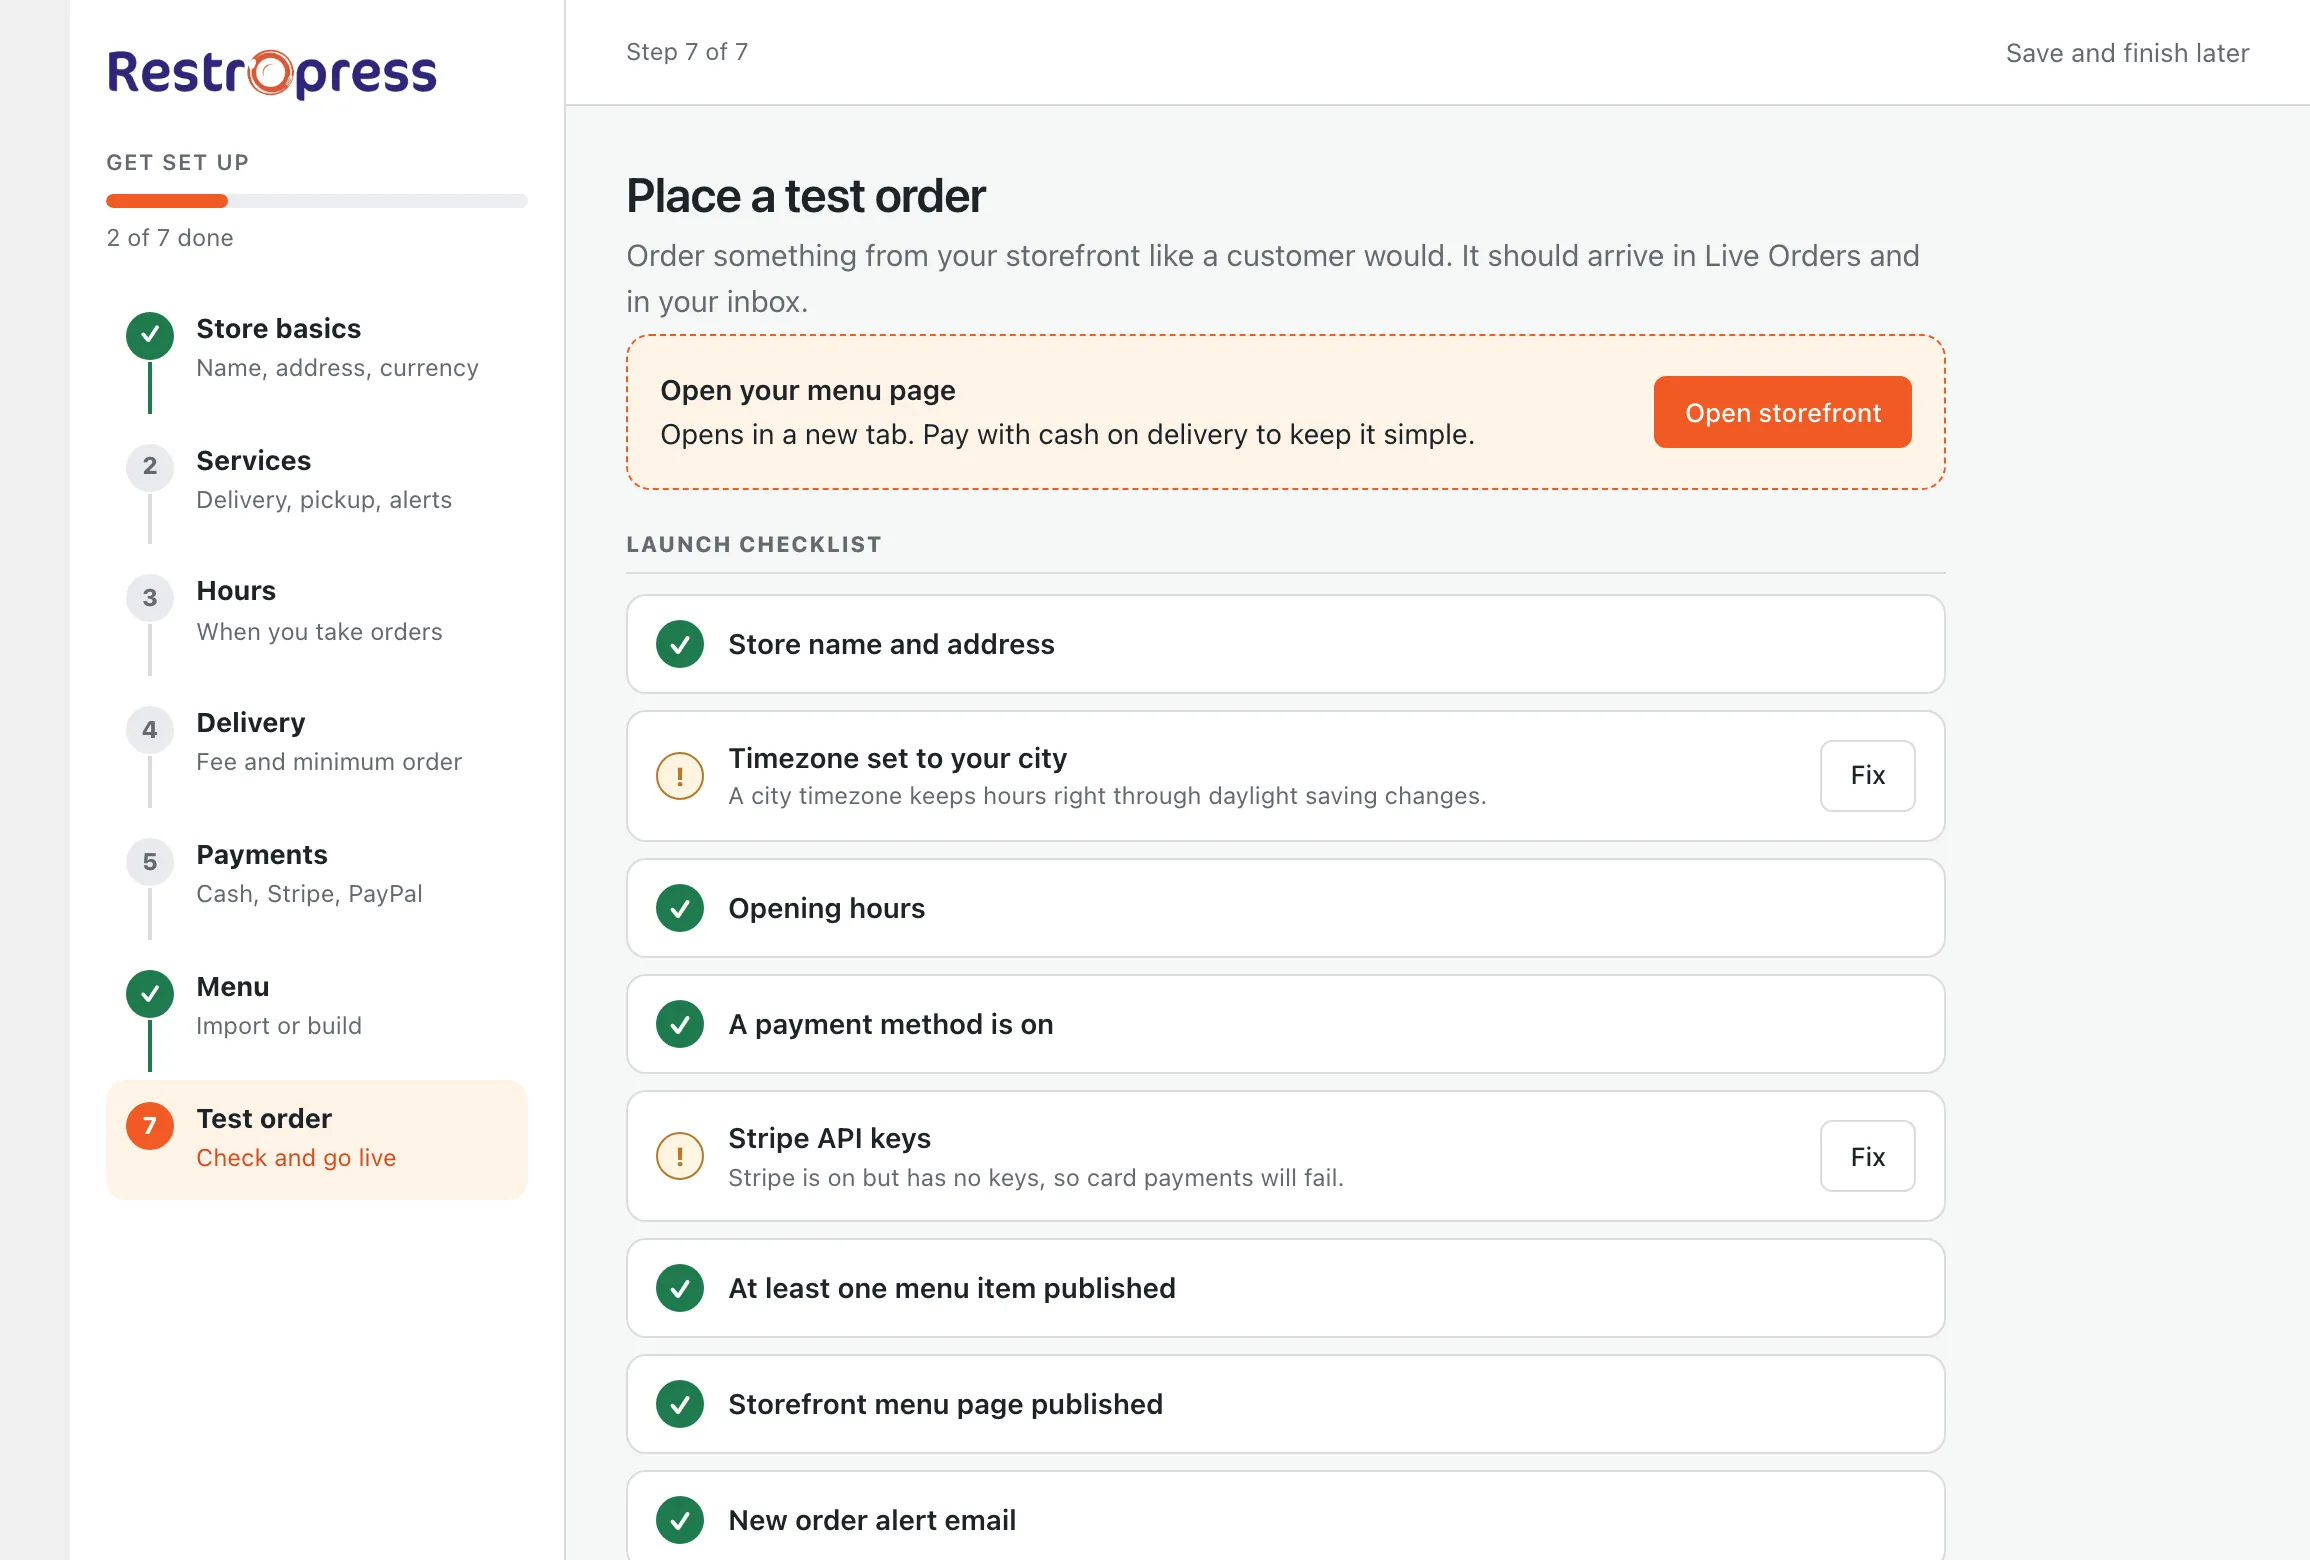
Place one real test order to prove the whole flow works. The Launch checklist shows what is still missing, each with a Fix button (back to the step) or an Open link:
- Store name and address
- Timezone set to your city
- Opening hours
- A payment method is on
- Stripe API keys (only if Stripe is on without keys)
- At least one menu item published
- Storefront menu page published
- New order alert email
- Delivery zones (only with the Delivery Fee extension)
- A test order placed
- Click Open storefront and place a test order. Cash on delivery keeps it simple.
- Check that it arrives in Live Orders and in your inbox.
- Click Finish setup.
Anything still missing can be fixed later. Finishing never locks you out of a step. The final screen gives you a copyable menu link (Copy link) and cards for Open Live Orders, View storefront, Manage menu and Settings, plus Review the setup steps again. Stores updated from 3.4 keep their saved wizard progress.
Pages RestroPress creates for you#
On activation RestroPress creates the pages customers use: Order Online (your menu), Checkout, Order Confirmation, Transaction Failed, Orders (order history), Login, Register and Forgot Password. They are selected under Settings › General › Store Setup. Turning on reservations also creates a Reserve a Table page. You can check they are all connected with RestroPress › Tools › Health Check.