
The Settings section contains the configuration options that must be reviewed and set up after the plugin has been successfully activated.
Within RestroPress, you will find a comprehensive range of settings, including General Settings, Payment Gateways, Emails, Taxes, Store Timings, Accounts, API, SMS Notifications, and more. Each option allows you to customize the plugin according to your business requirements.
This documentation provides a detailed explanation of every setting available in the plugin, along with guidance on how to configure them effectively.
You can find the option of settings in the left side menu bar under RestroPress.
To get started, go to RestroPress > Settings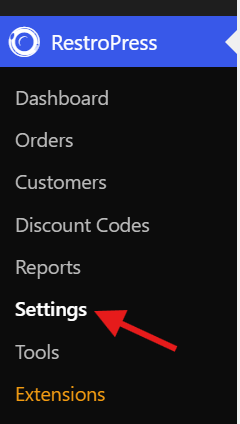
General:-
Store Setup:
Menu Items Page:
This page needs to be linked to your Food Item menu. It is the page where your buyers will browse your food items.
[fooditems] shortcode must be used on this page.
Checkout page:
Assign the page that is designed for the checkout process. It will be concerned with completing purchase functionality.
[fooditem_checkout] shortcode must be used on this page.
Success page:
Assign the order confirmation page where you want to redirect after the order is confirmed.
[rpress_receipt] shortcode must be used on this page.
Failed Transaction page:
You need to assign the page where you want to redirect if the transaction is canceled or fails.
Order History Page:
Assign the page that consists of the complete order history for the current users including food item links.
[order_history] shortcode must be used on this page.
Login Redirect Page:
Assign the page where you want your customer to redirect just after the login. [order_history] shortcode must be used on this page.
Store location:-
Base country:
You need to enter the country name where your store is operating.
Base state/province:
You need to enter the state/province from where your store is operating.
Store Address:
Enter your Store’s complete Address. It will be displayed on the order confirmation page and also in the order receipt when you add the template tag to the receipt content.
City:
Added details will be used for delivery zones, tax, and receipts.
Postcode / ZIP:
Added details will be used for delivery zones, tax, and receipts.
Restaurant Phone:
Public contact number shown on receipts and used for customer callbacks.
Show Veg / Non-veg marks:
Display the green/red Veg & Non-veg marker on menu items. Common in India and similar markets; off by default. Dietary labels stay available worldwide regardless.
Screenshot:-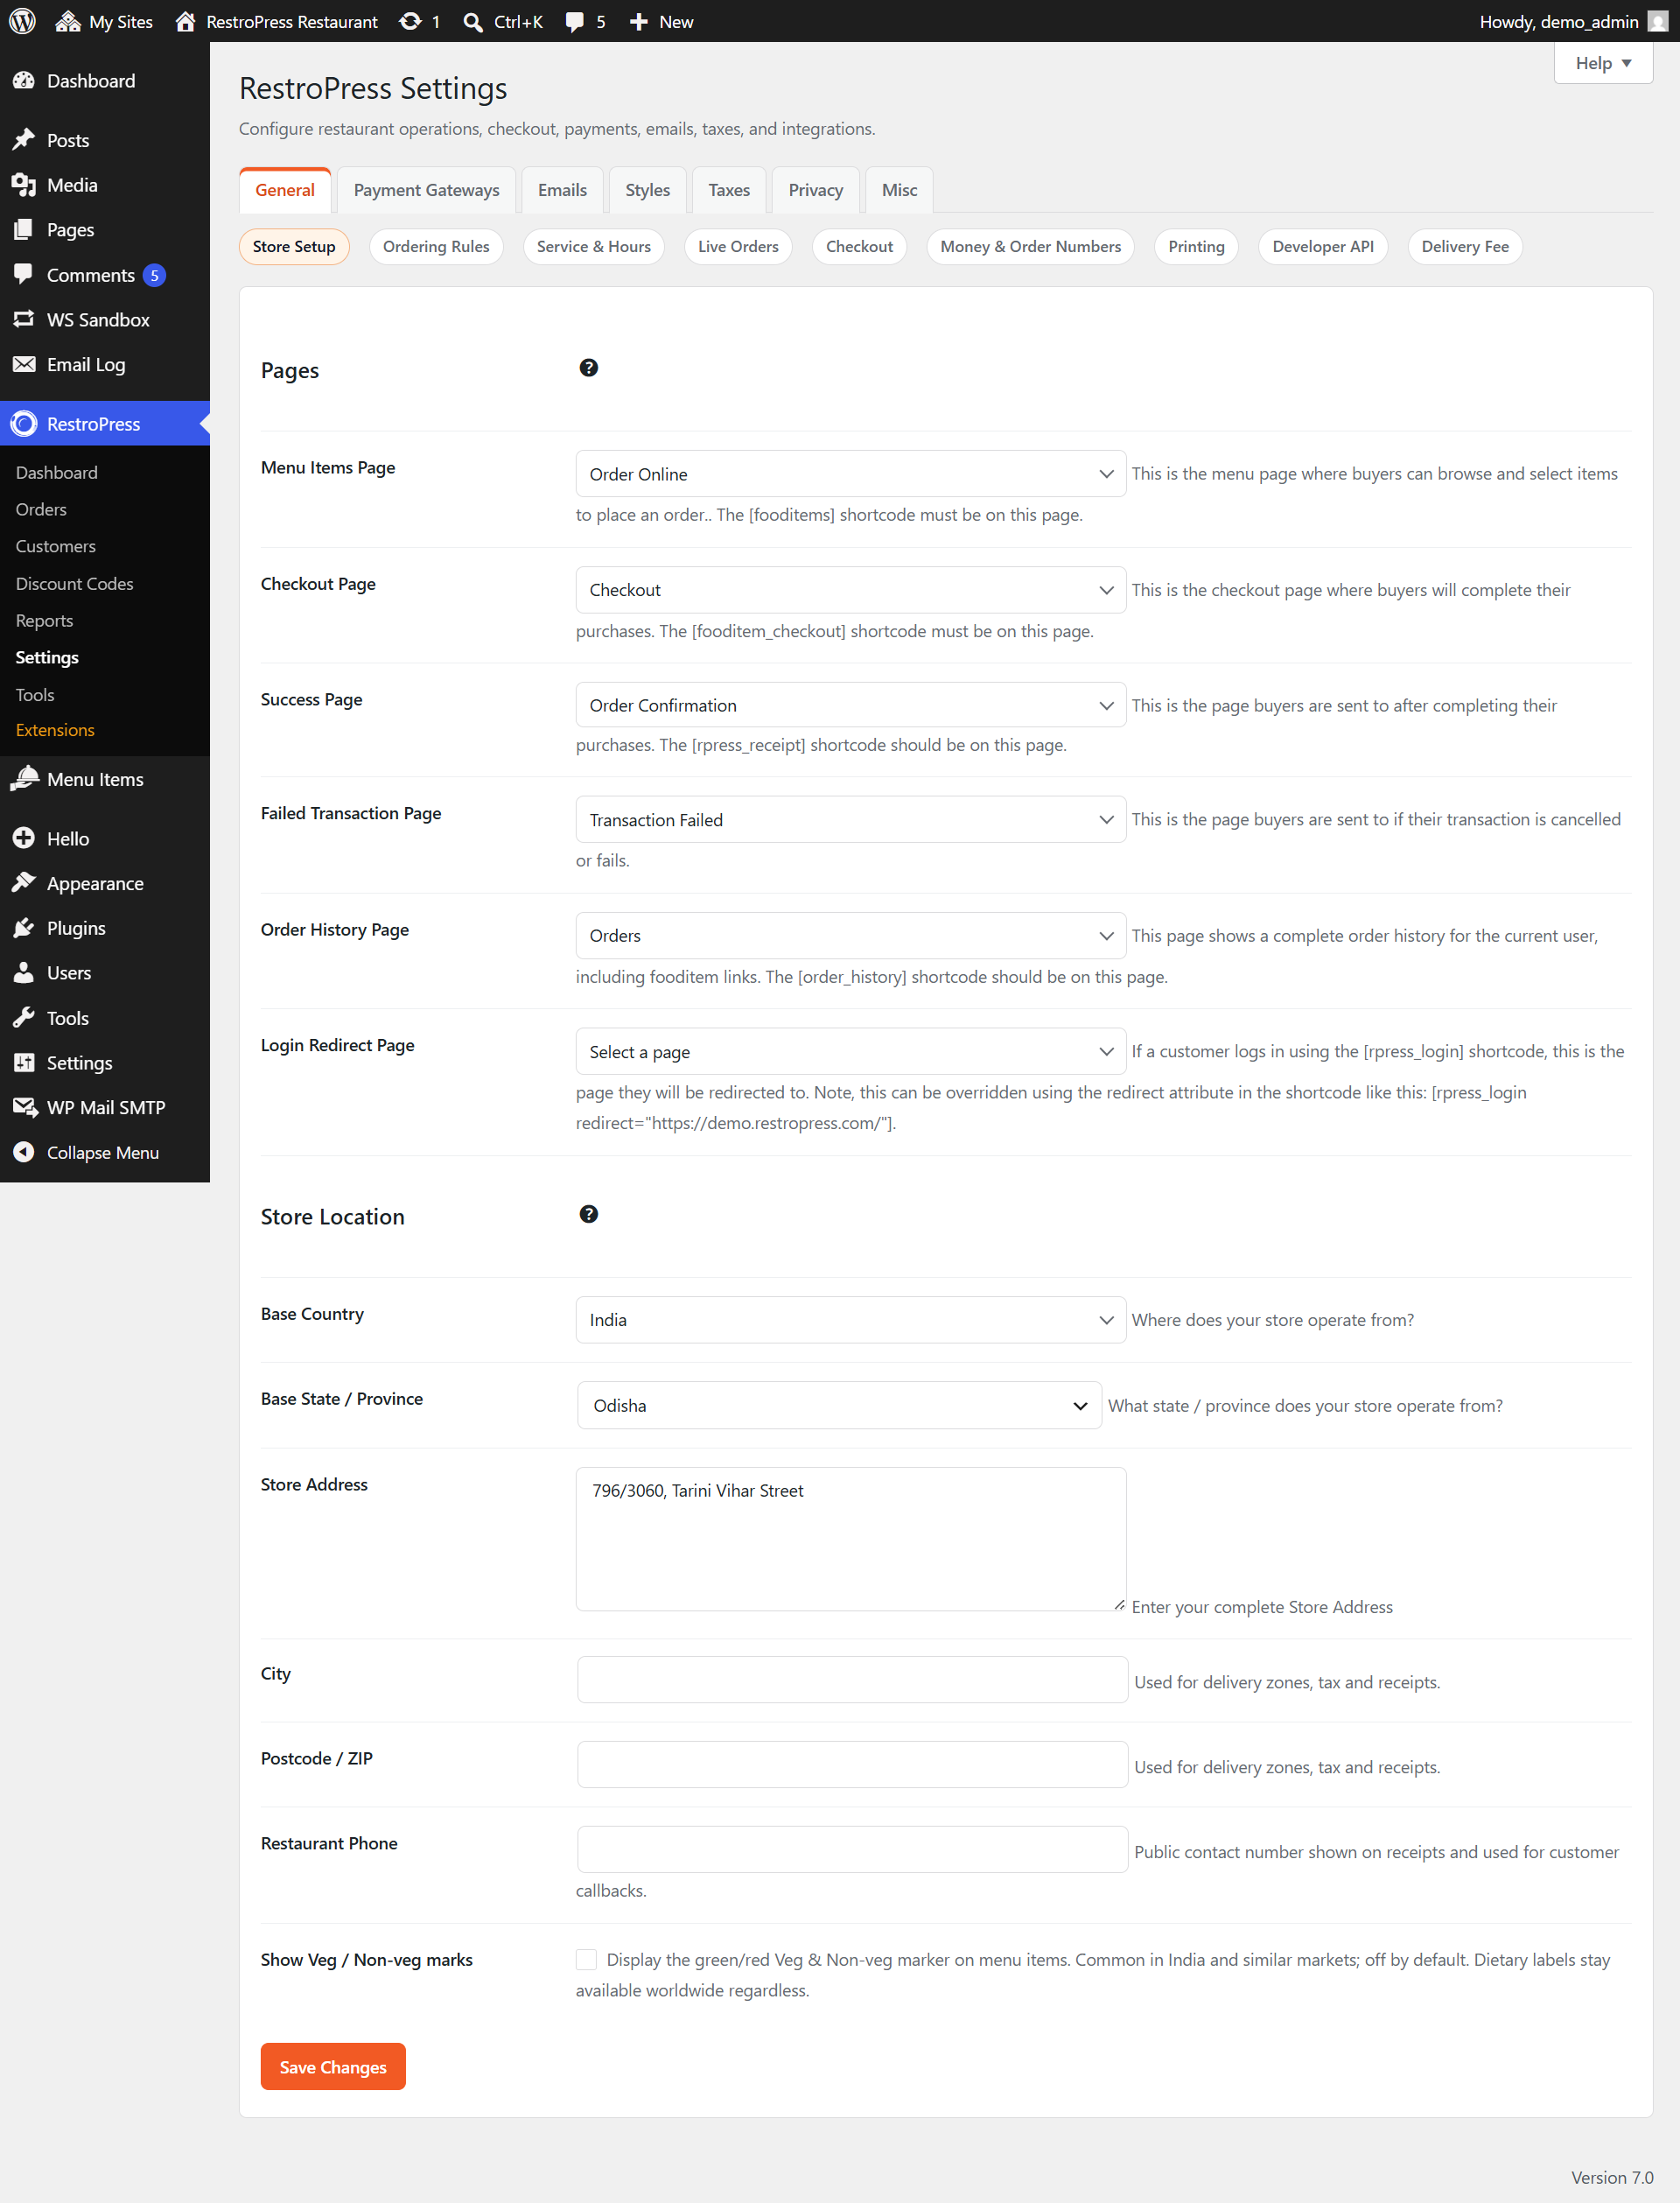
Ordering Rules:
General Settings:
Enable minimum order:
If you want your user to restrict purchasing a total minimum amount of food, you can enable the ‘Minimum Order Price’ option.
This option will restrict your users from purchasing below the minimum amount set.
Minimum order amount for delivery:
You can set a minimum order price for Delivery by placing the amount you want to add. The purchase will be restricted to the minimum amount set.
Minimum order amount for pickup:
You can set a minimum order price for Pickup by placing the amount you want to add. The purchase will be restricted to the minimum amount set.
Minimum order error message for delivery:
Set a message to be displayed if a customer places orders less than the minimum order amount.
Minimum order error message for pickup:
Set a message that is to be shown if a customer places orders less than the minimum order amount.
Enable Reorder:
This feature will be helpful for customers to reorder the previous orders easily without adding the items manually to the cart.
Screenshot:-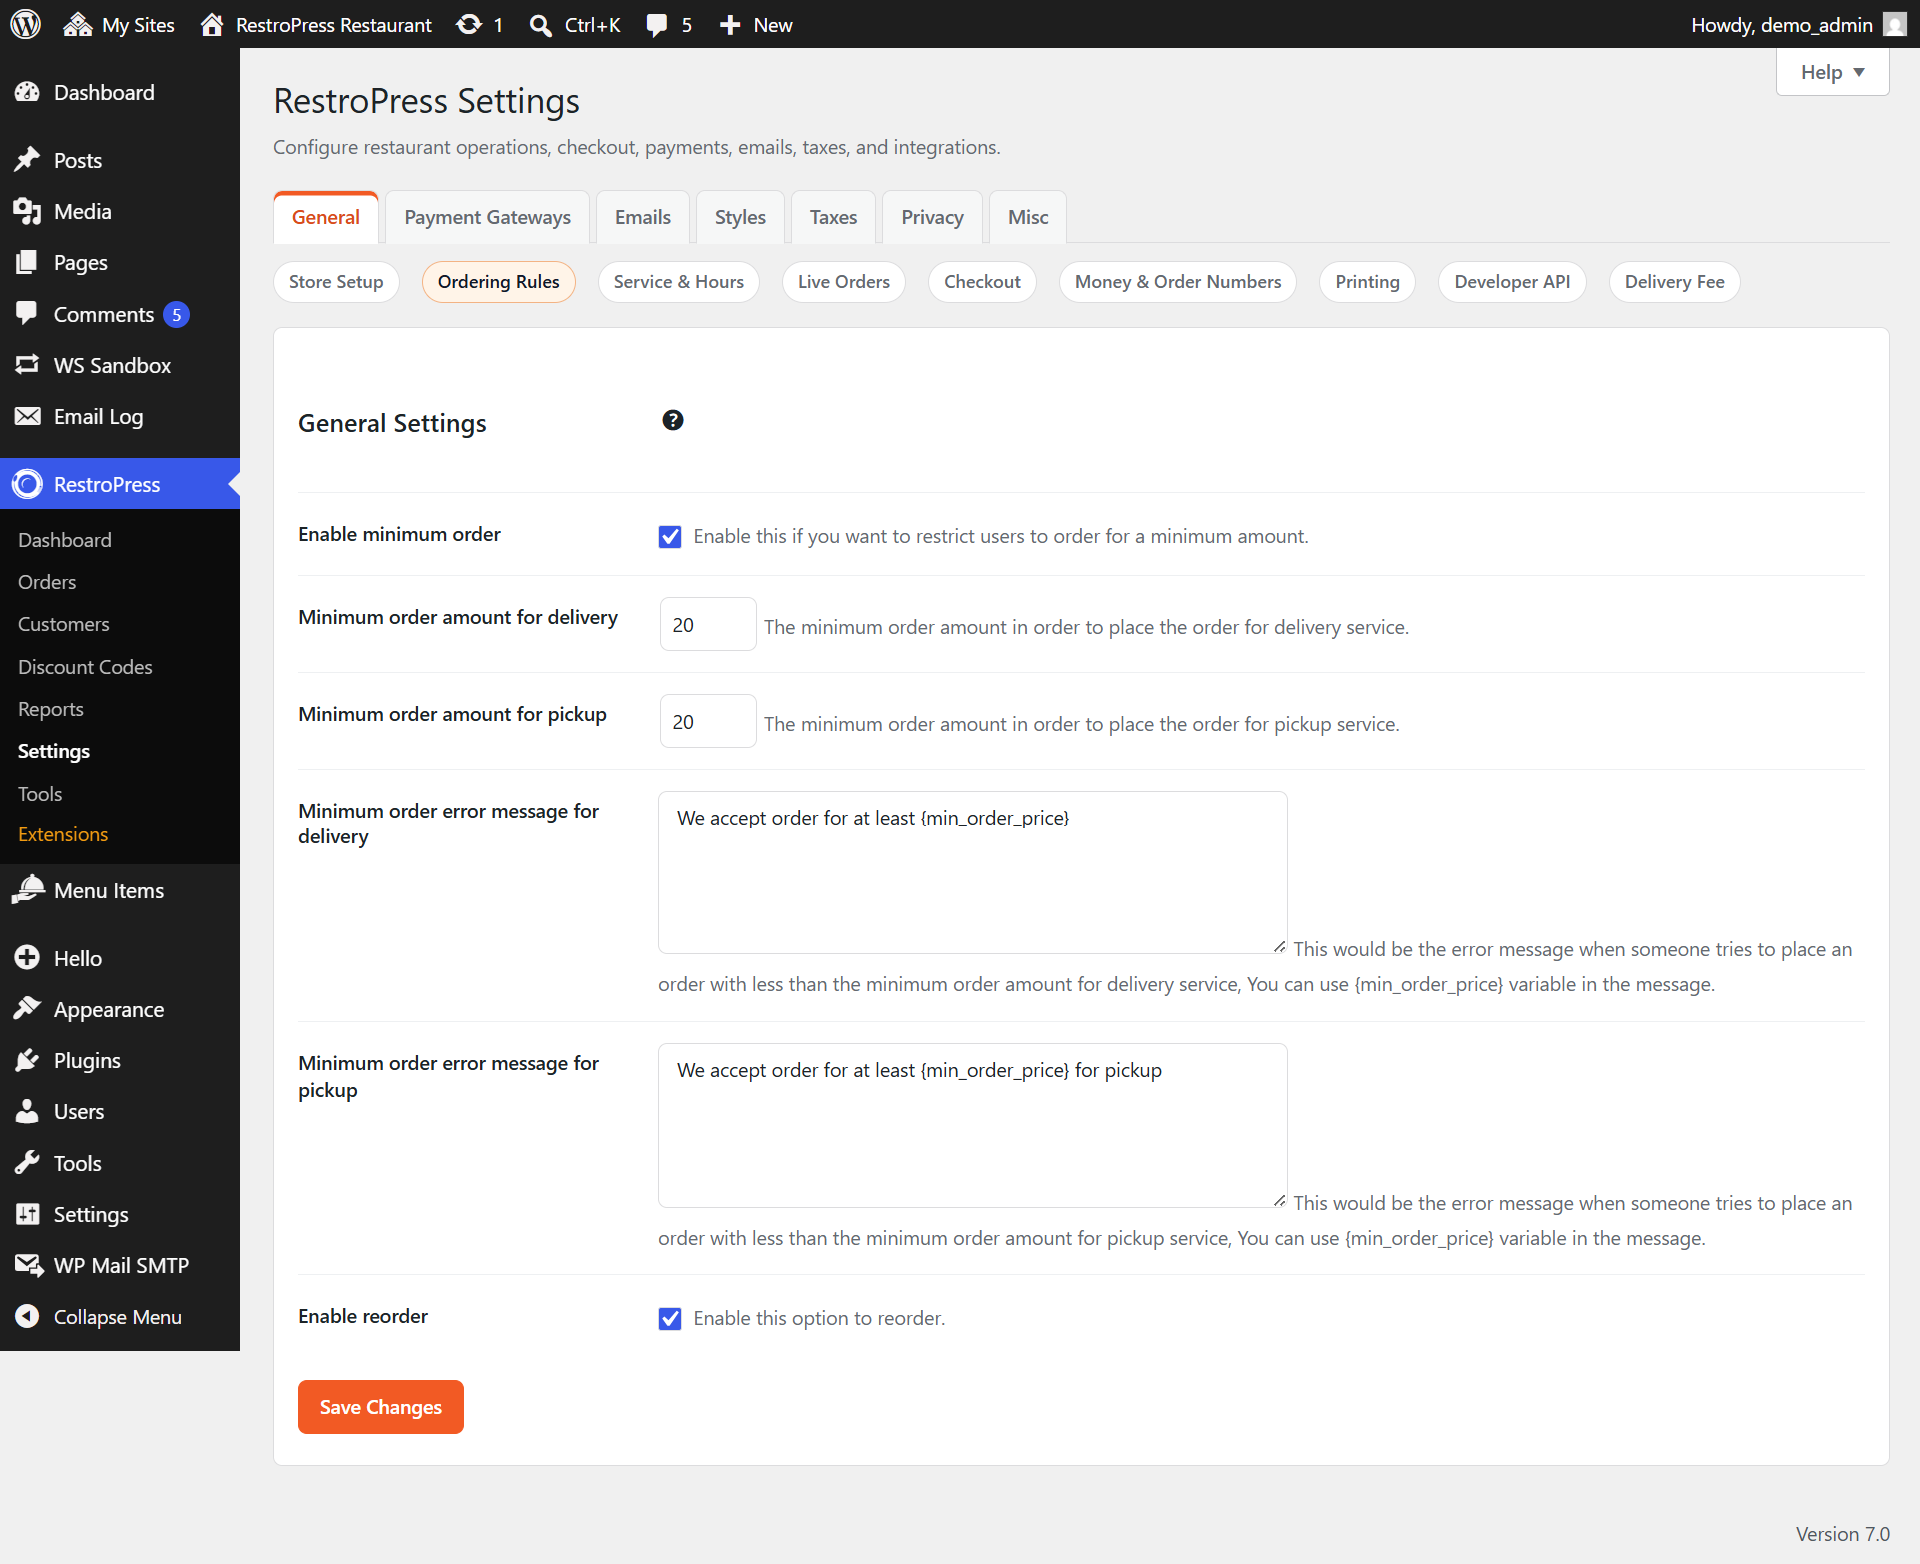
Service & Hours:
Choose Service :
Here you can set your required service type.
Default services:
Select your default service type as per your requirement.
Store Time Format:
Select your time format.
WordPress Time Zone:
You need to set up WordPress’s time zone as per your required country first.
Enable ASAP Option :
You can enable this option to show the ASAP option under the time slots list.
Delivery ASAP Time Limit:
Mention your specific time limit for ASAP, e:g ( Within 10 – 20 Minutes )
Pickup ASAP Time Limit:
Mention your specific time limit for ASAP, e:g ( Within 10 – 20 Minutes )
Enable ASAP Option Only :
Enable this option if you want to show only the ASAP instead of other time slots.
Enable Always Order Option :
This option will help you to enable your store for 24 hours.
Open Time:
Set your required store open time.
Close Time:
Set your store’s closing time.
Cooking Time/ Prep Time:
Set up your required cooking preparation time so that the first slot will show that much forward.
Service Cookies Expire Time:
Enter the value (in minutes) after which the cookies will expire.
Store Closed Message:
When your store is closed, you can display a custom Store closed message.
Screenshot:-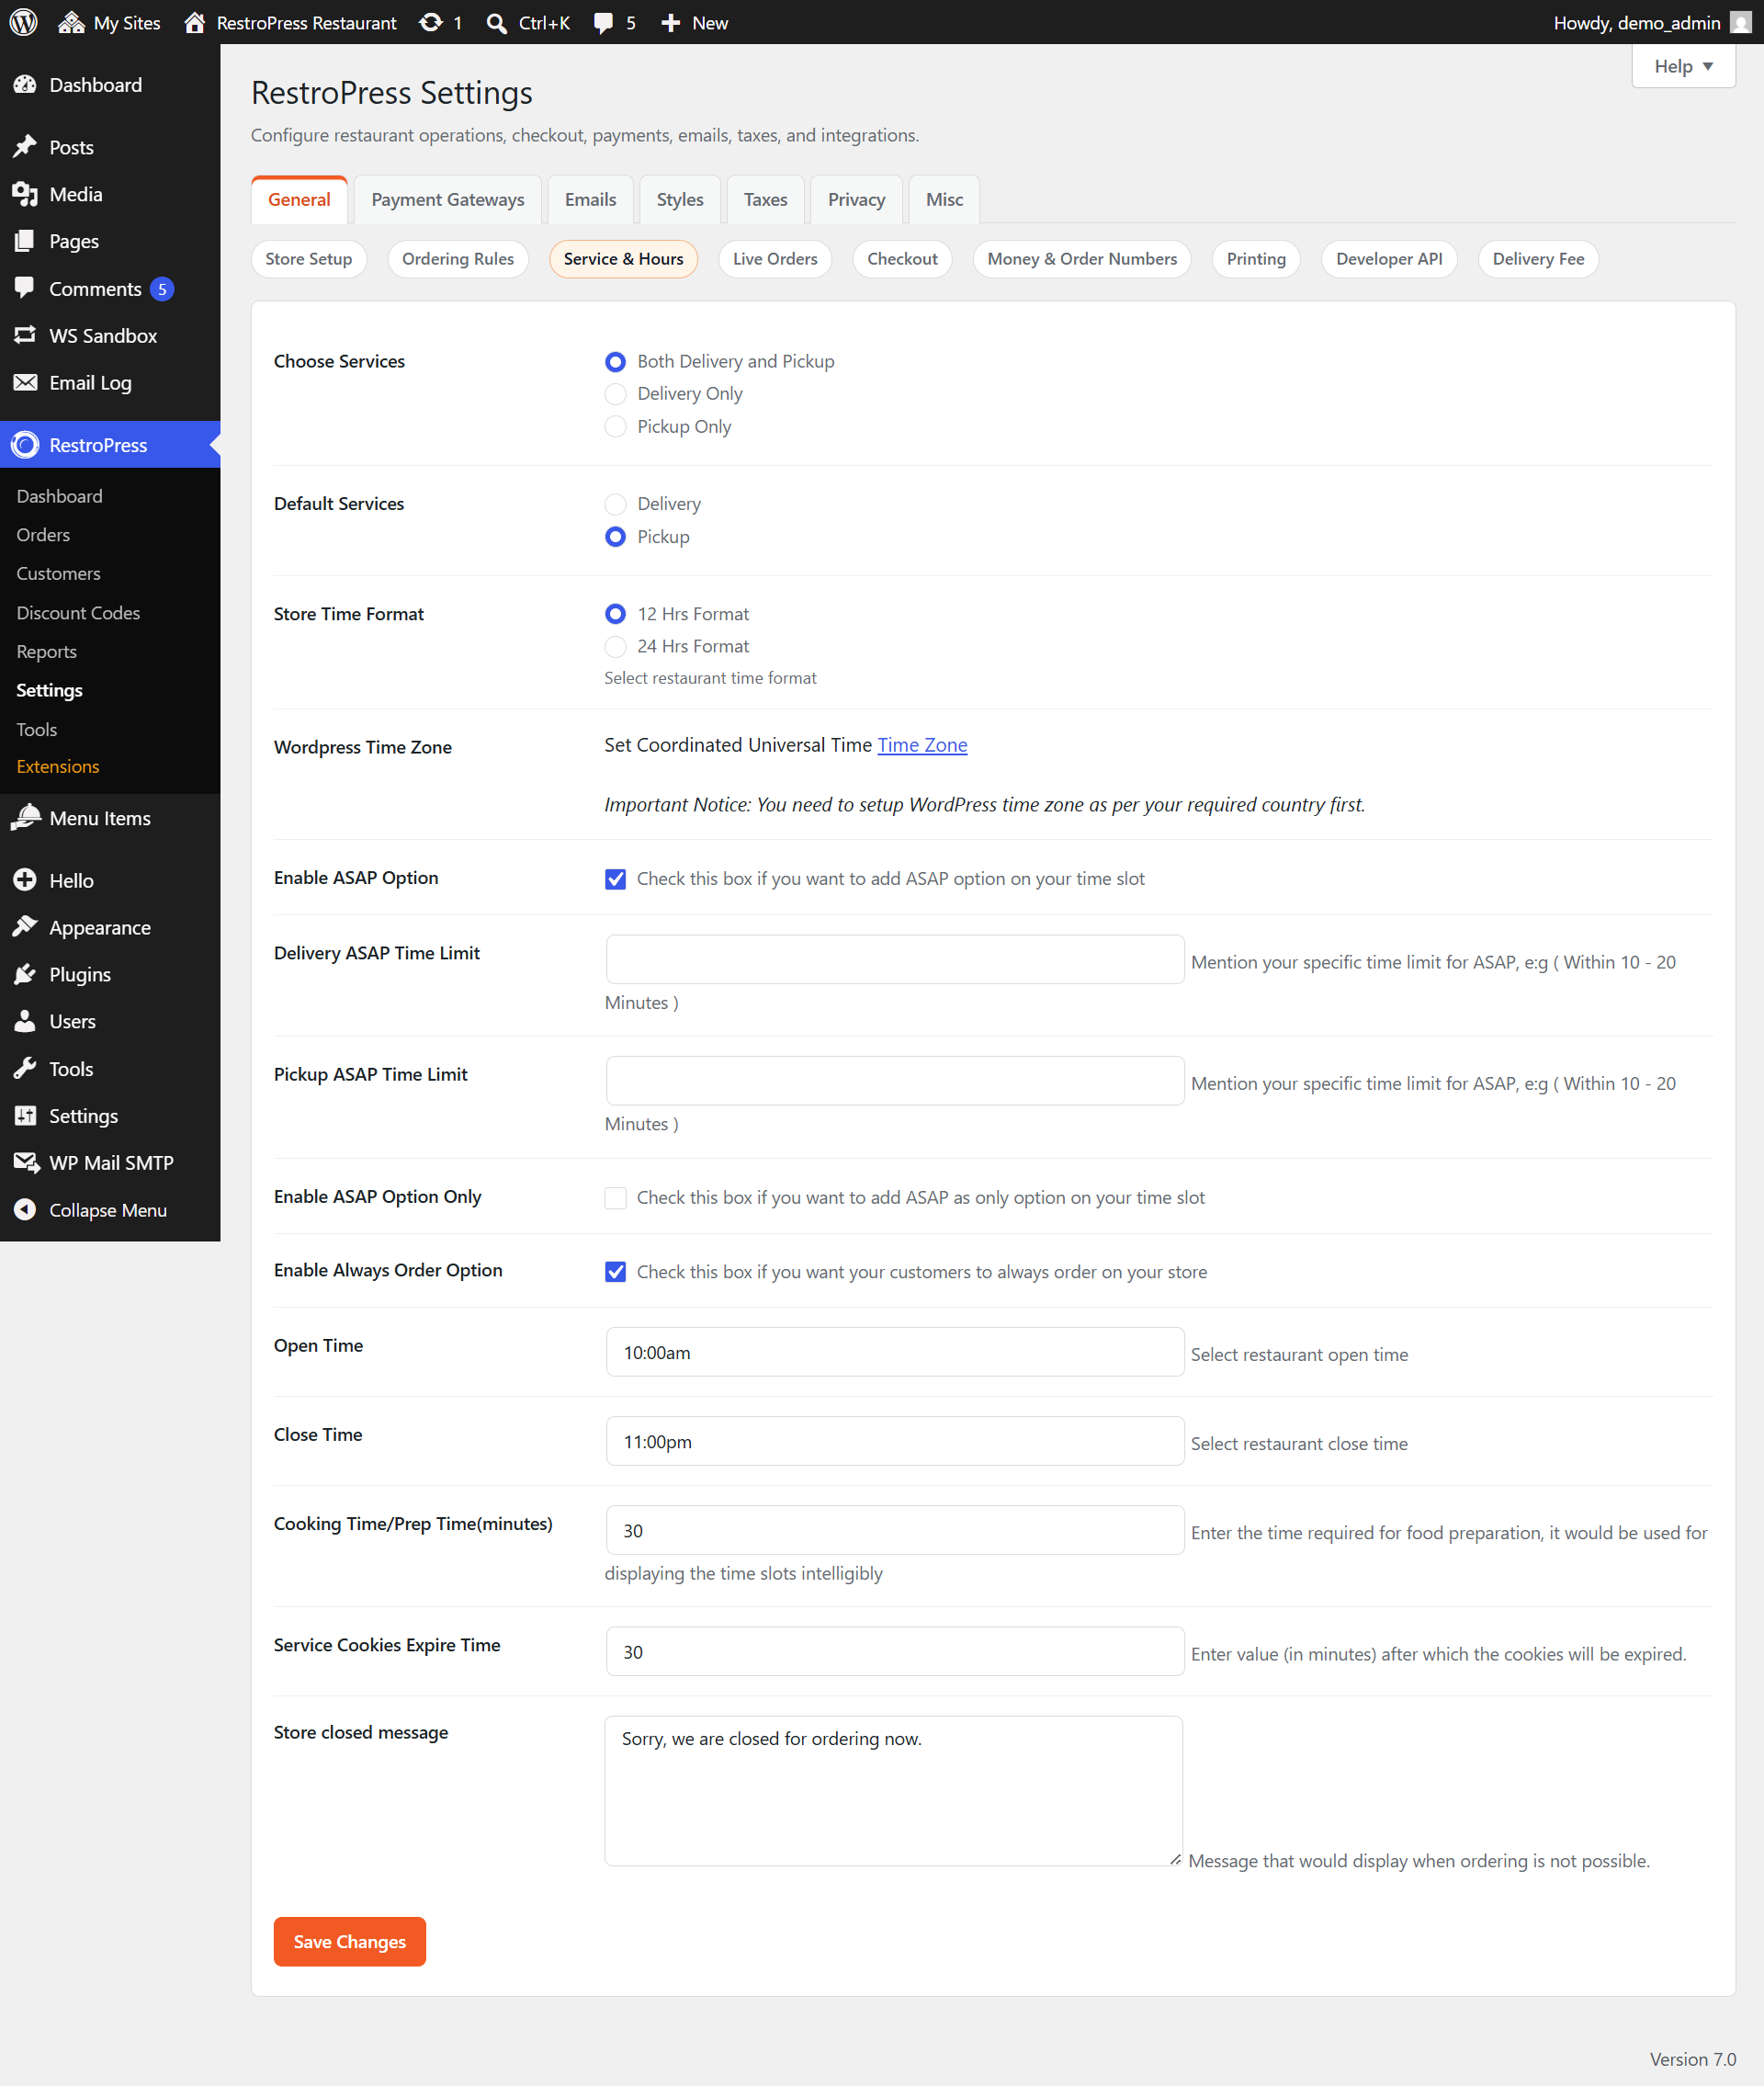
Live Orders:
Enable Notification:
By enabling this setting option, you can get a browser push notification when an order is placed.
Title:
Give the notification title.
Description:
Enter notification desc. Available place holder {order_id} – Order Id, {service_type} – Service Type, {payment_status} – Payment Status, {service_date} – Service Date
Notification sound:
Choose an MP3 file to set your web notification sound.
Play notification sound in loop:
Enable this if you want the notification sound not to stop until the notification duration.
Notification Icon:
Select an image to use as the notification icon.
Notification Length:
Time in seconds, “0” = Default notification length.
Live Orders refresh interval:
How often the Live Orders kanban polls for new orders, in seconds. Lower = more responsive, higher = lighter on the server. Allowed range: 10–300.
Live order section, screenshot:-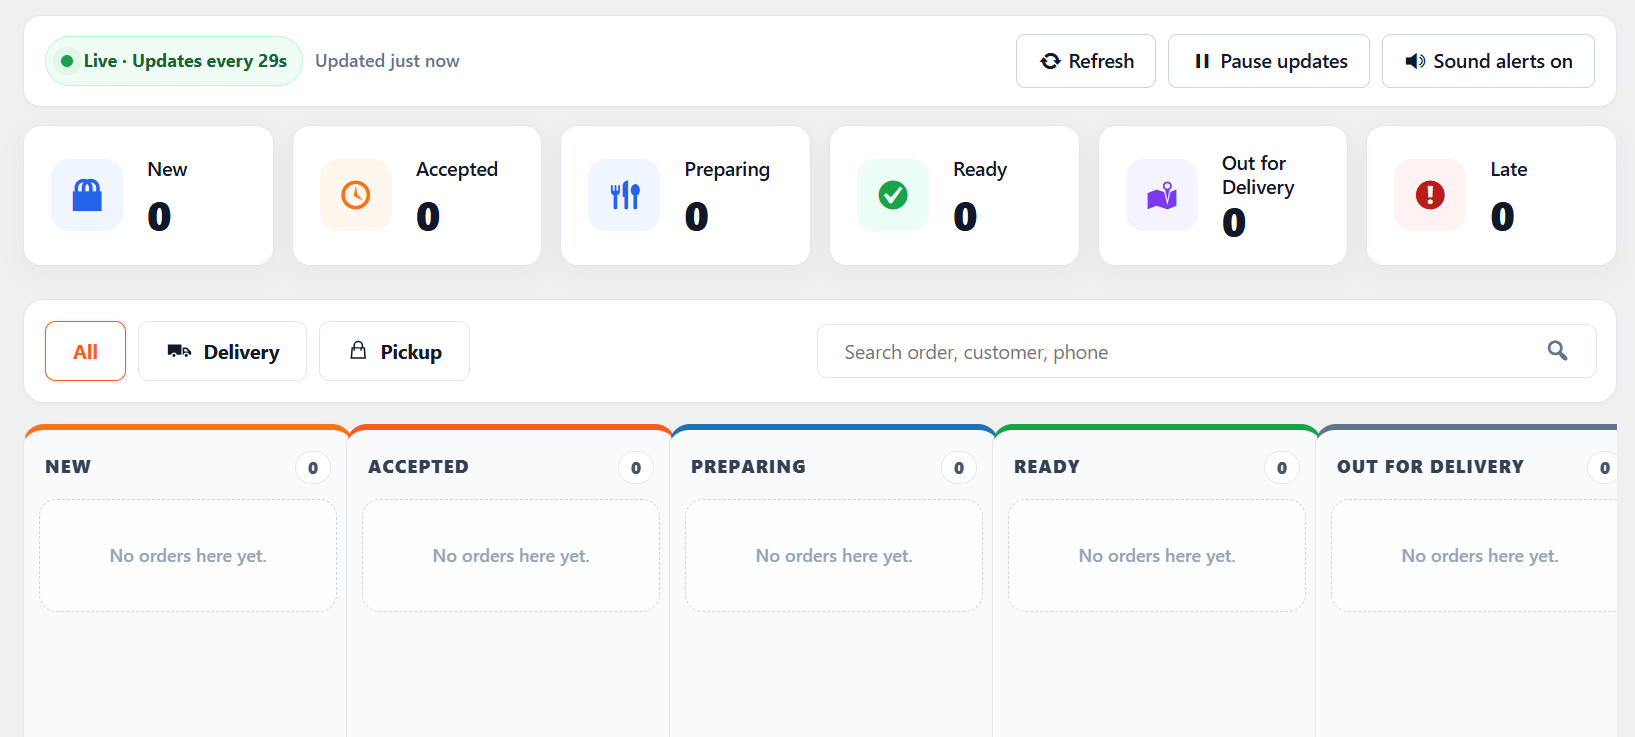
Open Live Orders by default:
When checked, the Orders menu link goes straight to the Live Orders kanban instead of the historical list. Useful for kitchen/counter staff.
Show customer phone in orders list:
Controls how the customer phone number appears in the Order column of the orders list. Defaults to the full number so staff can quickly contact customers; choose a masked or hidden option for shared screens.
Order Auto Accepted:
Automatically update new orders to Accepted after 2 seconds.
Screenshot:-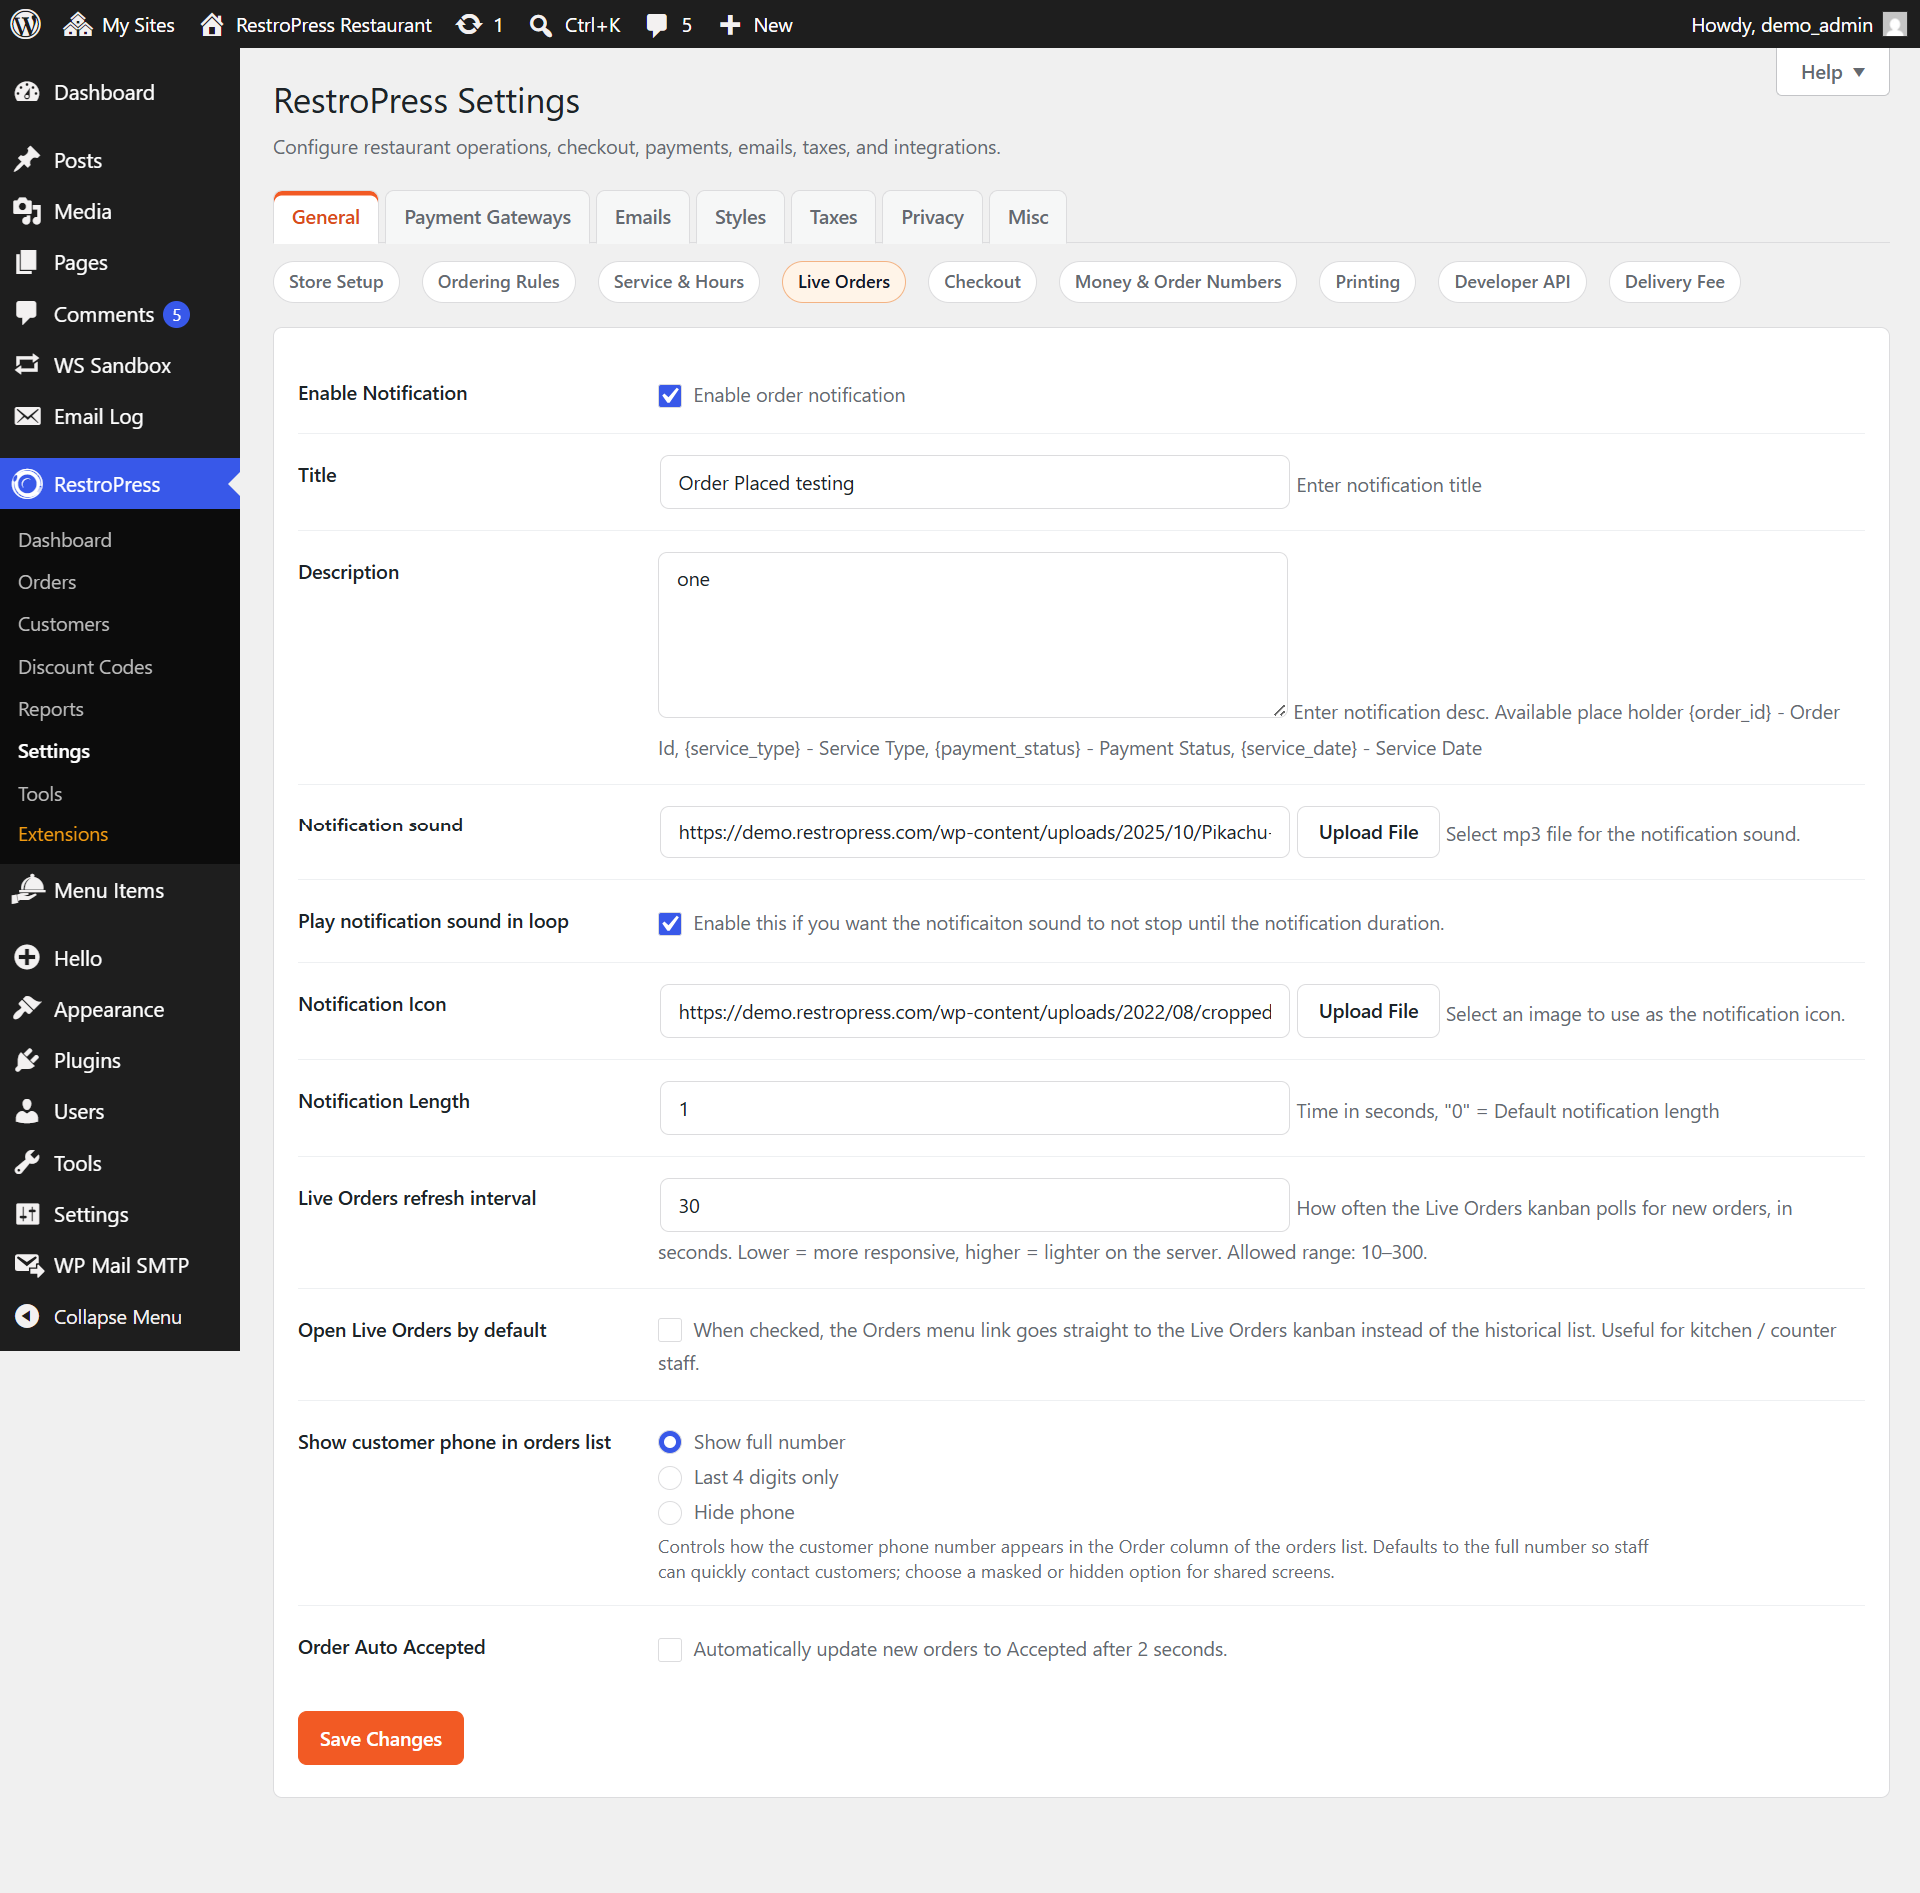
Checkout:
Login/Register Option:
This option affects how login/register options are offered on the checkout page.
Enforce SSL on Checkout:
Check this to force users to be redirected to the secure checkout page. You must have an SSL certificate installed to use this option.
Enable Cart Saving:
Note:- Cart saving option helps to shoppers to create a temporary link to their current shopping cart so they can come back later or share it with someone.
Screenshot:-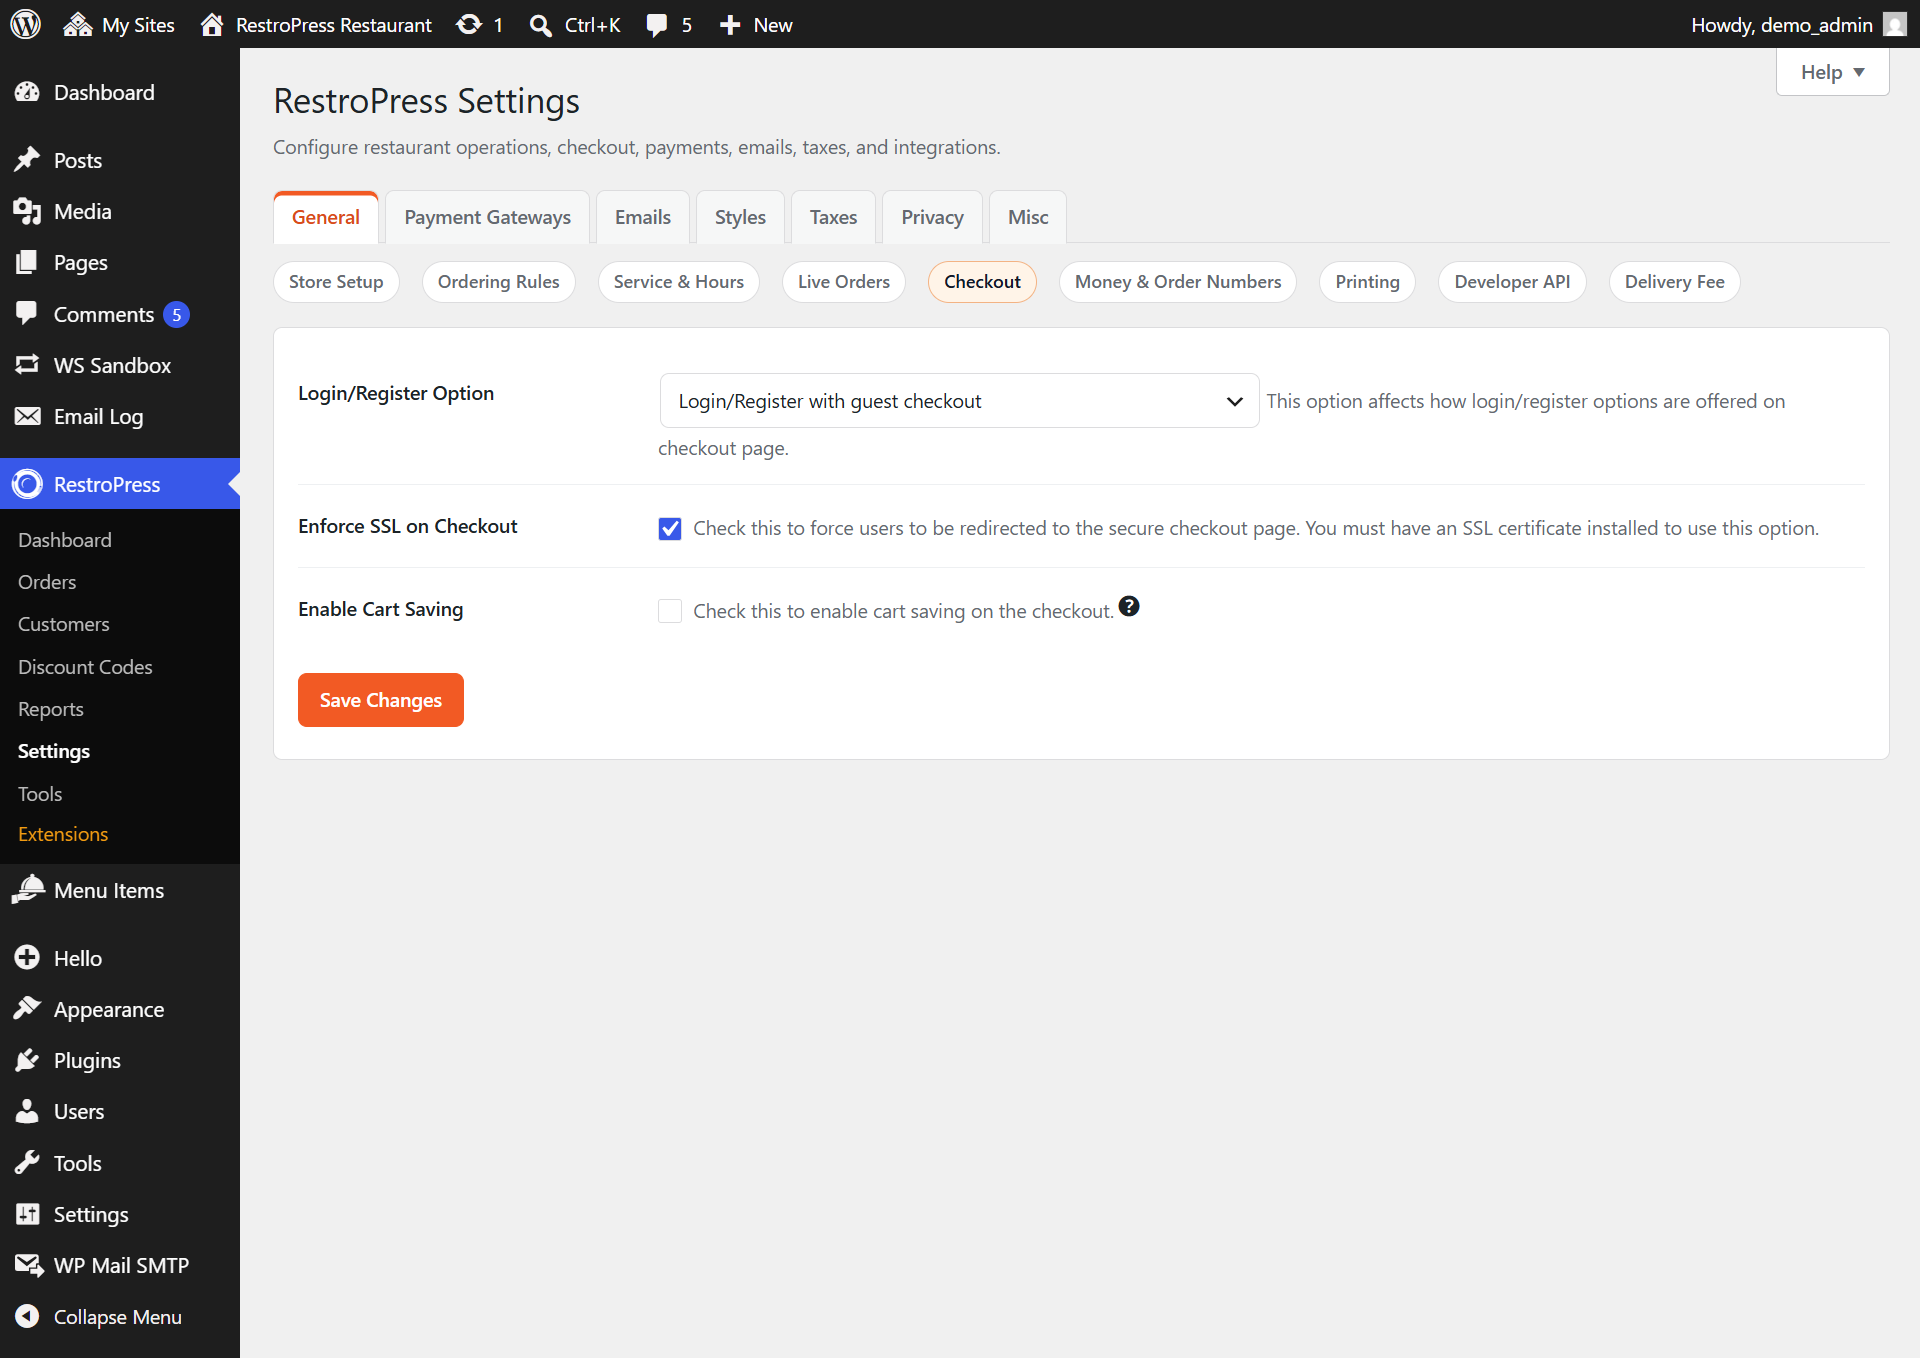
Money & Order Numbers:
Currency :
If you want to include your Currency, then you can use the following codes and place them in your “active theme’s functions.php file”:
//Add your custom currency
add_filter( 'rpress_currencies', 'rpress_add_currency' );
function rpress_add_currency( $currencies ) {
  //Replace with the currecy you want
  $currencies['Rp'] = __( 'Indonesian rupiah', 'restropress' );
  return $currencies;
}
If you want to remove the Decimal from your Currency, you can use the following code in your active theme’s functions.php file:
add_filter( 'rpress_currency_decimal_count', 'rpress_remove_decimal' );
function rpress_remove_decimal( $decimals ) {
 $decimals = 0;
 return $decimals;
}
Currency Position:
Here, you can choose your currency sign position as per your requirement (e.g, before $10 or after 10$).
Currency value type:
Choose your currency value type: Float or Round.
Thousand separator:
Use ‘.’ or ‘,’ for the thousand separator as per your requirement.
Decimal Separator:
Use ‘.’ or ‘,’ for the Decimal separator as per your requirement.
Enable SKU Entry:
Enable this to allow entry of product SKUs. SKUs will be shown on the purchase receipt and exported purchase histories.
Sequential Order Numbers:
Enter your preferred starting number for the sequence (e.g., 100, 1000, etc.).
Sequential Number Prefix:
A prefix to prepend to all sequential order numbers.
Sequential Number Postfix:
A postfix to append to all sequential order numbers.
Screenshots:-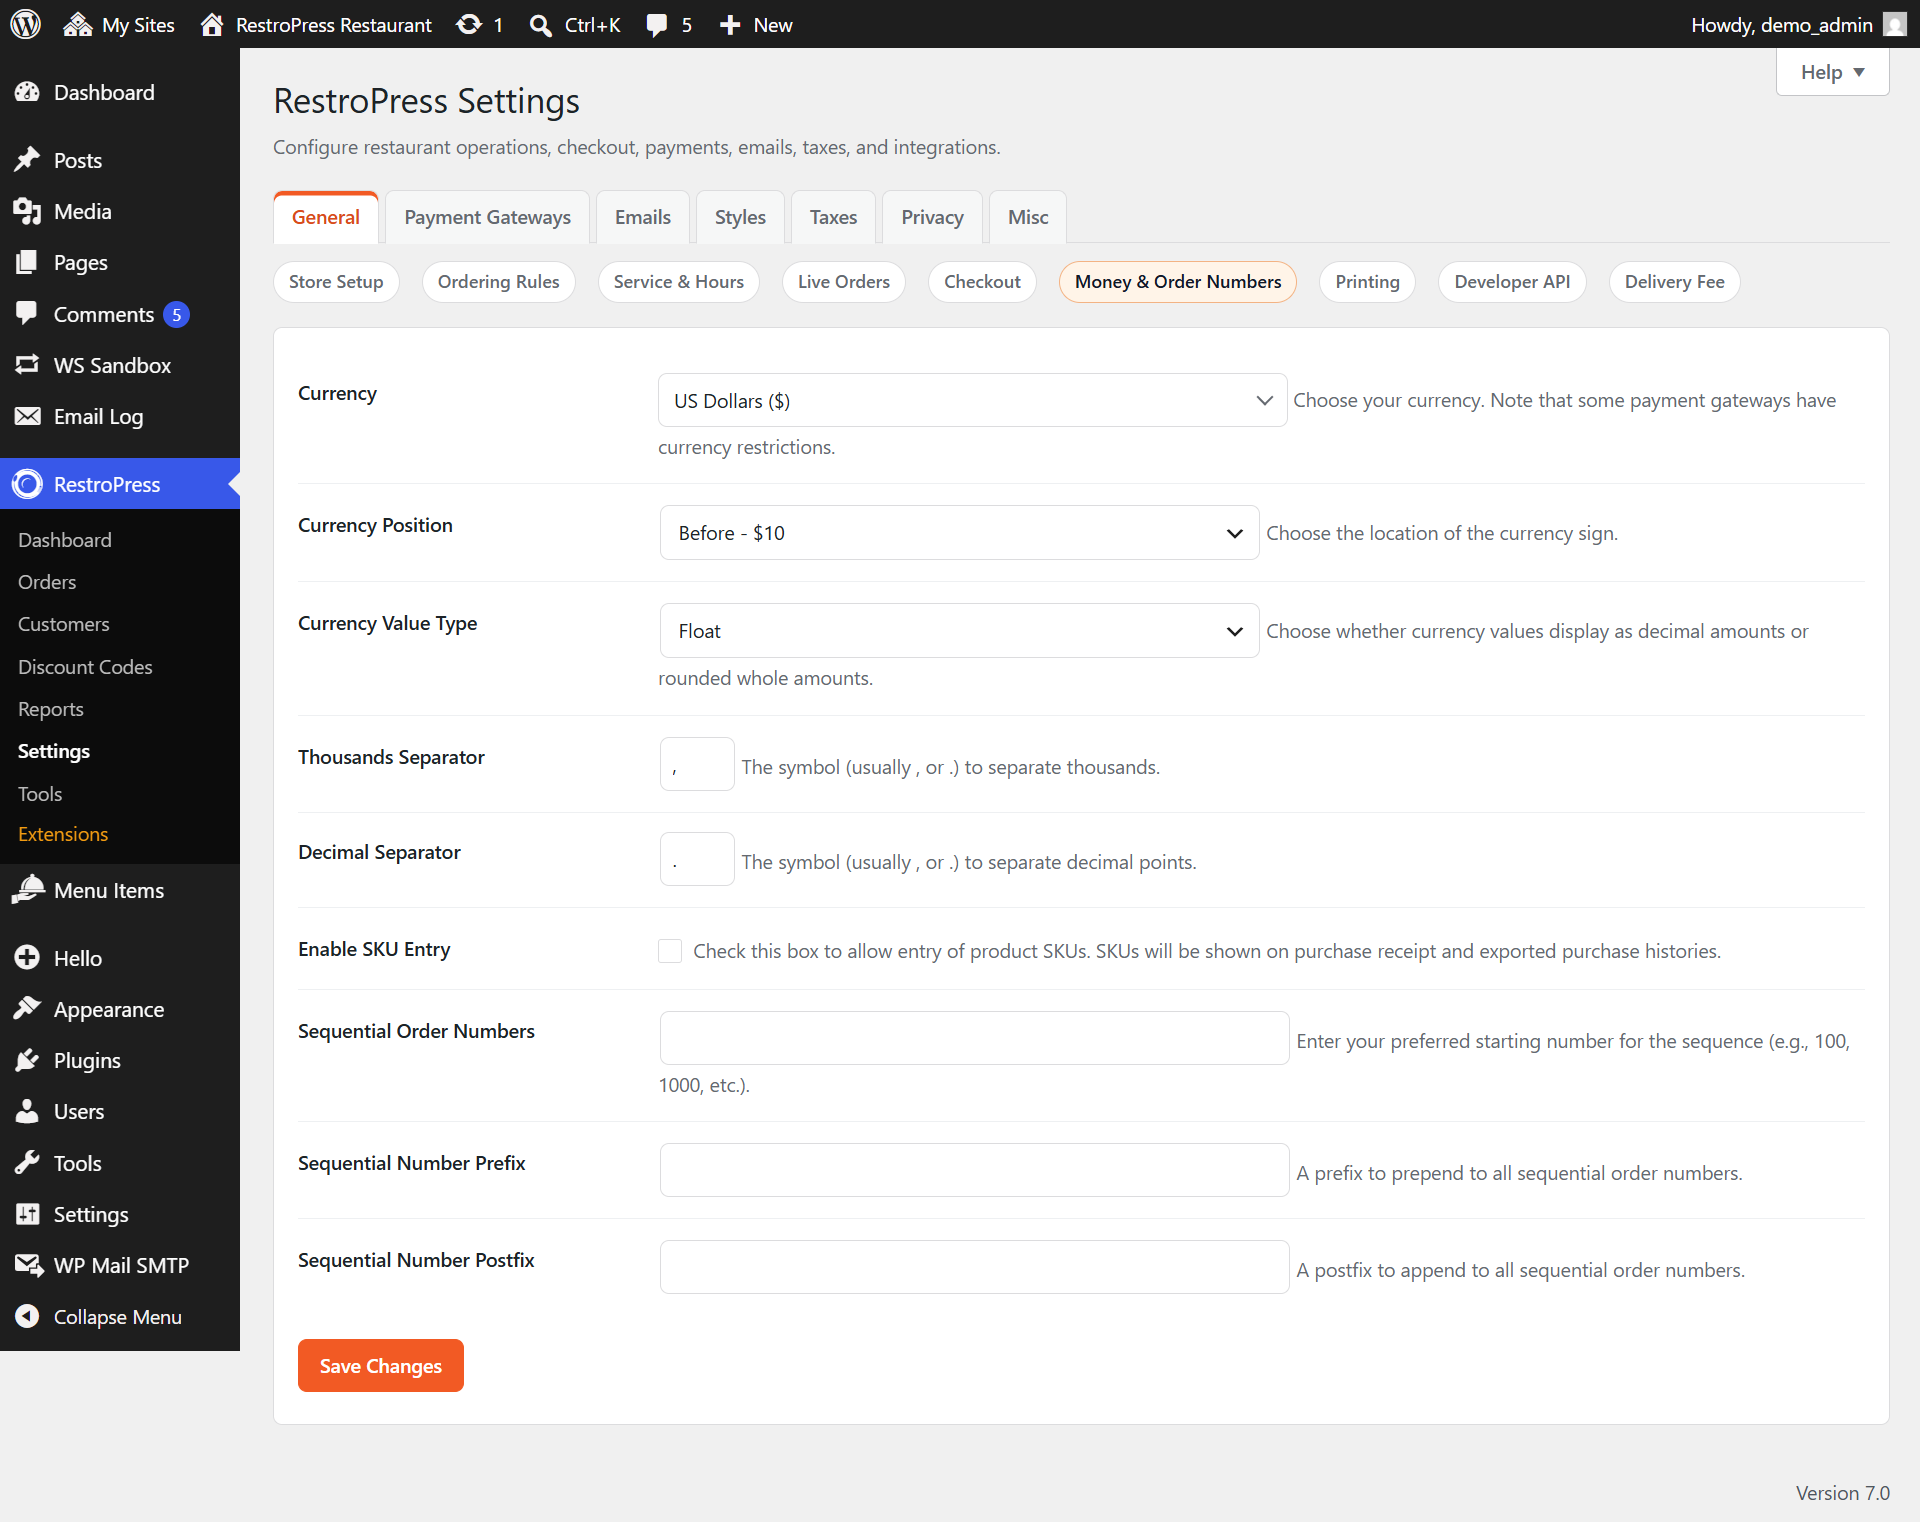
Payment Gateways :
This setting allows you to enable and manage the payment methods available on your website’s checkout page. It includes all the configuration options and information related to your payment gateways, enabling you to customize how customers complete their transactions.
General:
You can enable the payment methods that you want to offer to your customers from this section.
To verify that a payment gateway has been configured correctly, you can enable Test Mode and perform a test transaction before going live.
When Test Mode is enabled, make sure to select Test Payment as an active payment method and set it as the default payment gateway. This allows you to safely test the checkout process without processing real transactions.
Once you have confirmed that the payment gateway is functioning properly and are ready to accept live payments, disable Test Mode and remove any related test payment settings to ensure that all transactions are processed through the live payment gateway.
Screenshot:-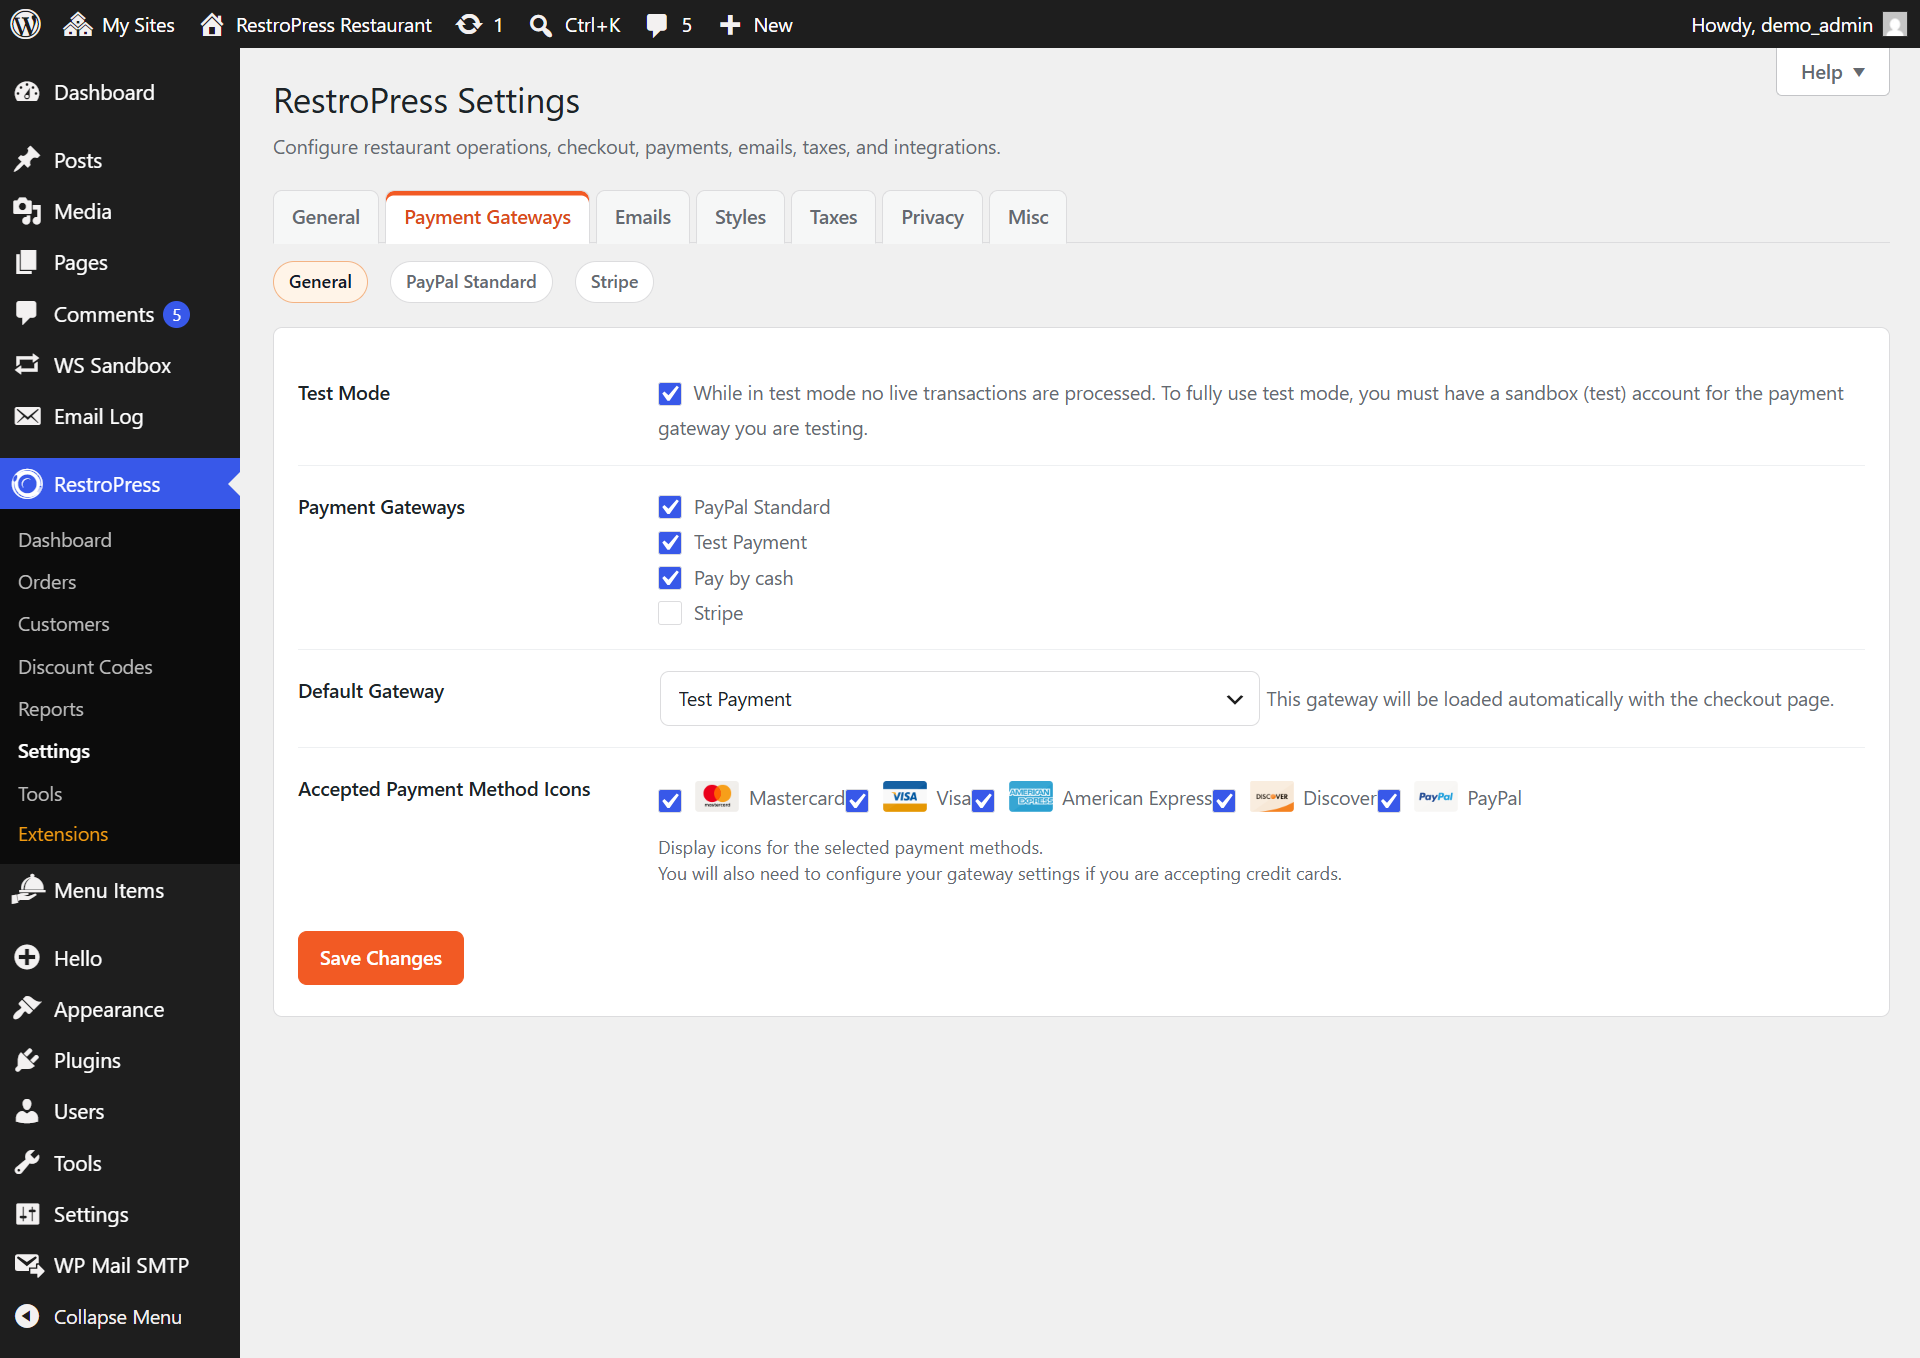
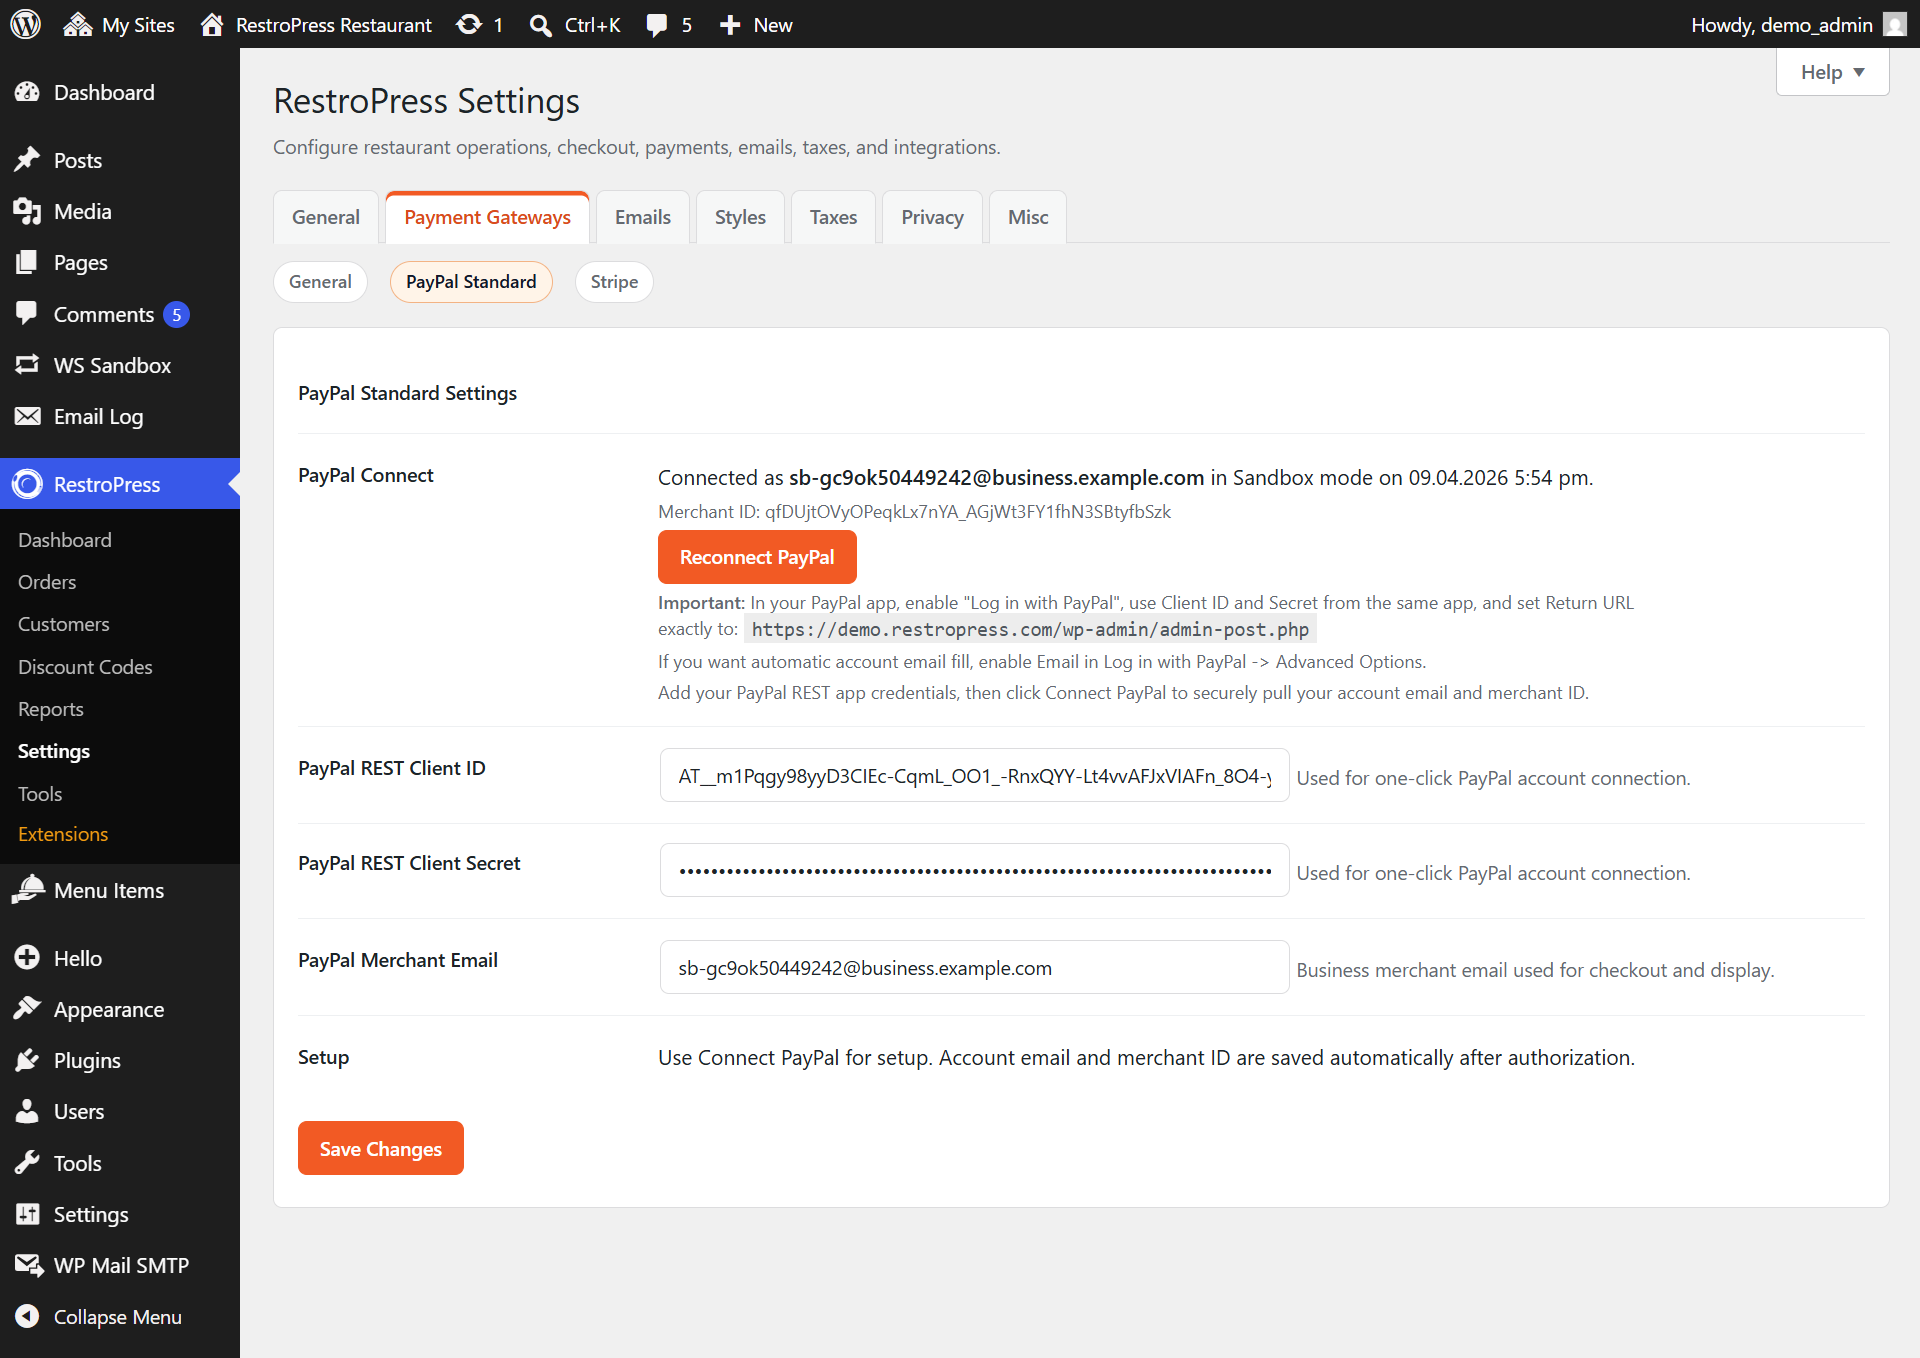
Paypal Standard:
Screenshots:-
Emails :
This page is responsible for the purchase emails and the order status updates.
You can find the available template set up under the General settings of Emails.
General: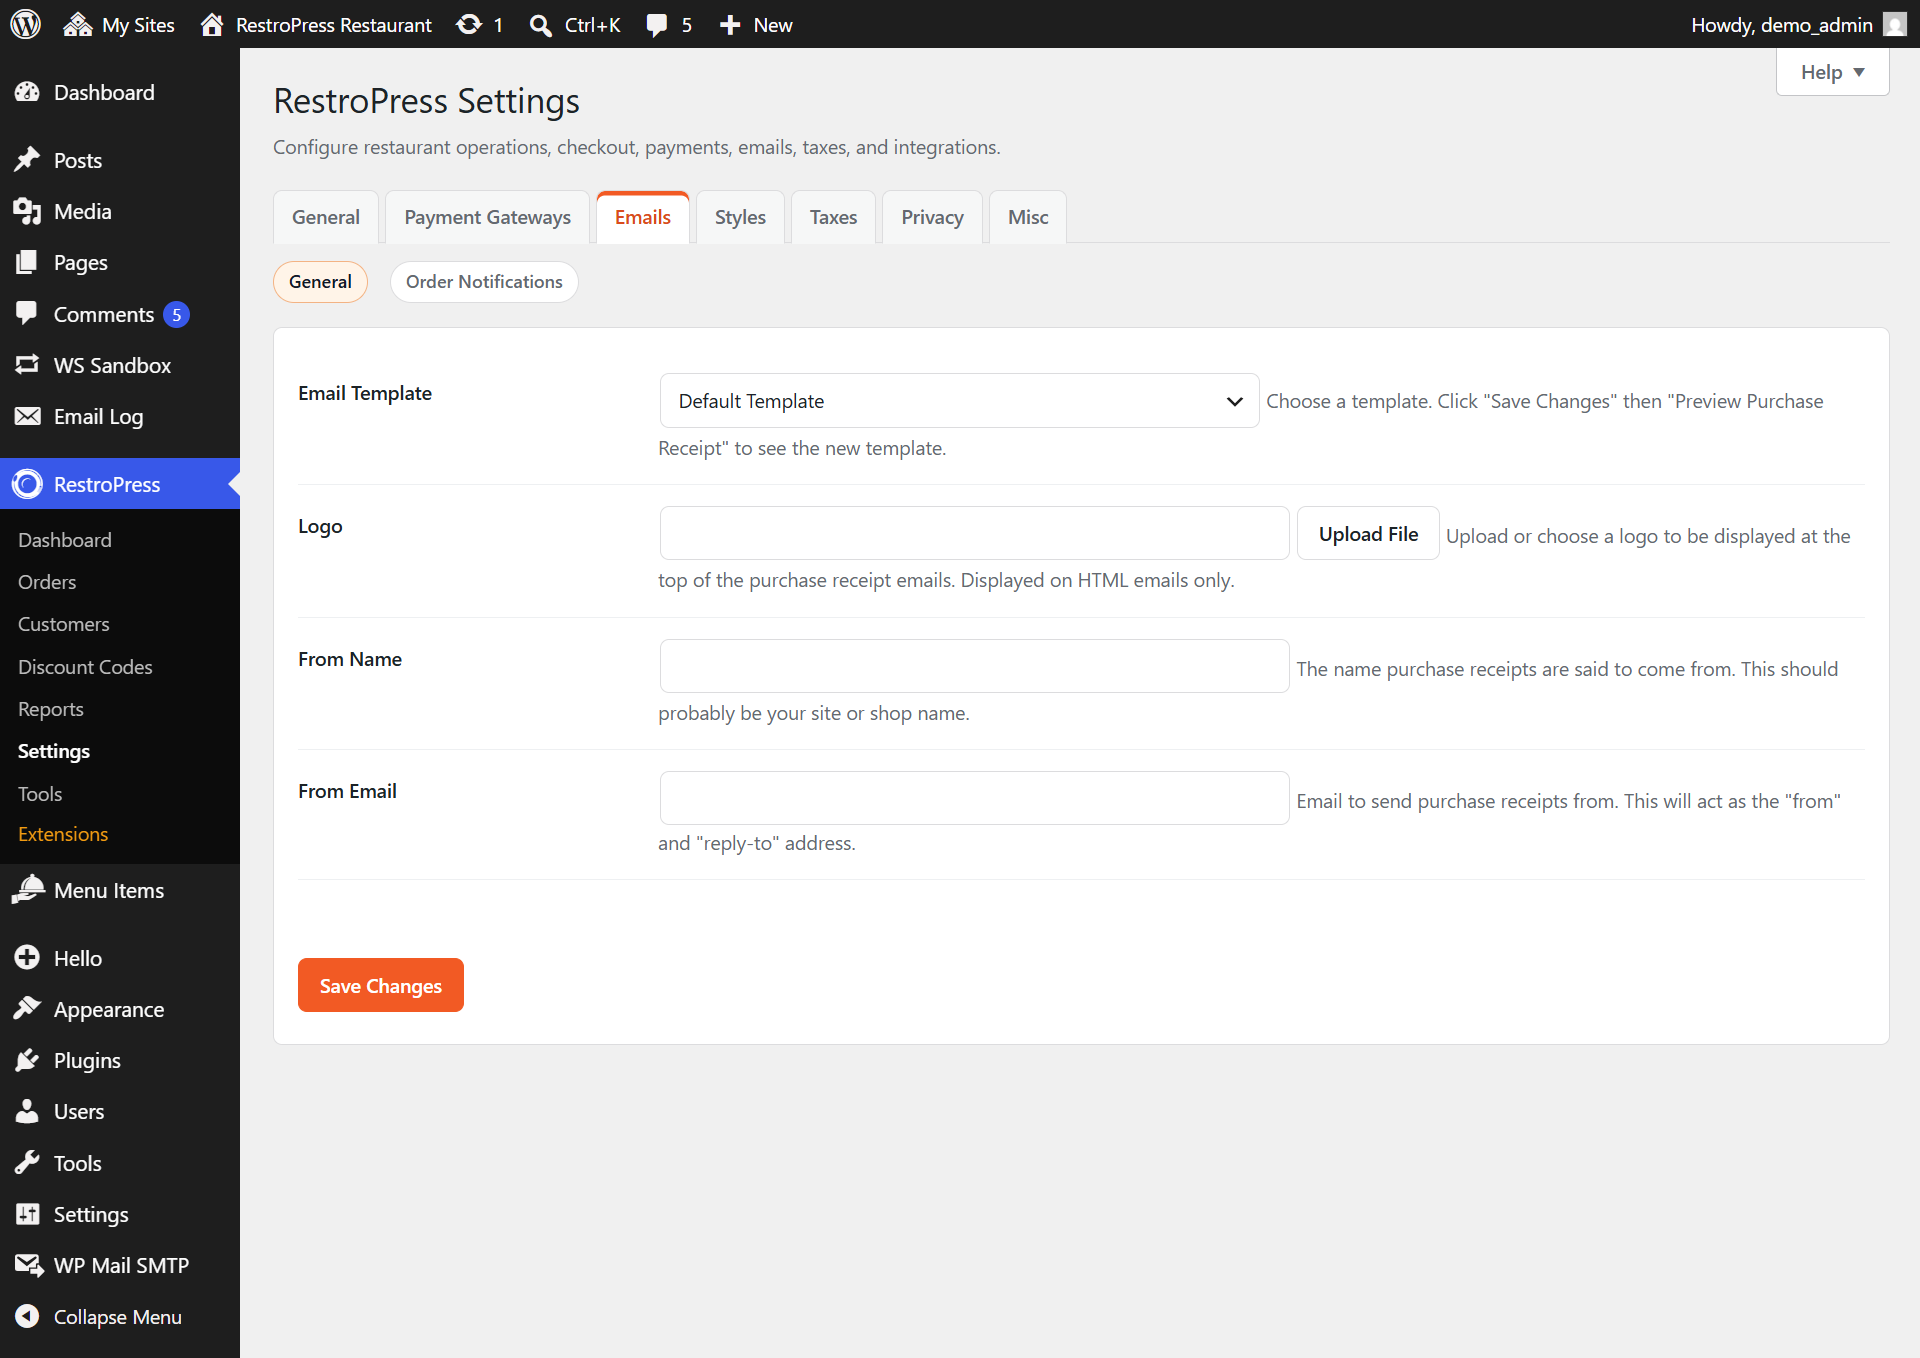
Order Notification :
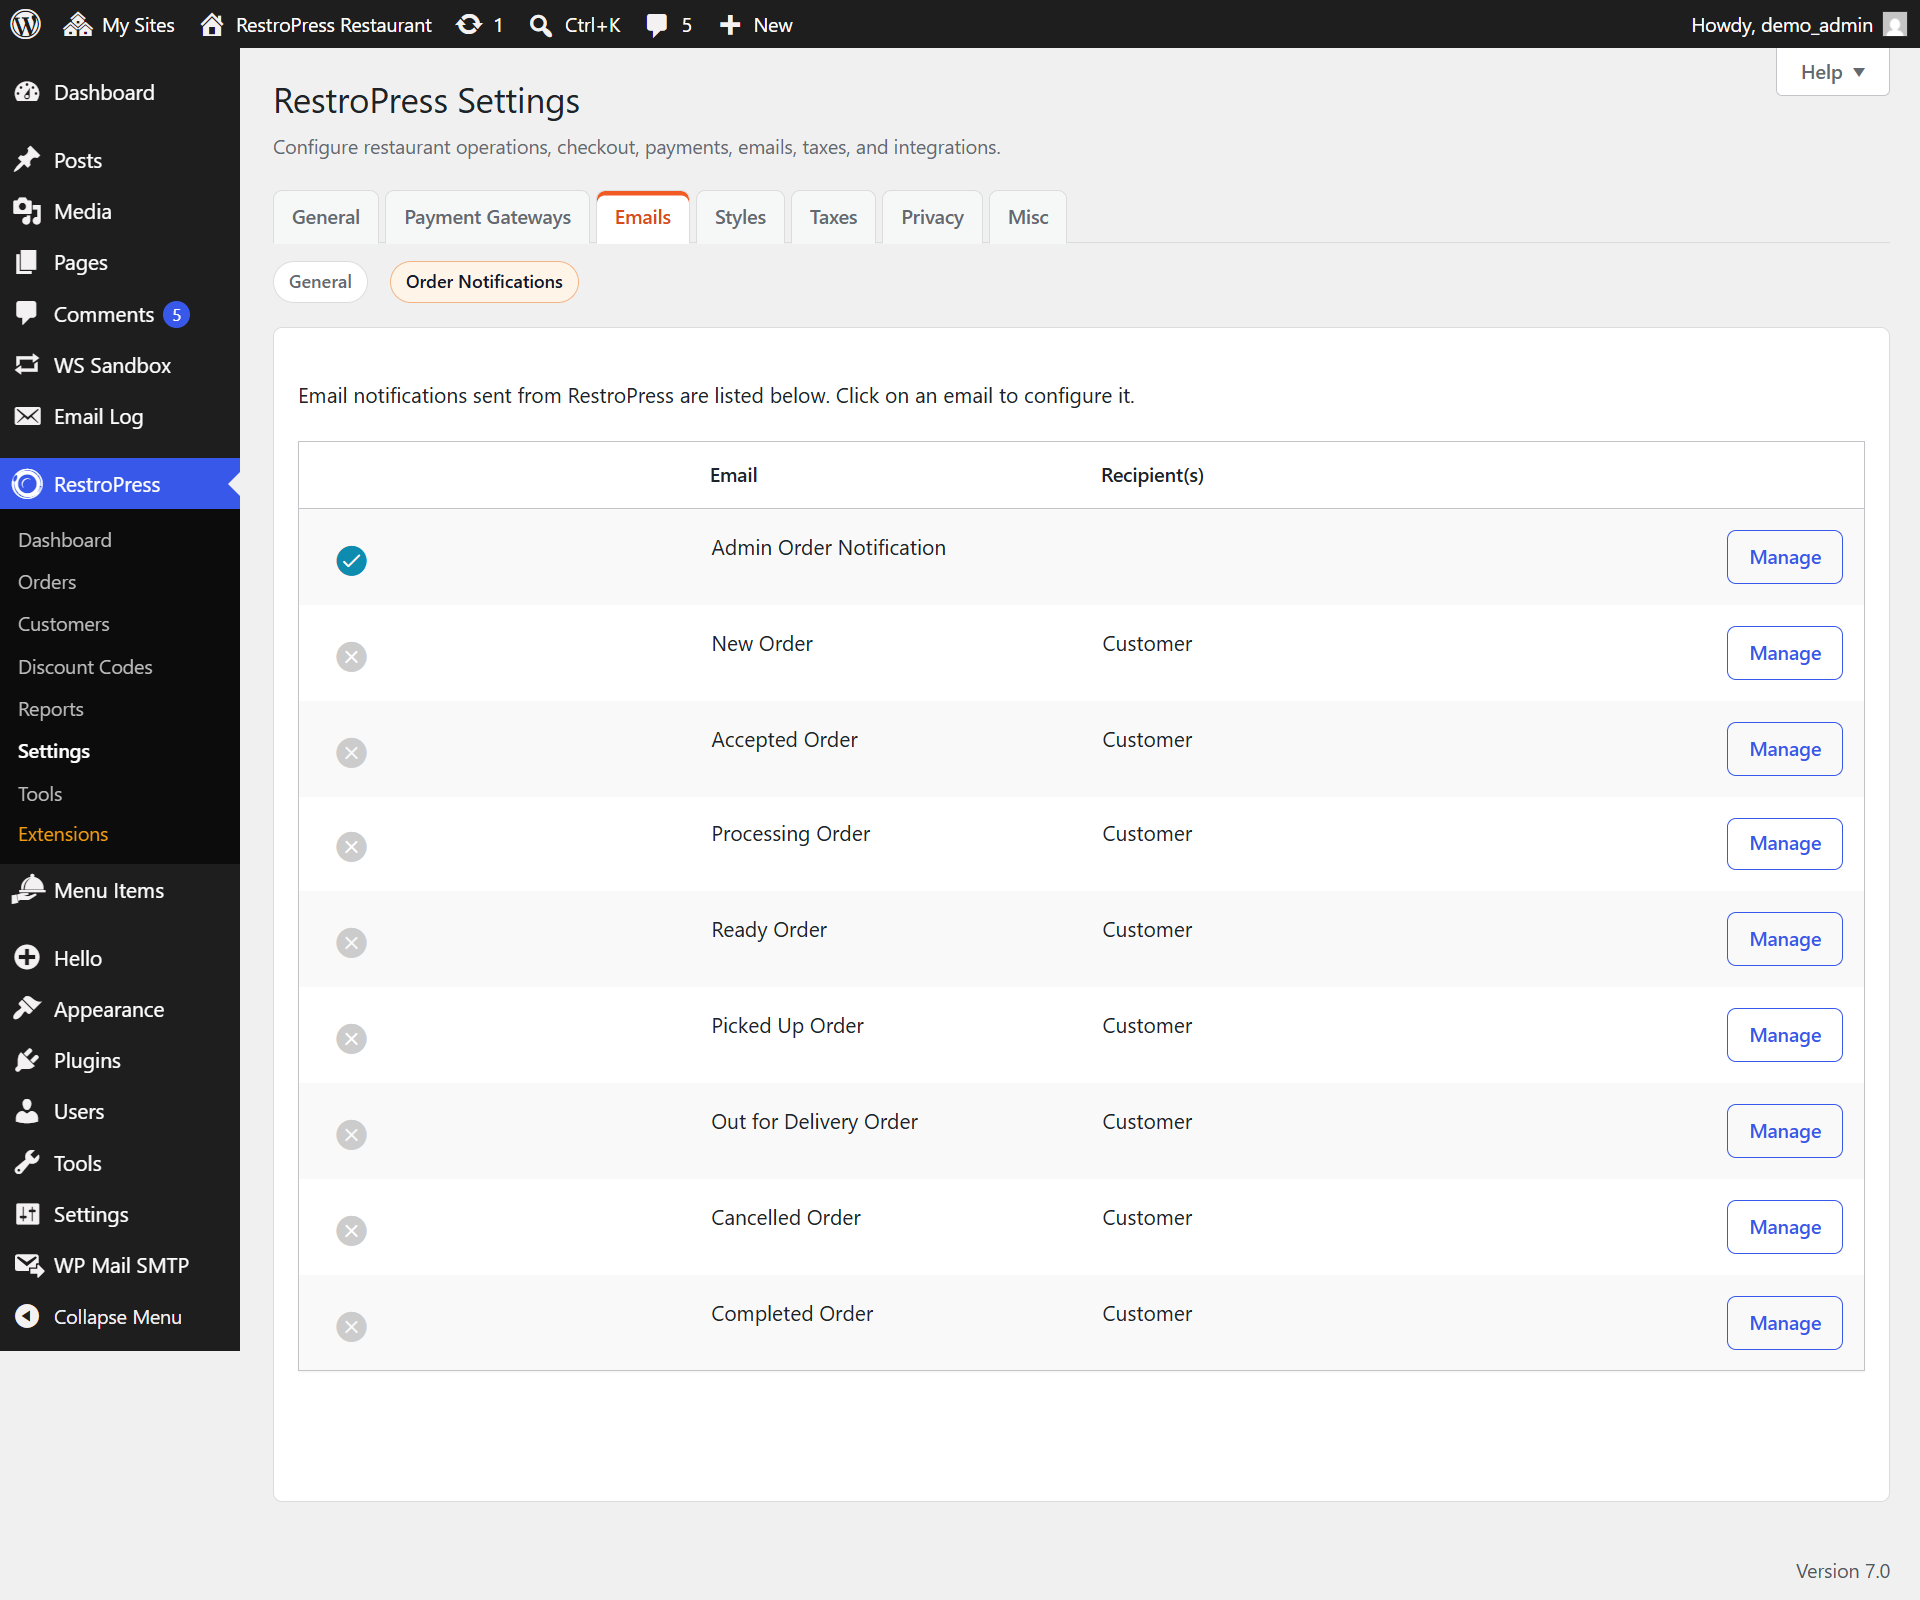
You need to set up the details under order notification that includes the email with its contents for each order status. Click on the Manage button to get the complete setup page for the emails and related. Use the template tags mentioned below the receipt content.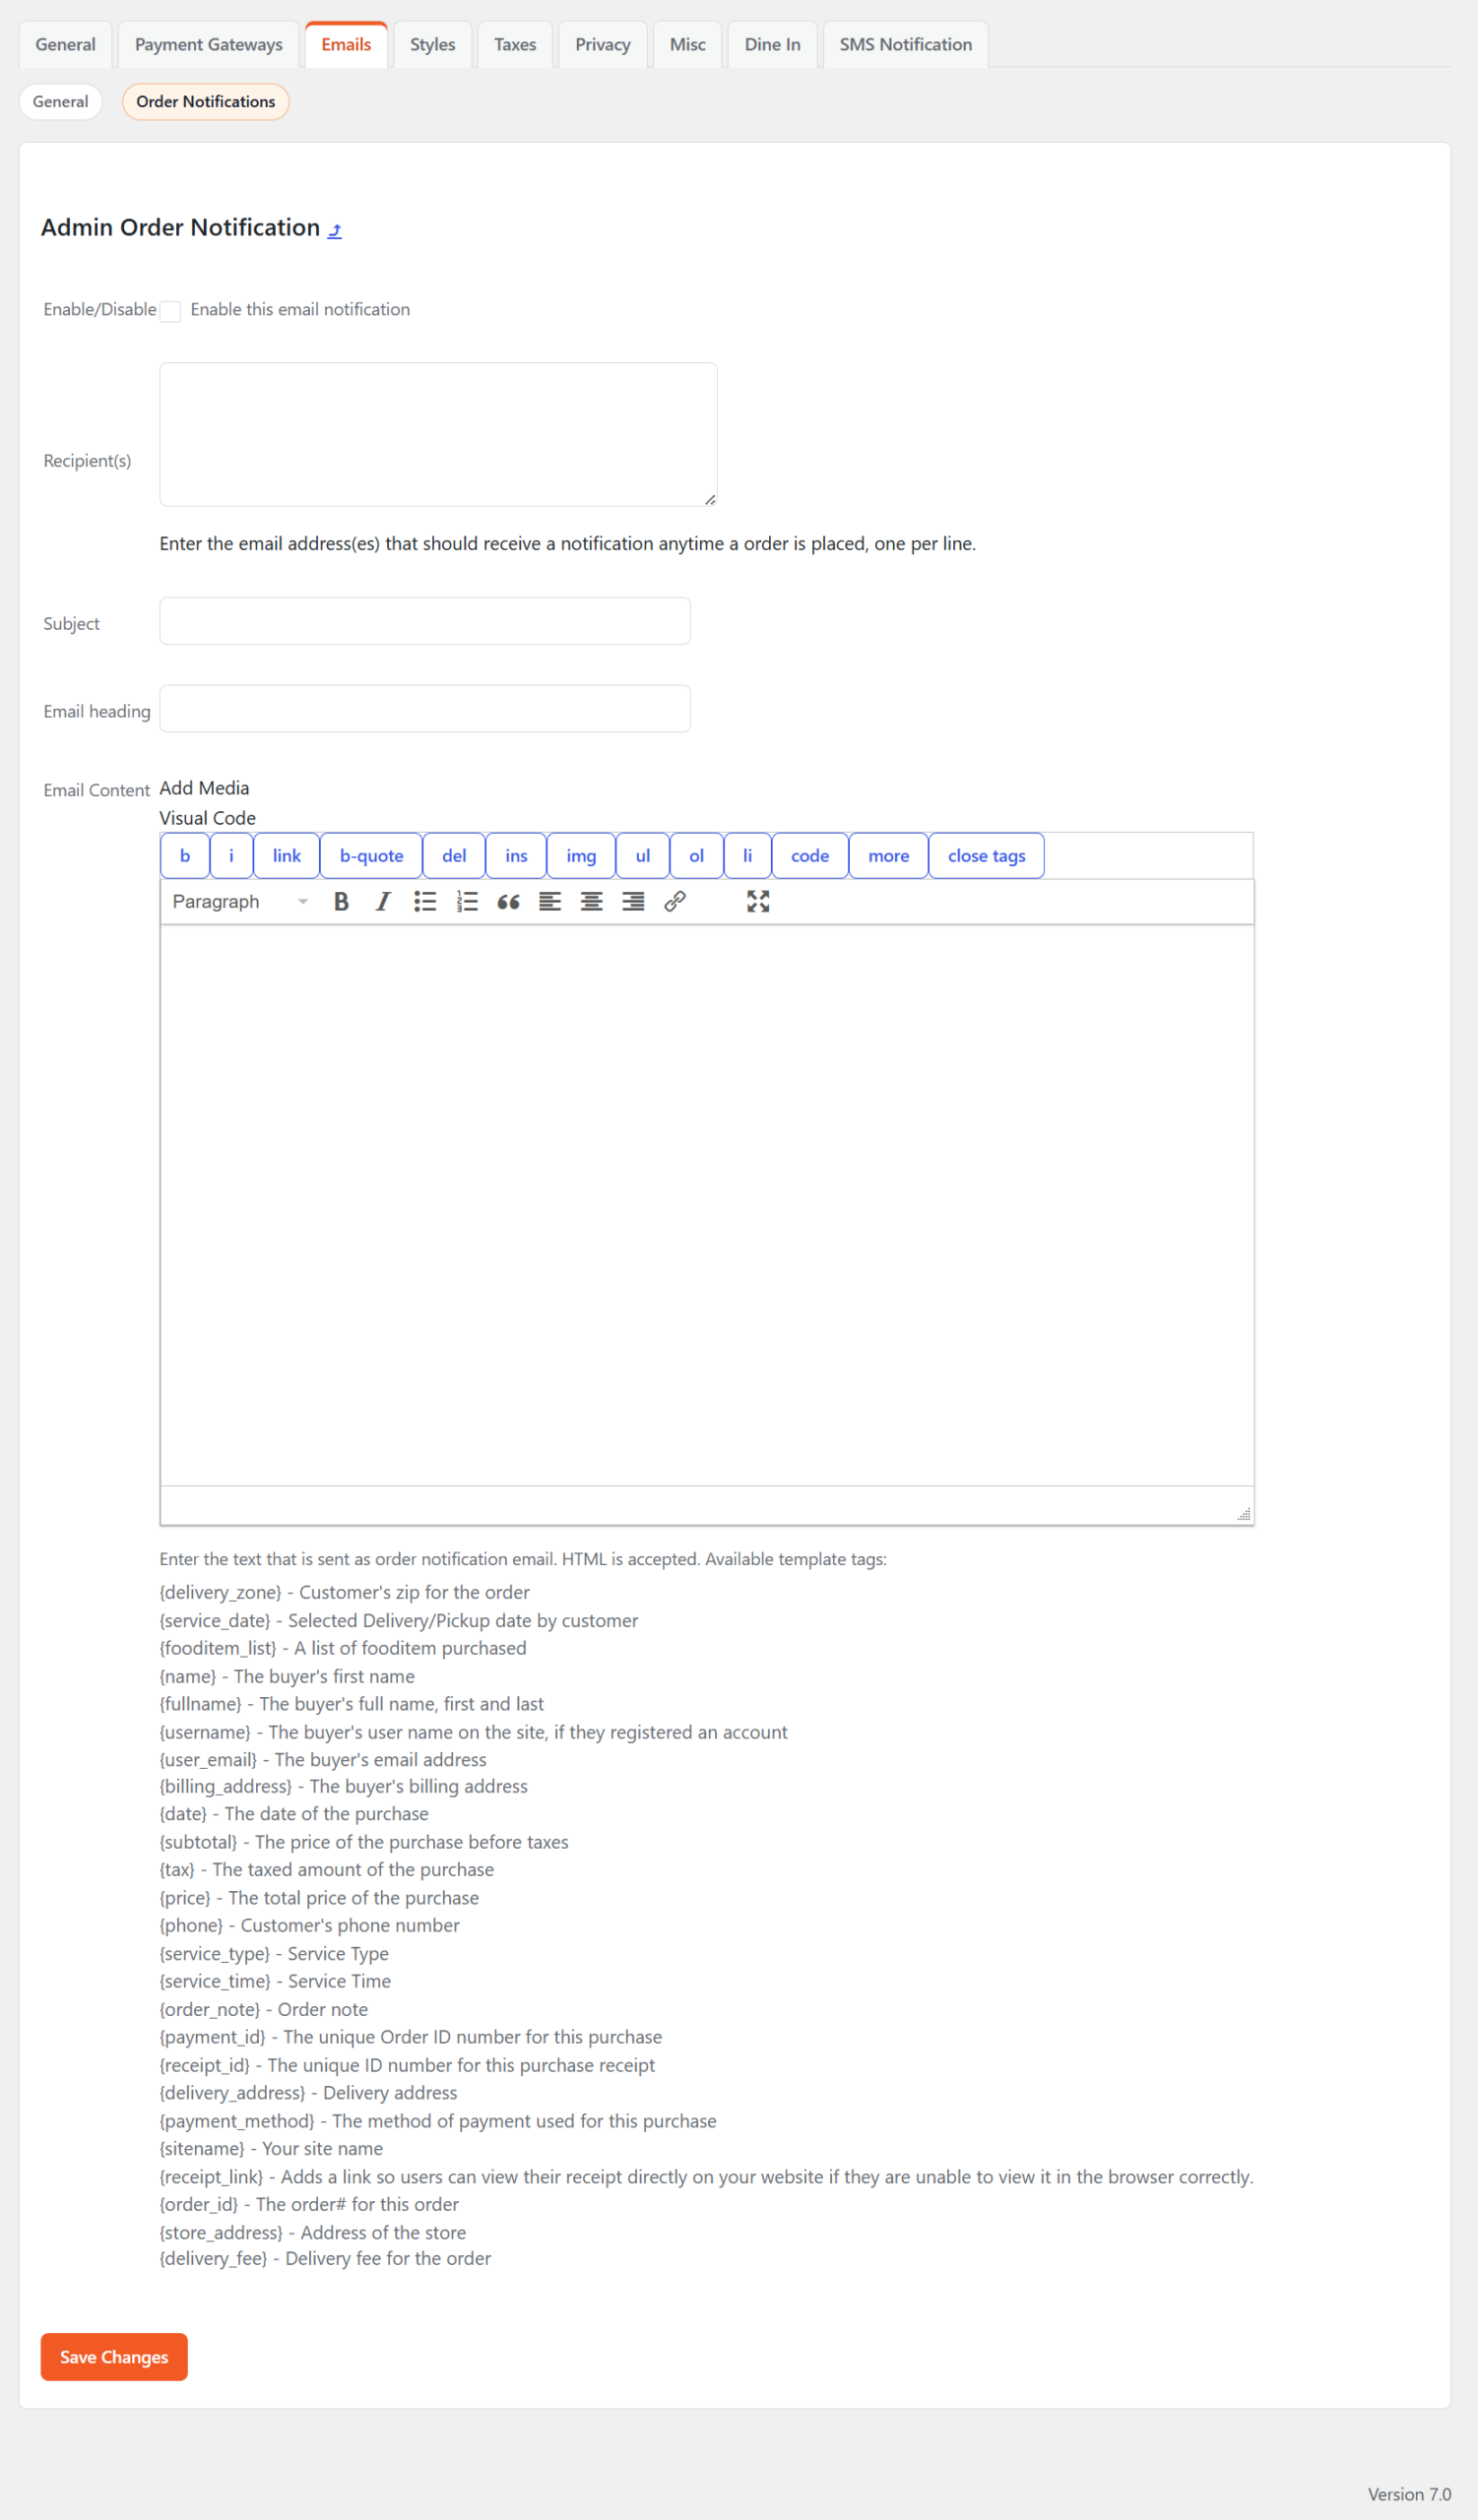
Admin Order Notification enables the emails for the admin side and rest other options are for the customer side for the new order notification.
Styles :
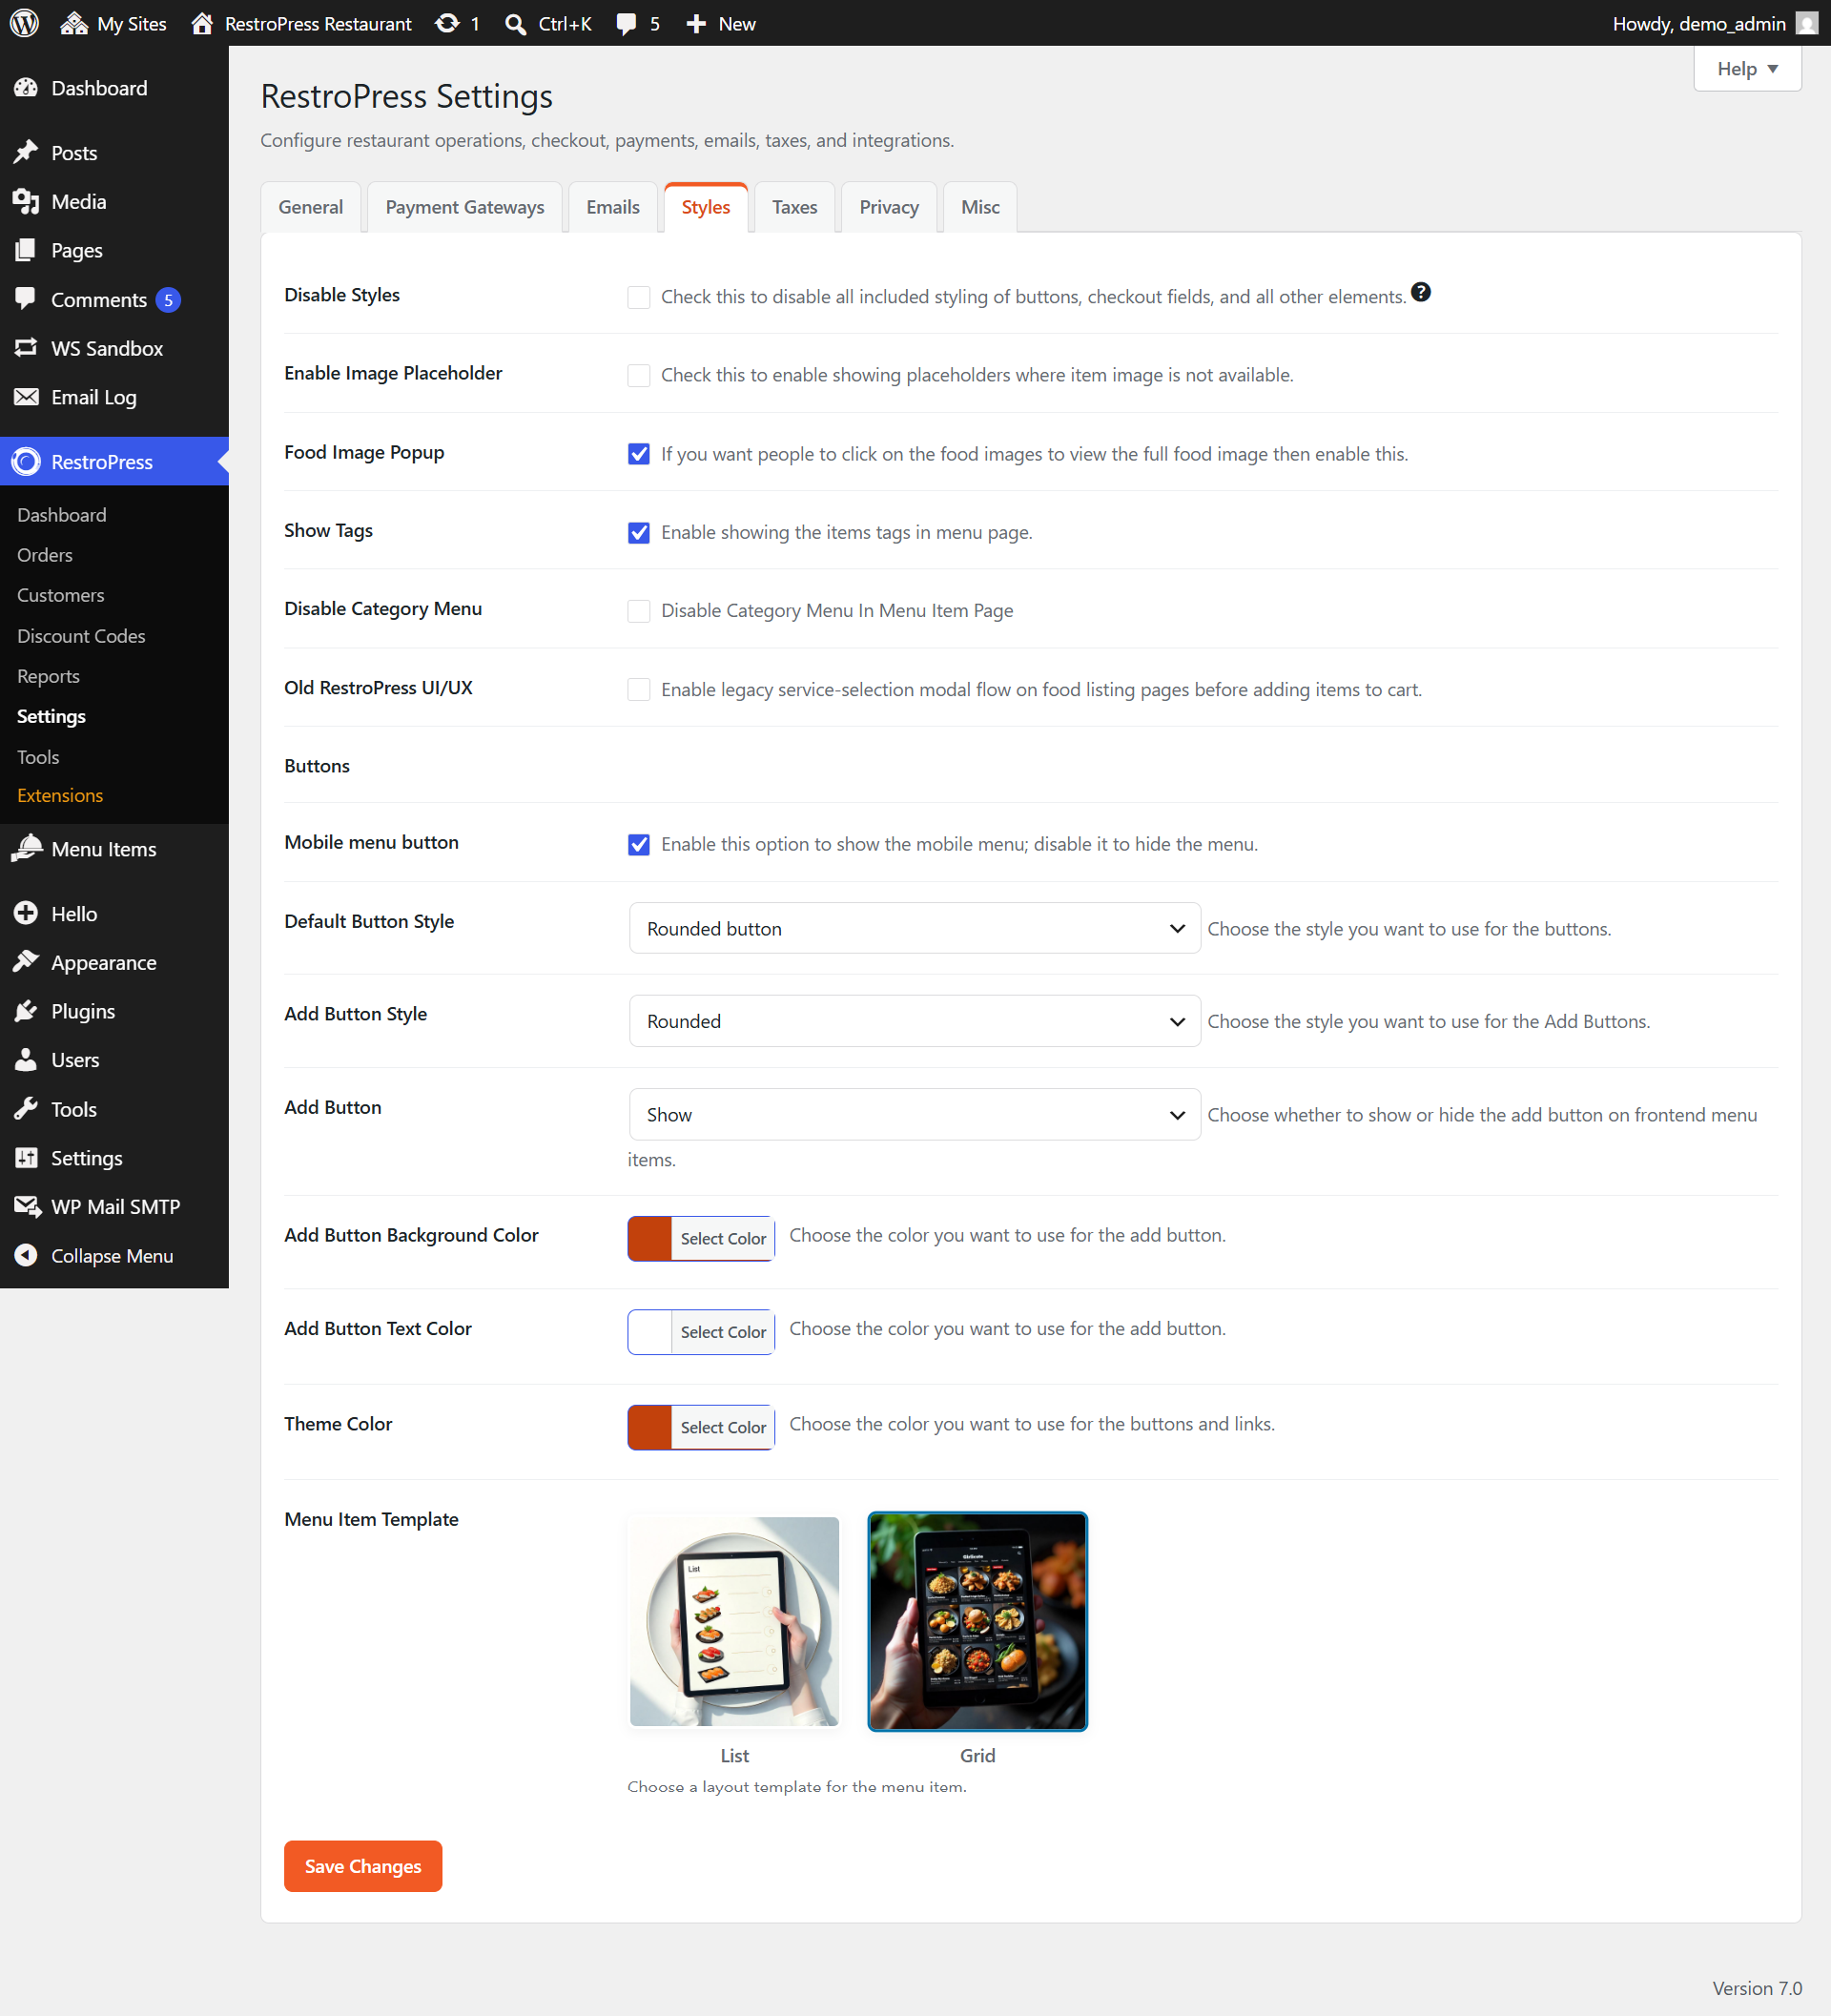
- Disable styles: If you enable this option, all implemented styles applied through the restropress style settings will be removed.
- Enable image placeholder: This will help to display an unavailable image placeholder.
- Food image popup: This option will allow the customer to see the item image in full-width view; image clarity will depend on the image quality.
- Show Tags: Through this option, you can show the item tags to the customers.
- Disable category menu: Disable Category Menu In Menu Item Page.
- Old RestroPress UI/UX: Enable legacy service-selection modal flow on food listing pages before adding items to cart.
- Default Button Style: This option provides three button styles, such as Rectangle Button, Rounded Button, Border radius, and Plain Text.
Note: This style will be applied to all buttons except the “Add Button”. - Add Button Style: Here you can also able to get 3 button styles: Rectangle, Rounded, and Circle.
- Add Button: Choose whether to show or hide the add button on frontend menu items.
- Add Button Background Color: Through this option, you can change the background color of the add button as per your requirement.
- Add Button Text Color: Through this option, you can change the text color of the add button as per your requirement.
- Theme Color: This color setting will be applicable for the category labels, buttons, and some links, except the “Add Button”.
- Food Item Template: Here, you can use your required template, List, or Grid.
Screenshots:-
List View screenshot: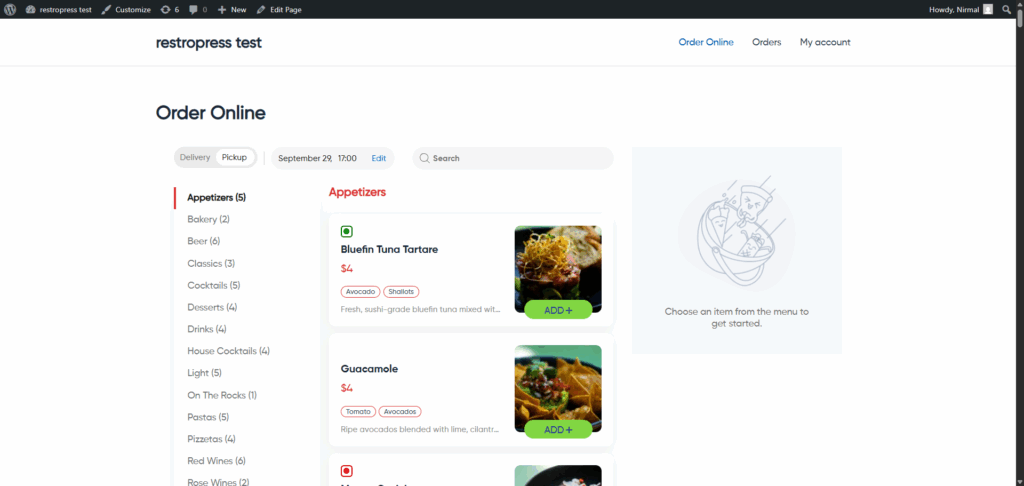
Grid view screenshot: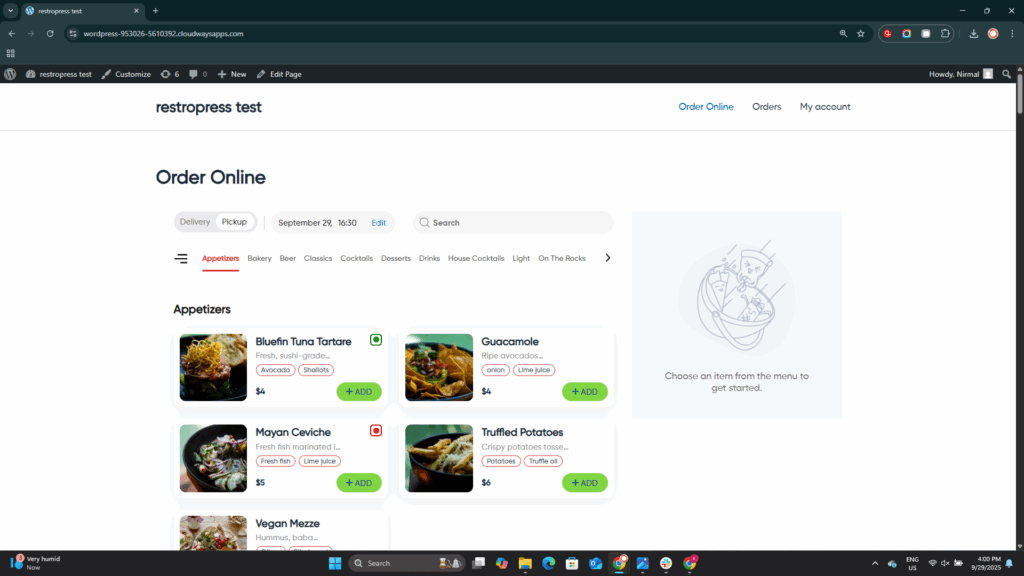
Taxes :
This page is concerned with the taxes that are to be charged to the customers. The options explain the meaning of their respective option.
Screenshots:-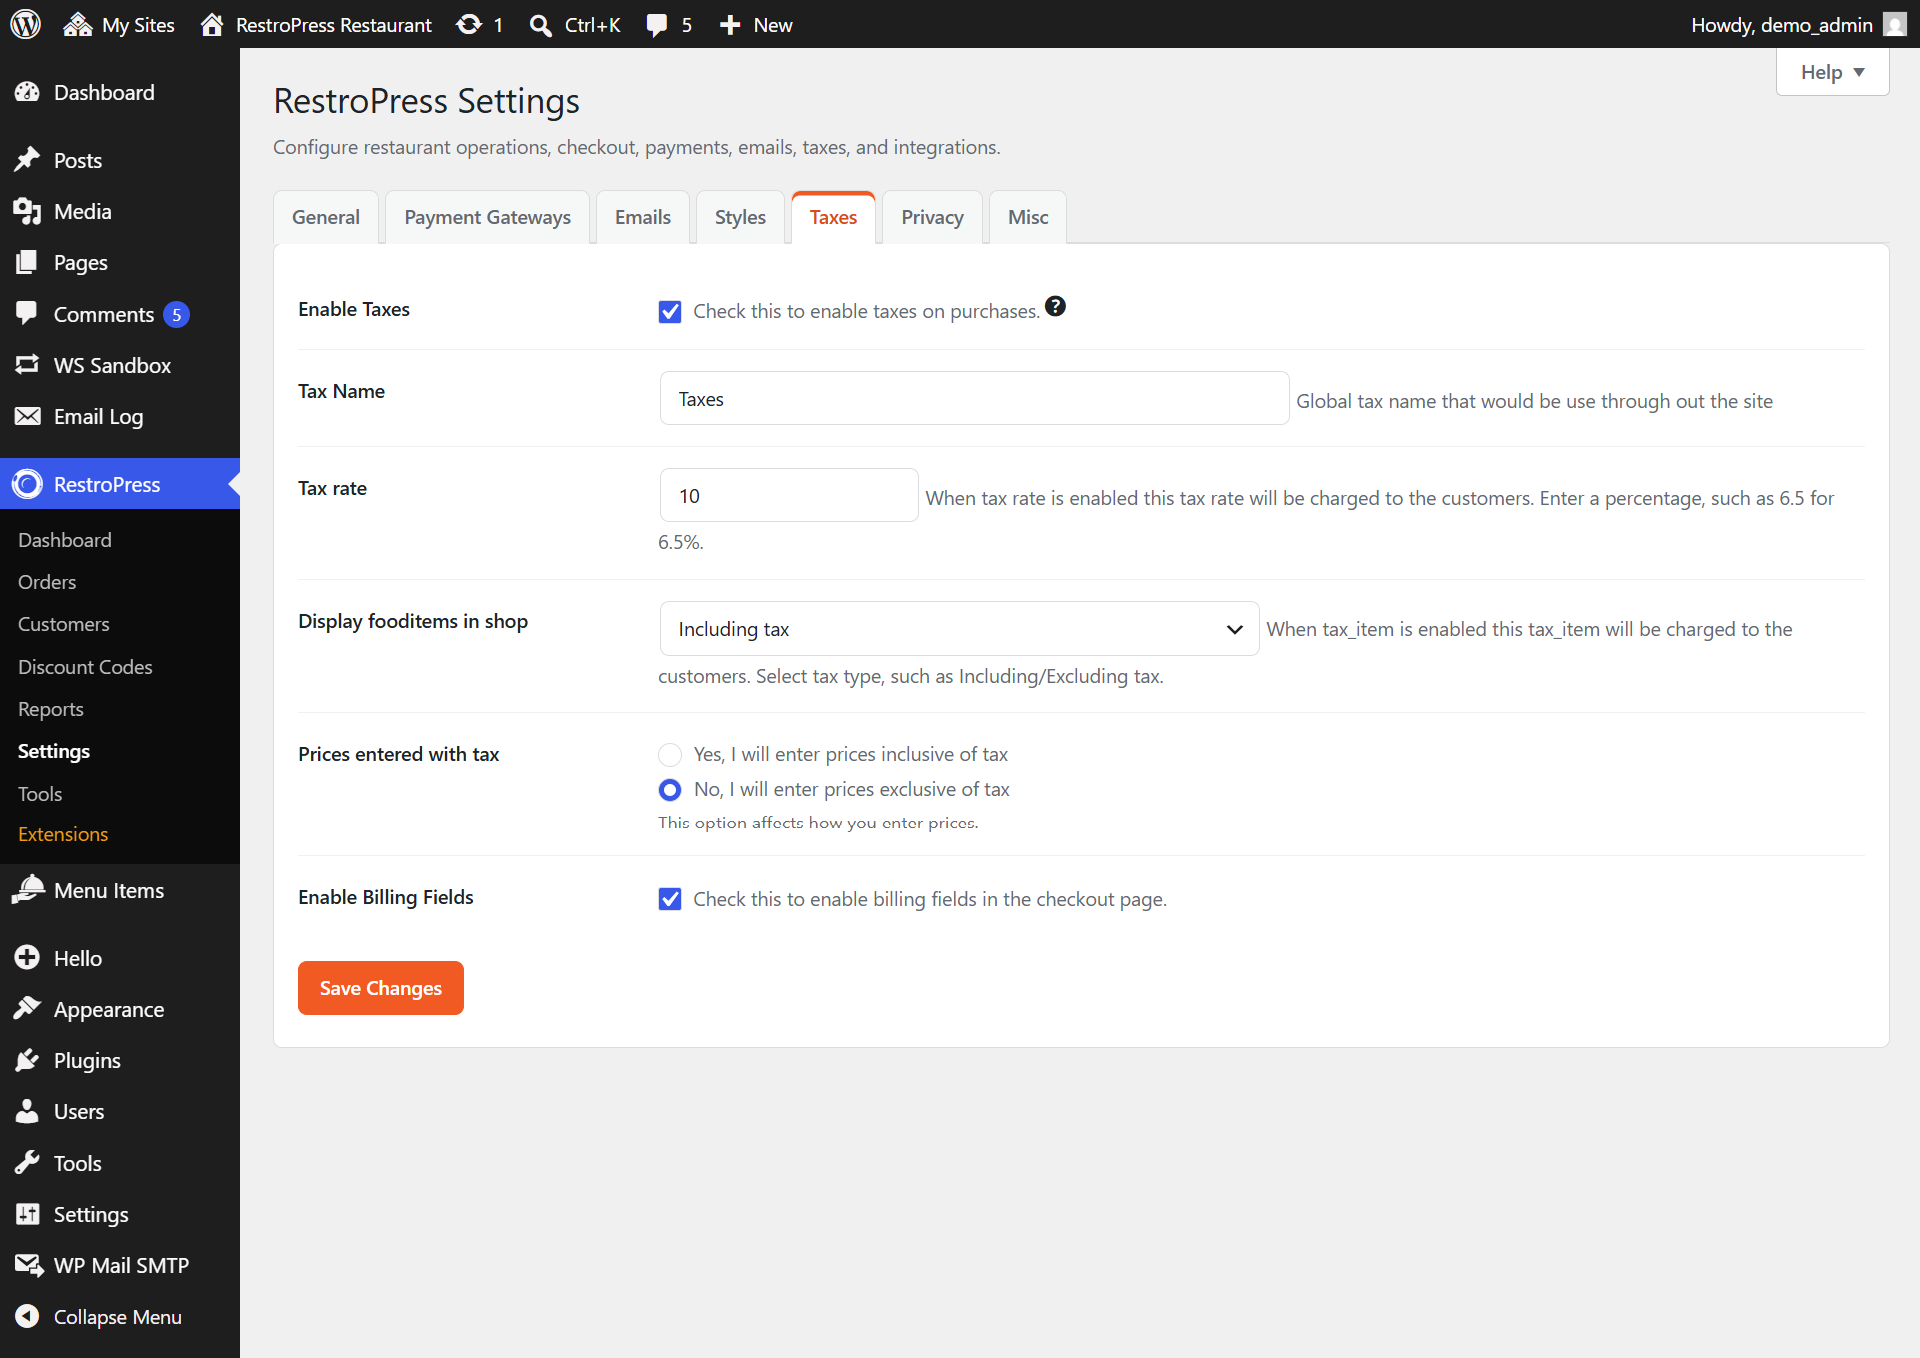
Privacy :
When a user is removed or anonymized from the website, his data and records are to be managed on this settings page.
Screenshot:-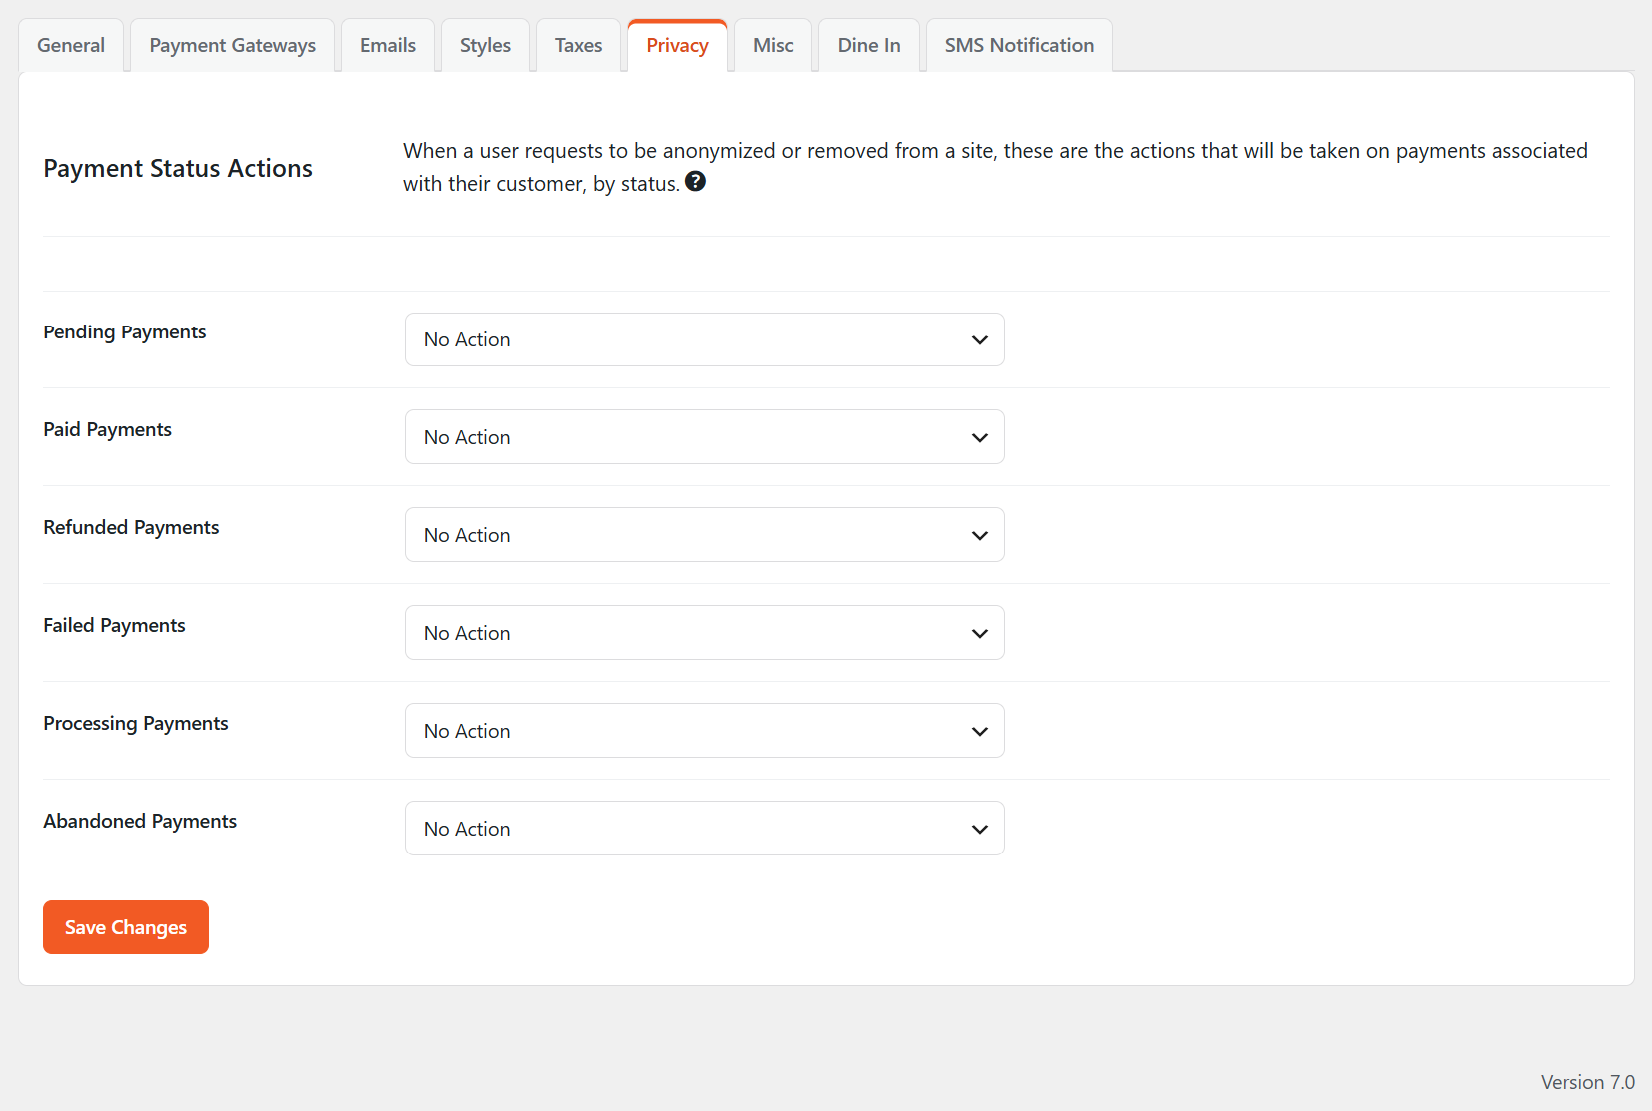
Misc :
Miscellaneous
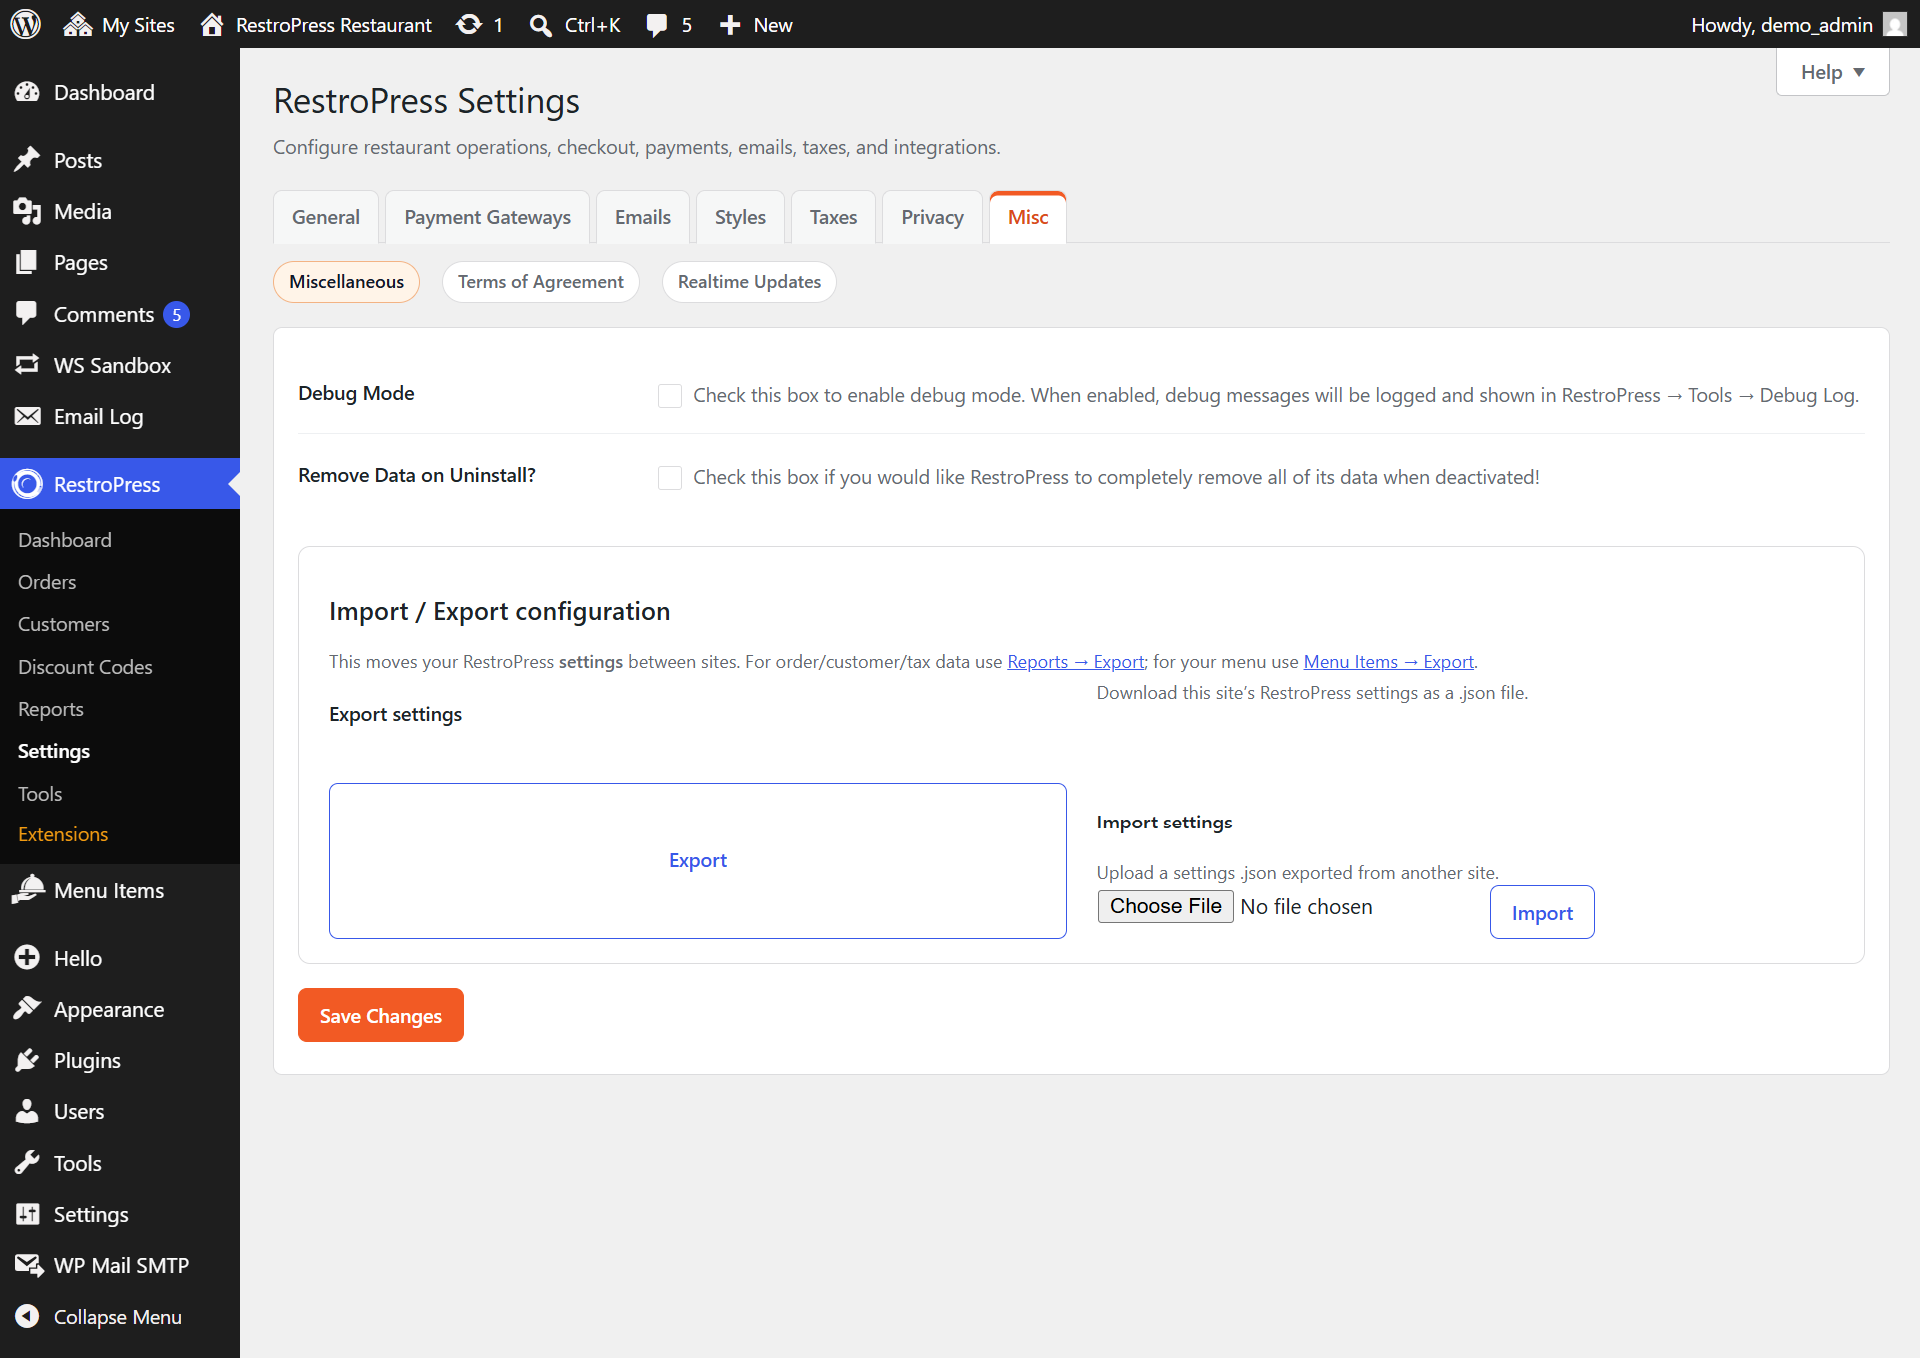
It includes the option to enable debug mode and the removal of data after uninstallation.
Terms of Agreement
It includes the agreement terms that you want to be legitimate for the user of your website.
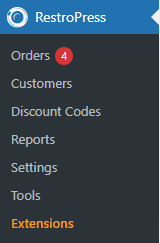
Other Options of Plugin :
 .
.
Orders: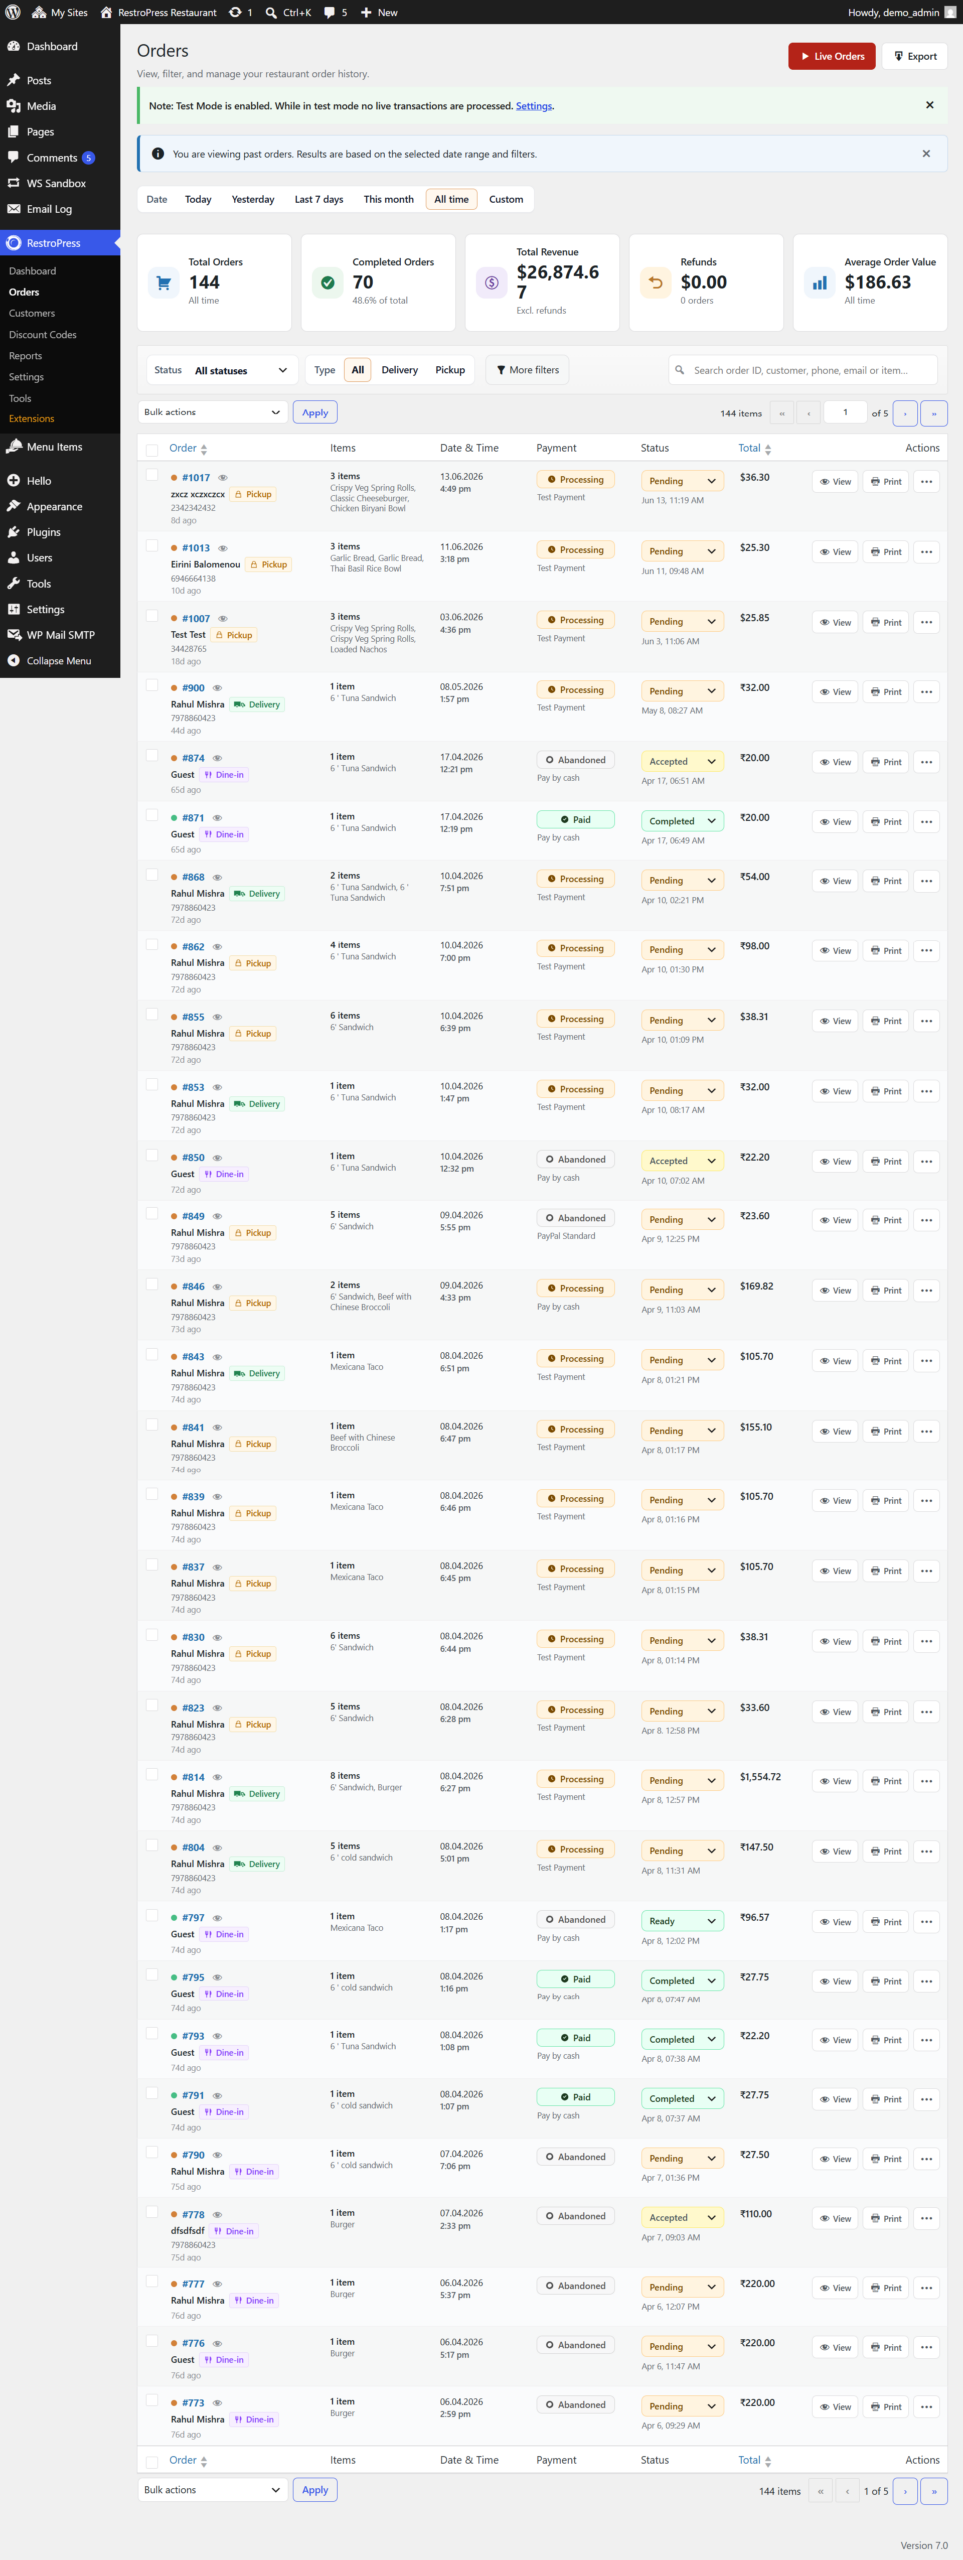
It will contain the records of the Orders that were being placed. You can check for the details of the orders on this page. It contains the complete details of the orders along with customer details.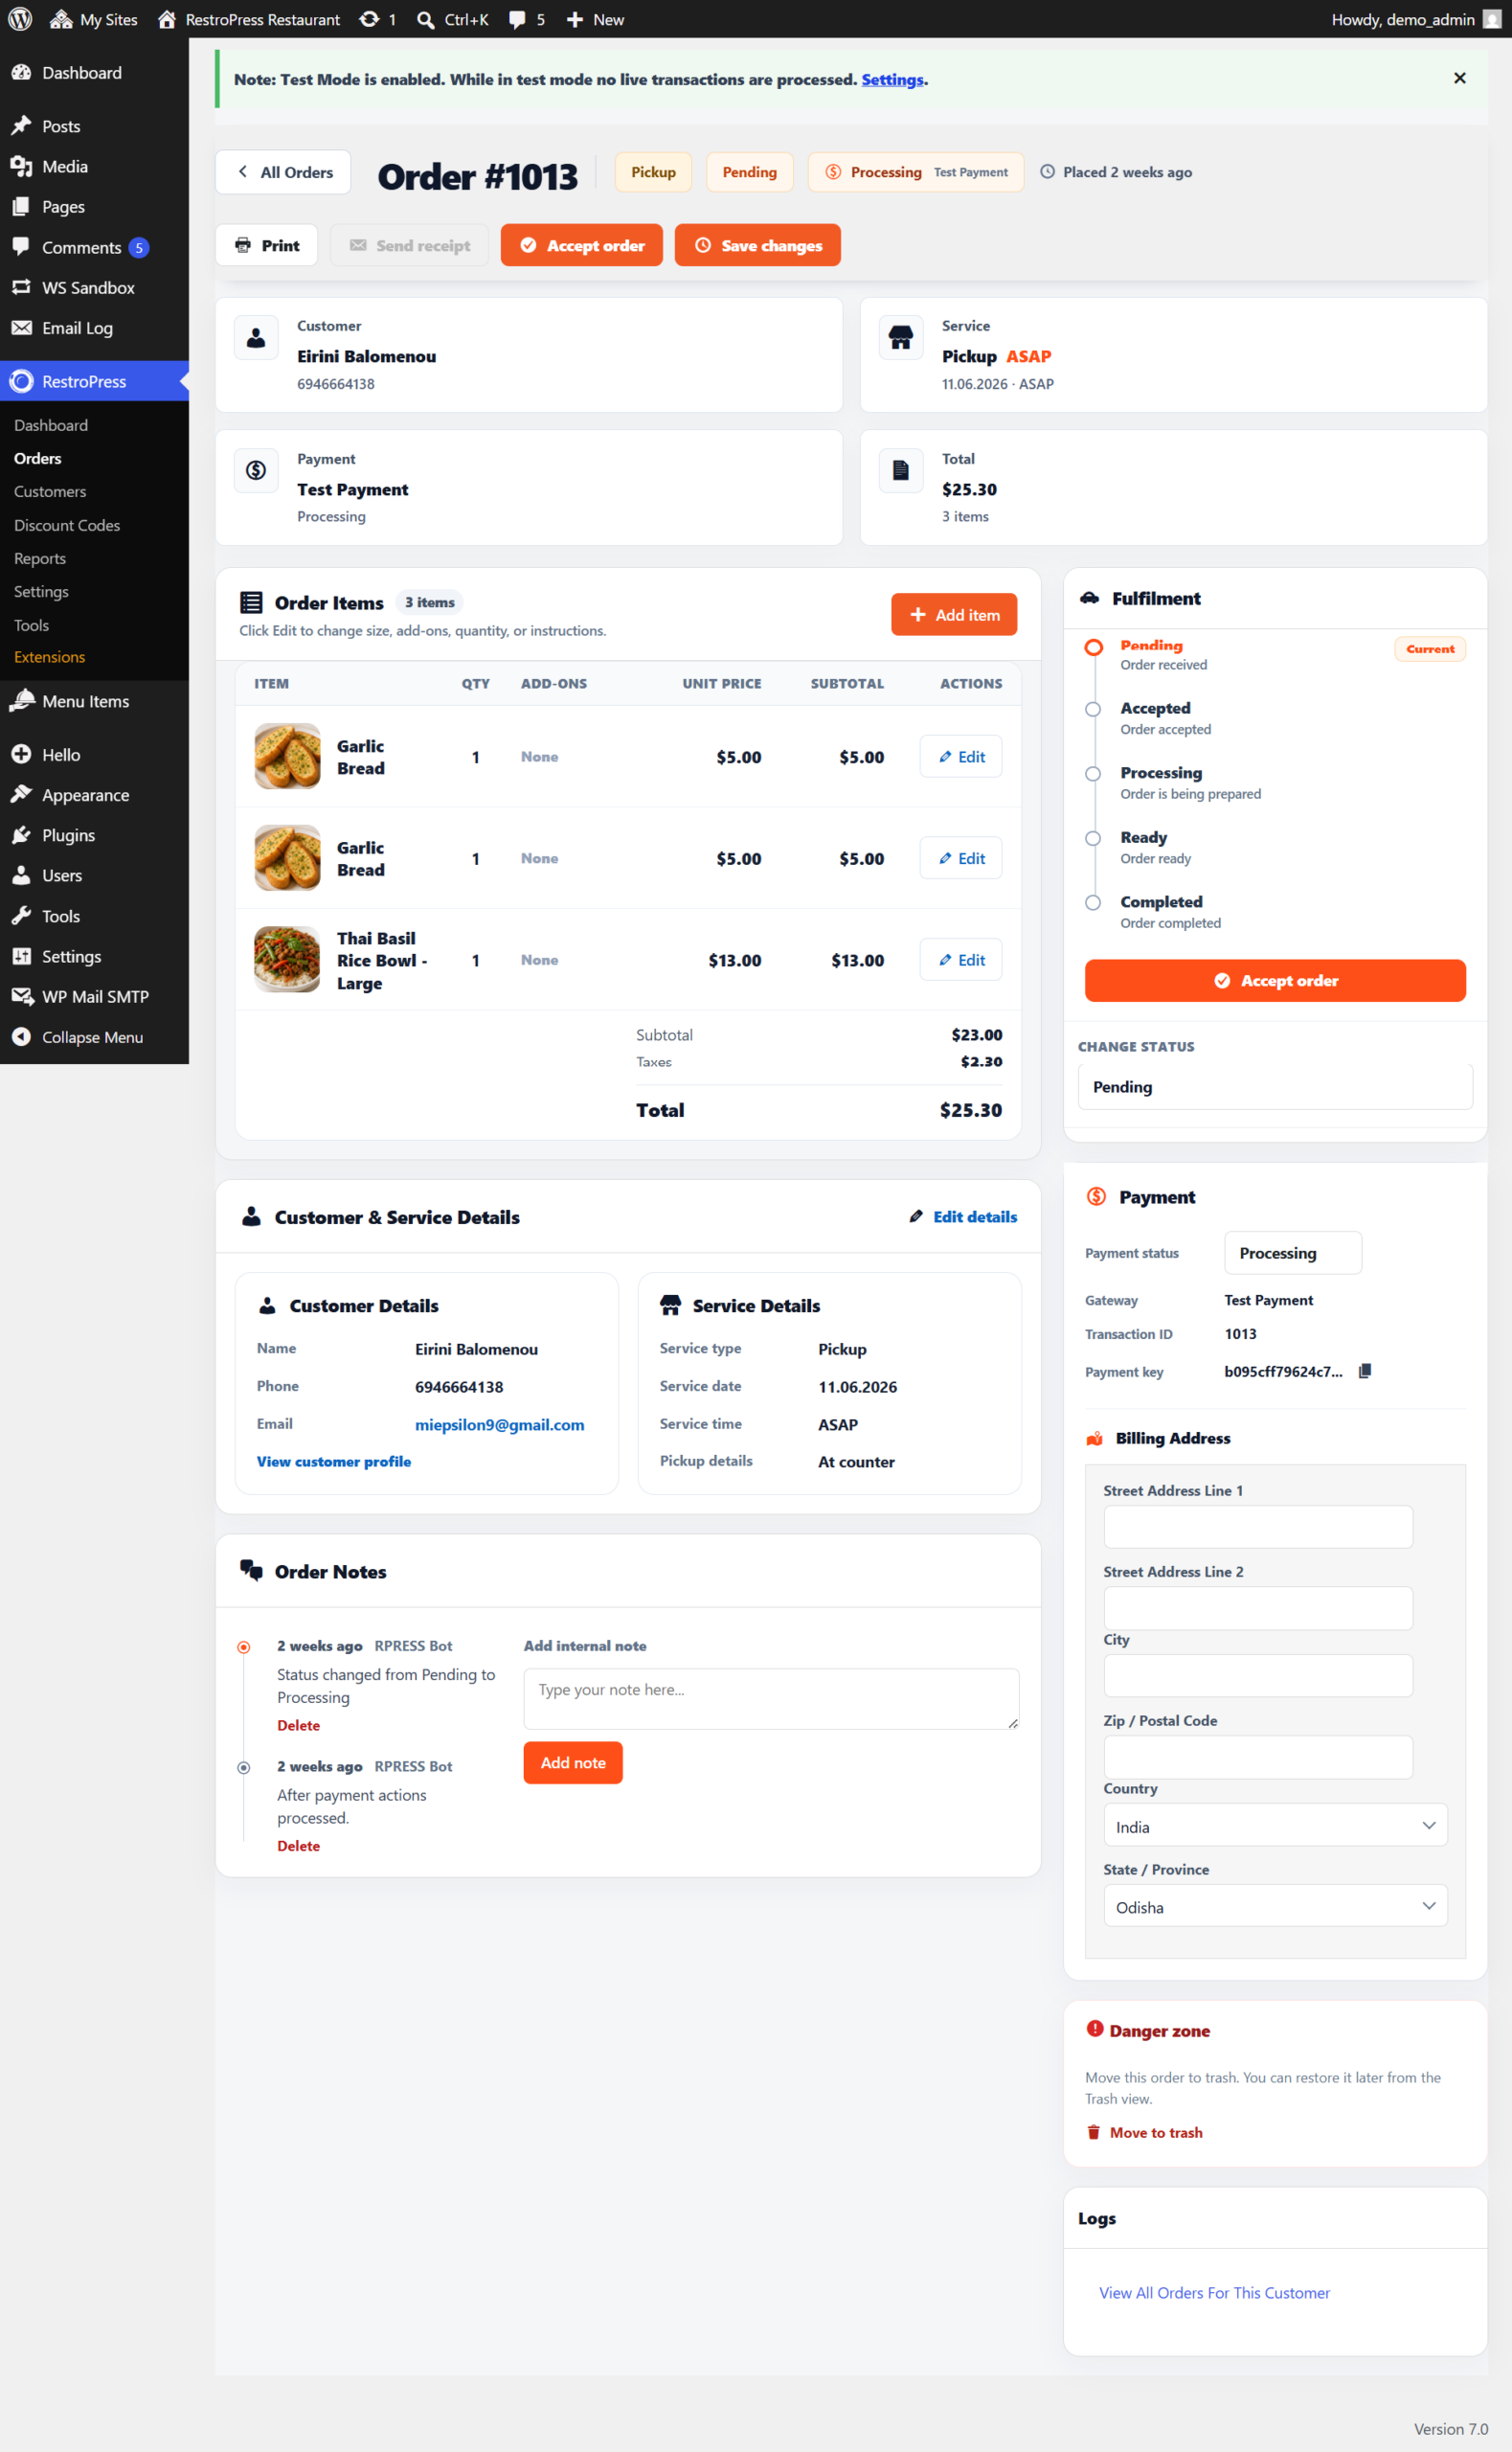
Customers: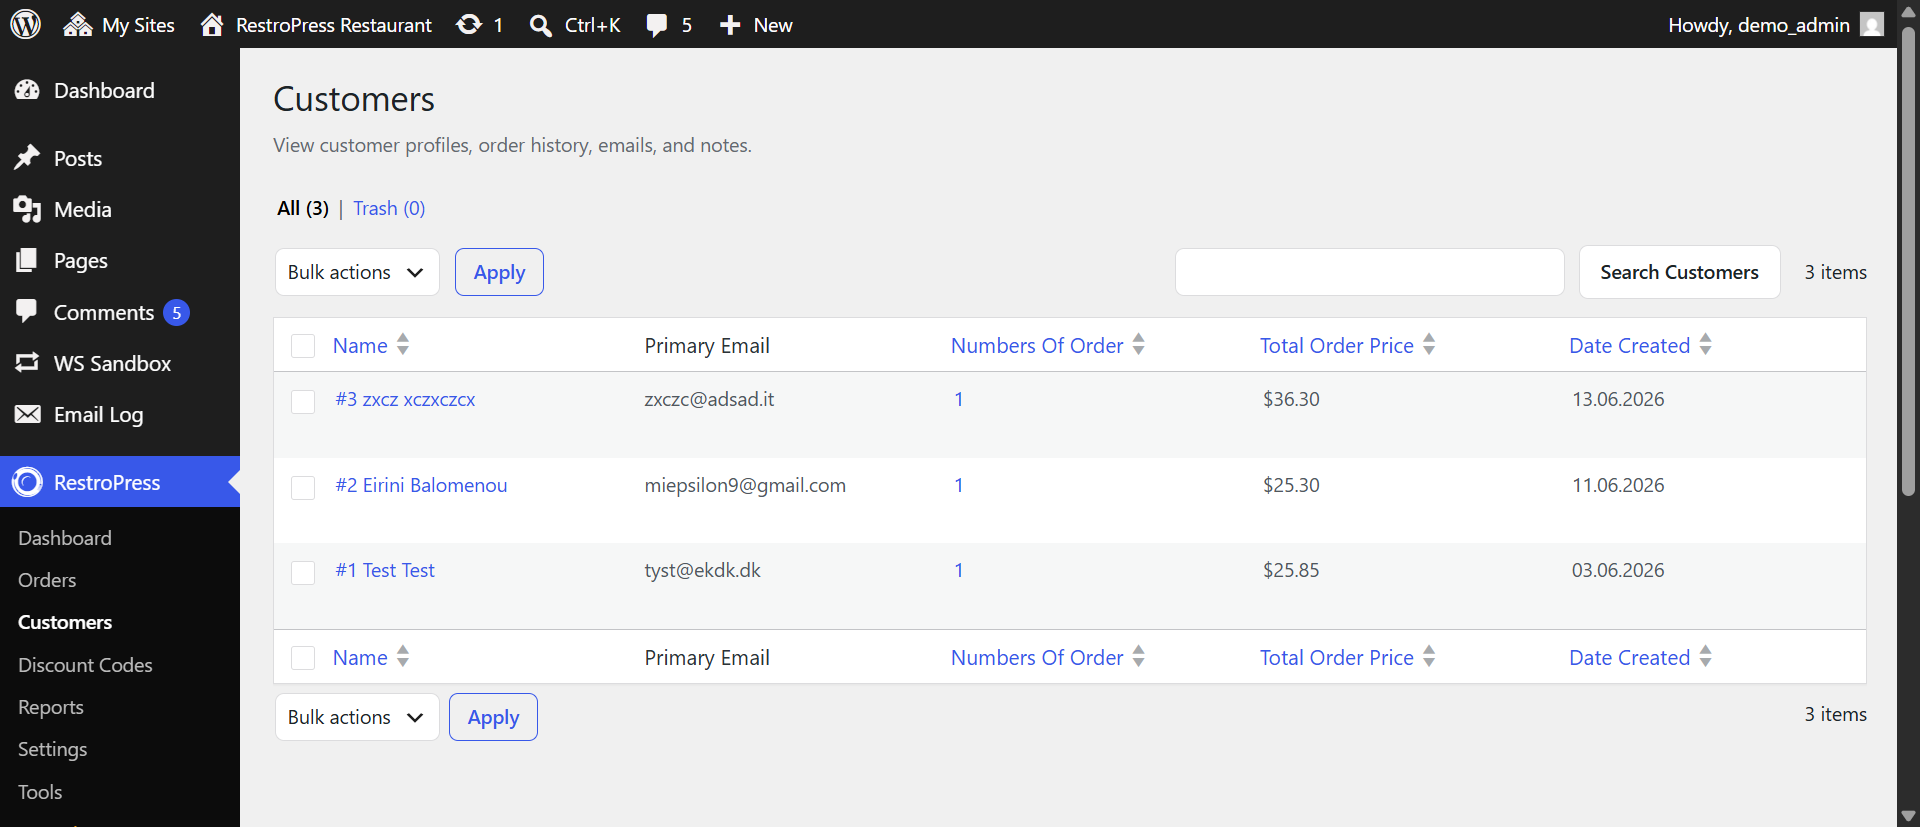
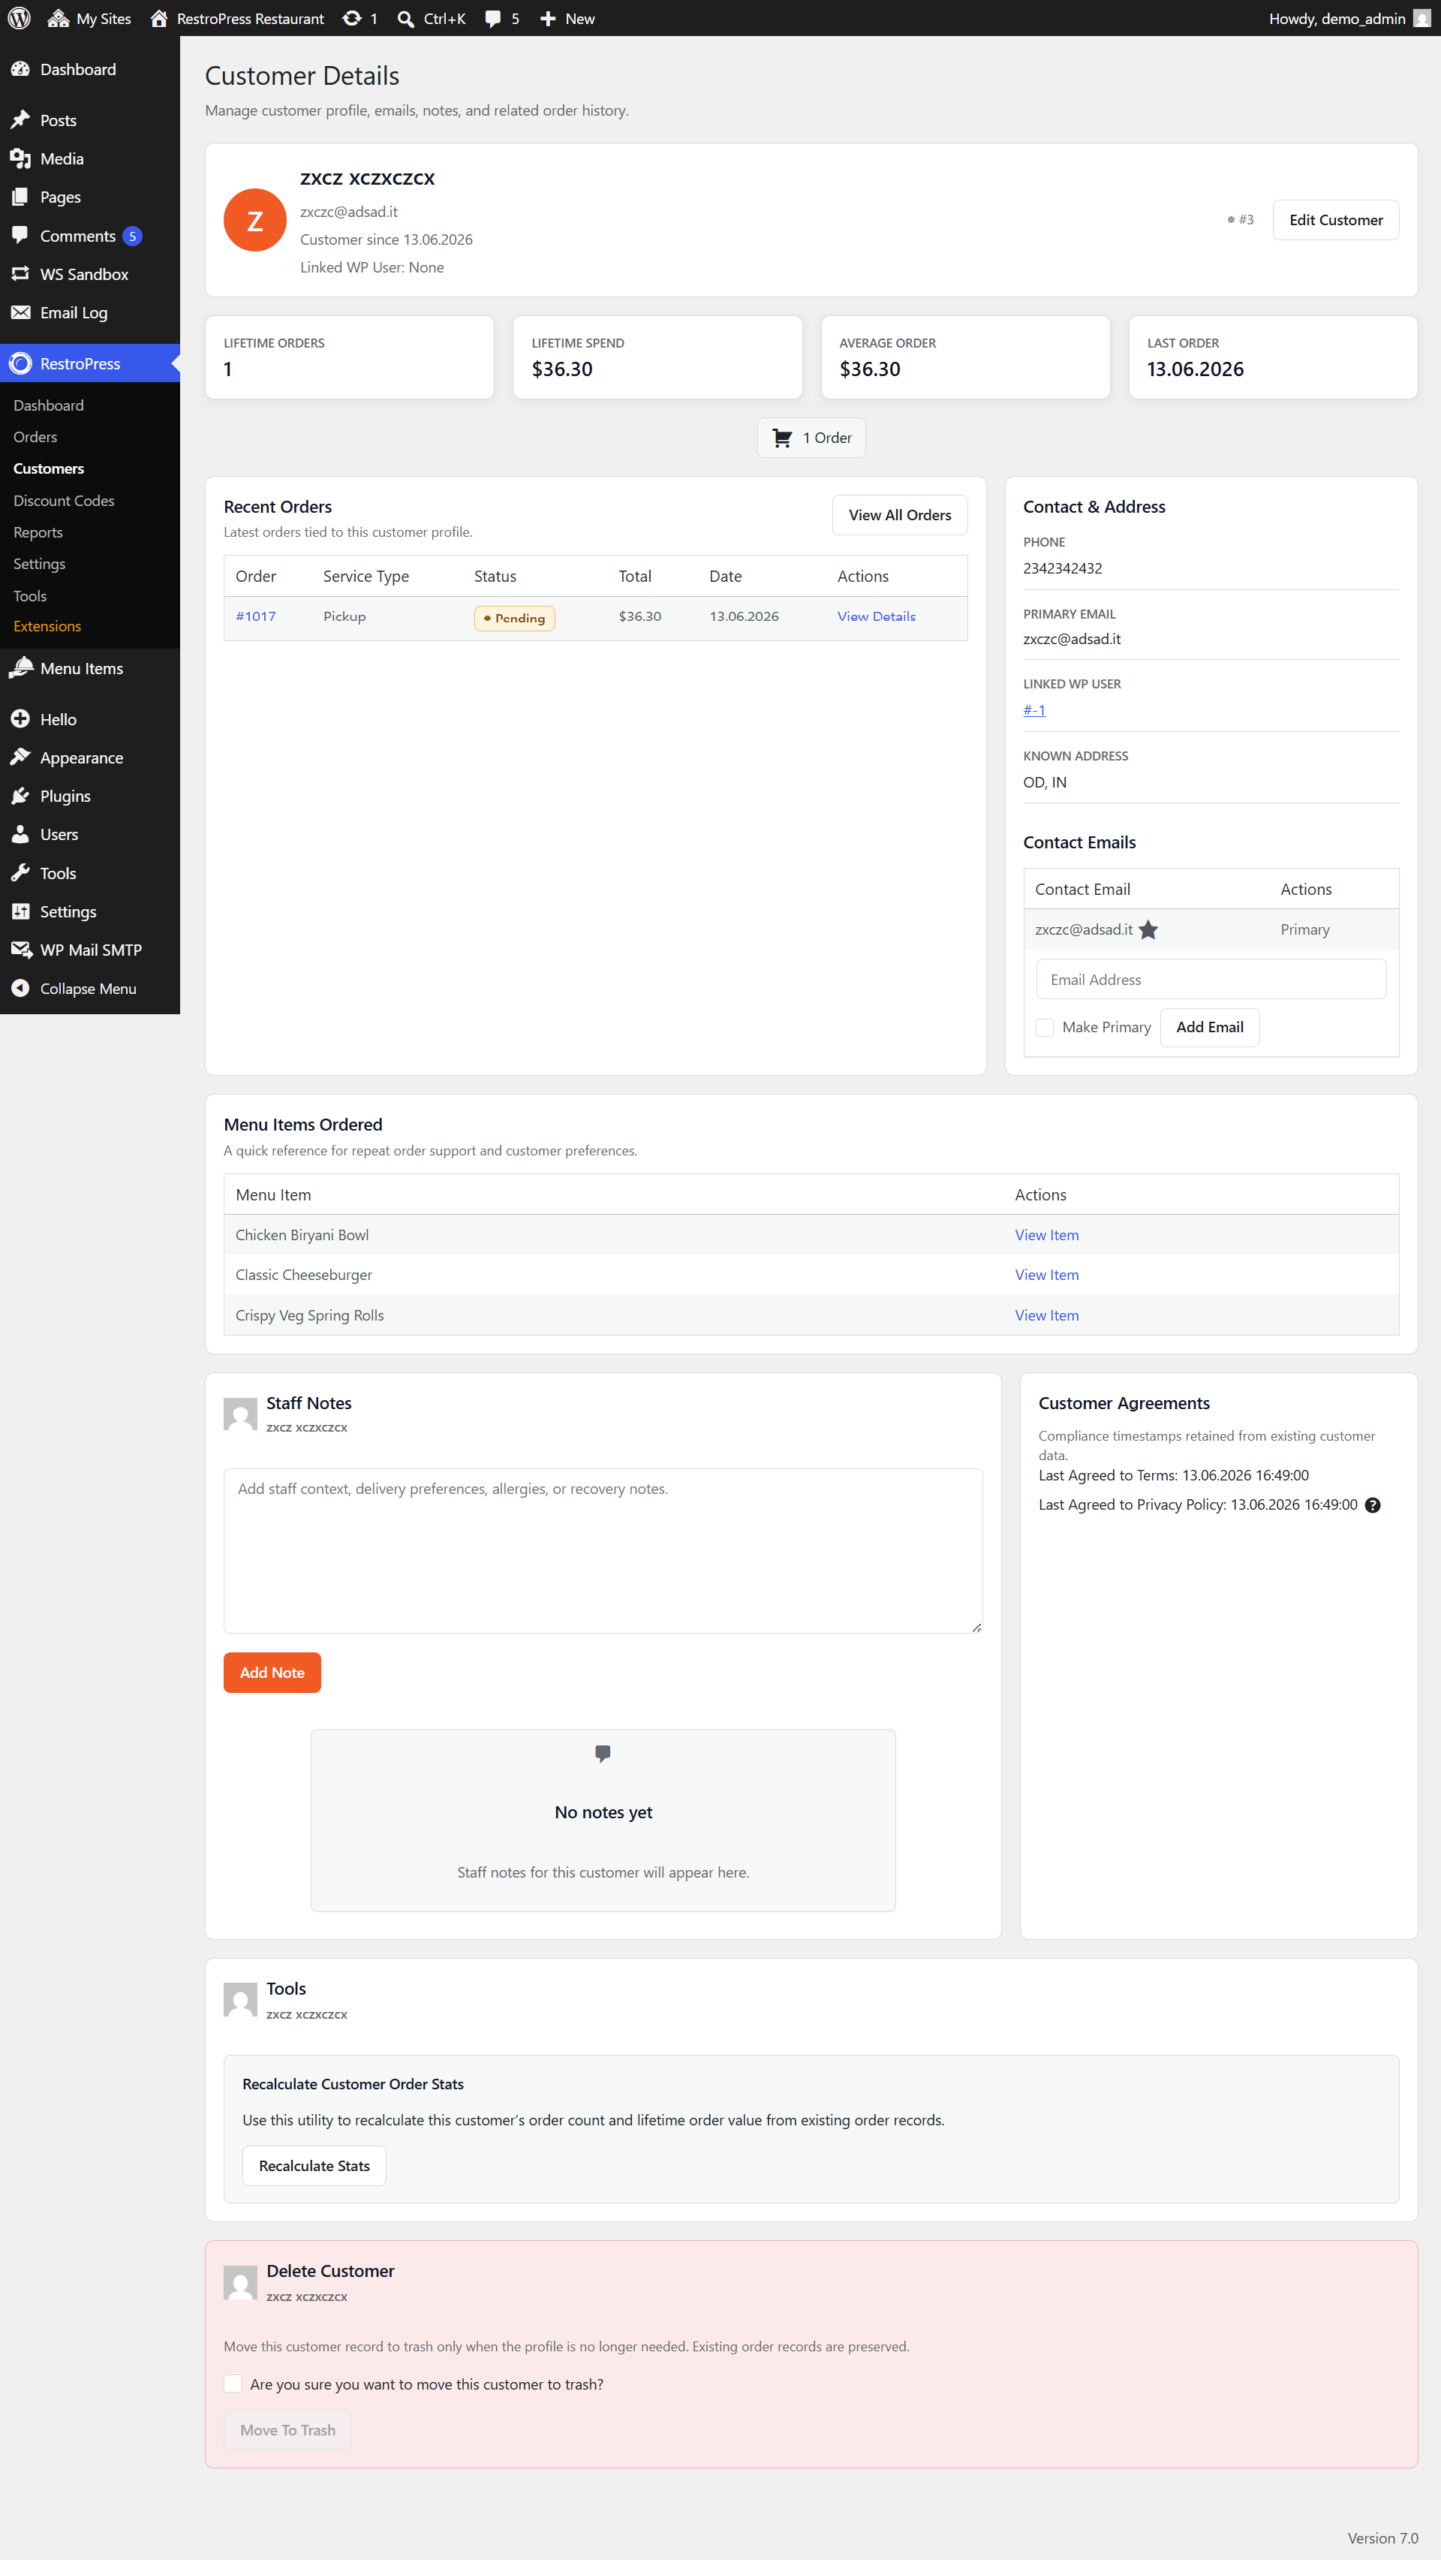
The records regarding the customers are stored here and also the details of the customers are stored in these options.
Discount Codes: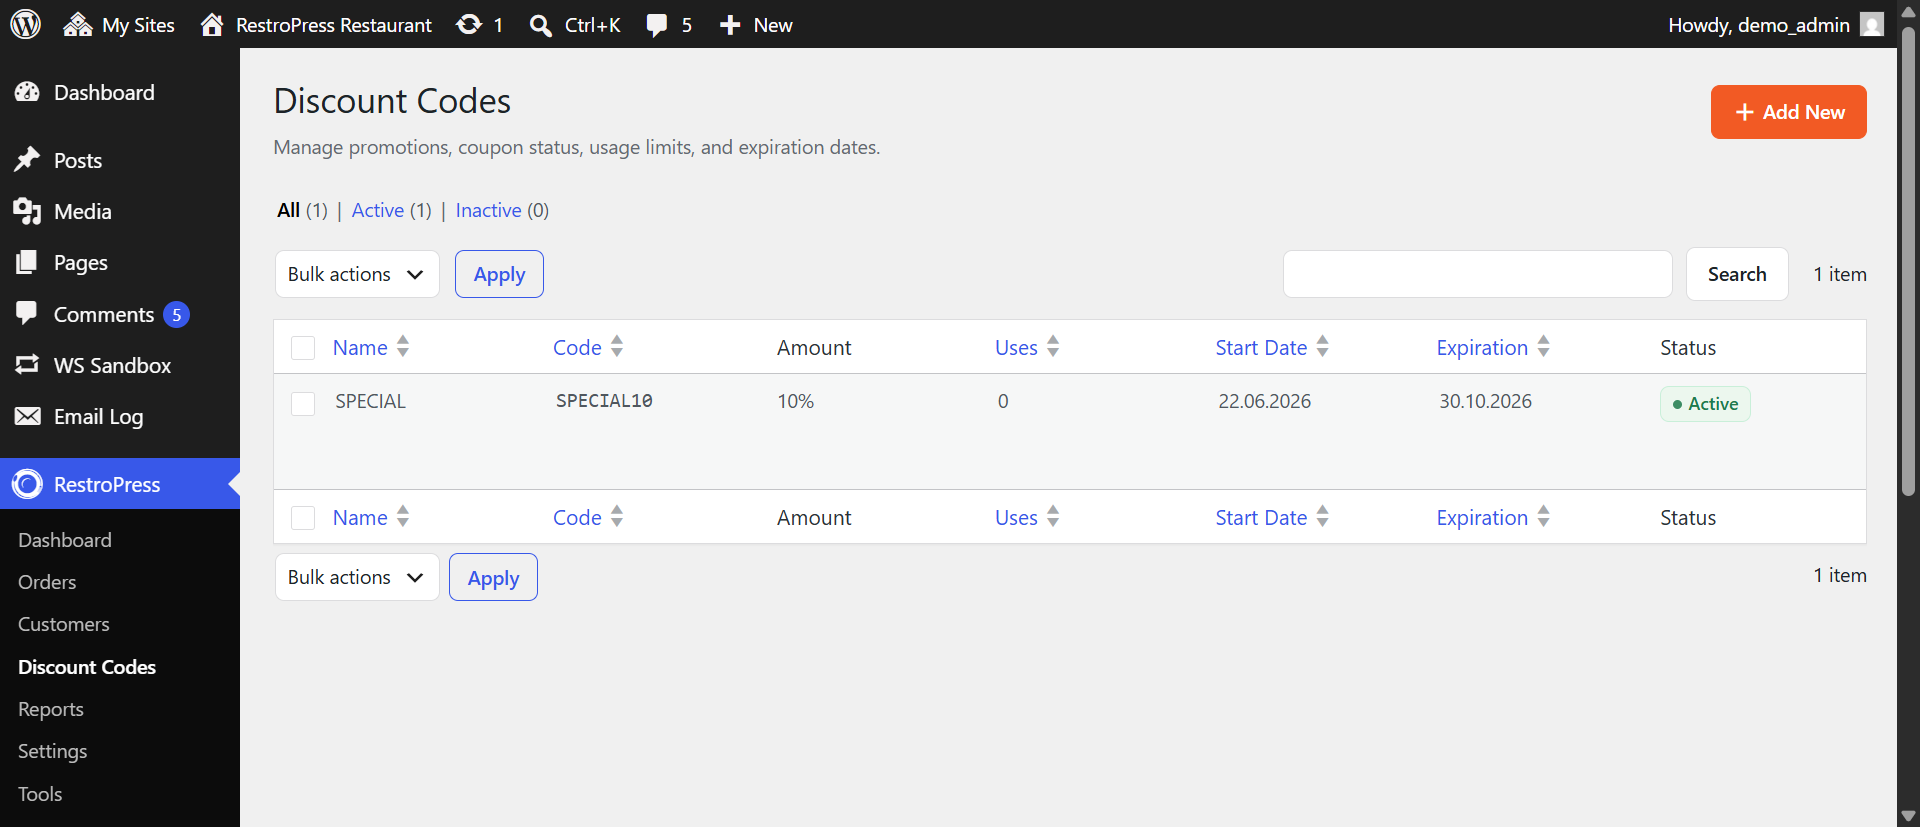
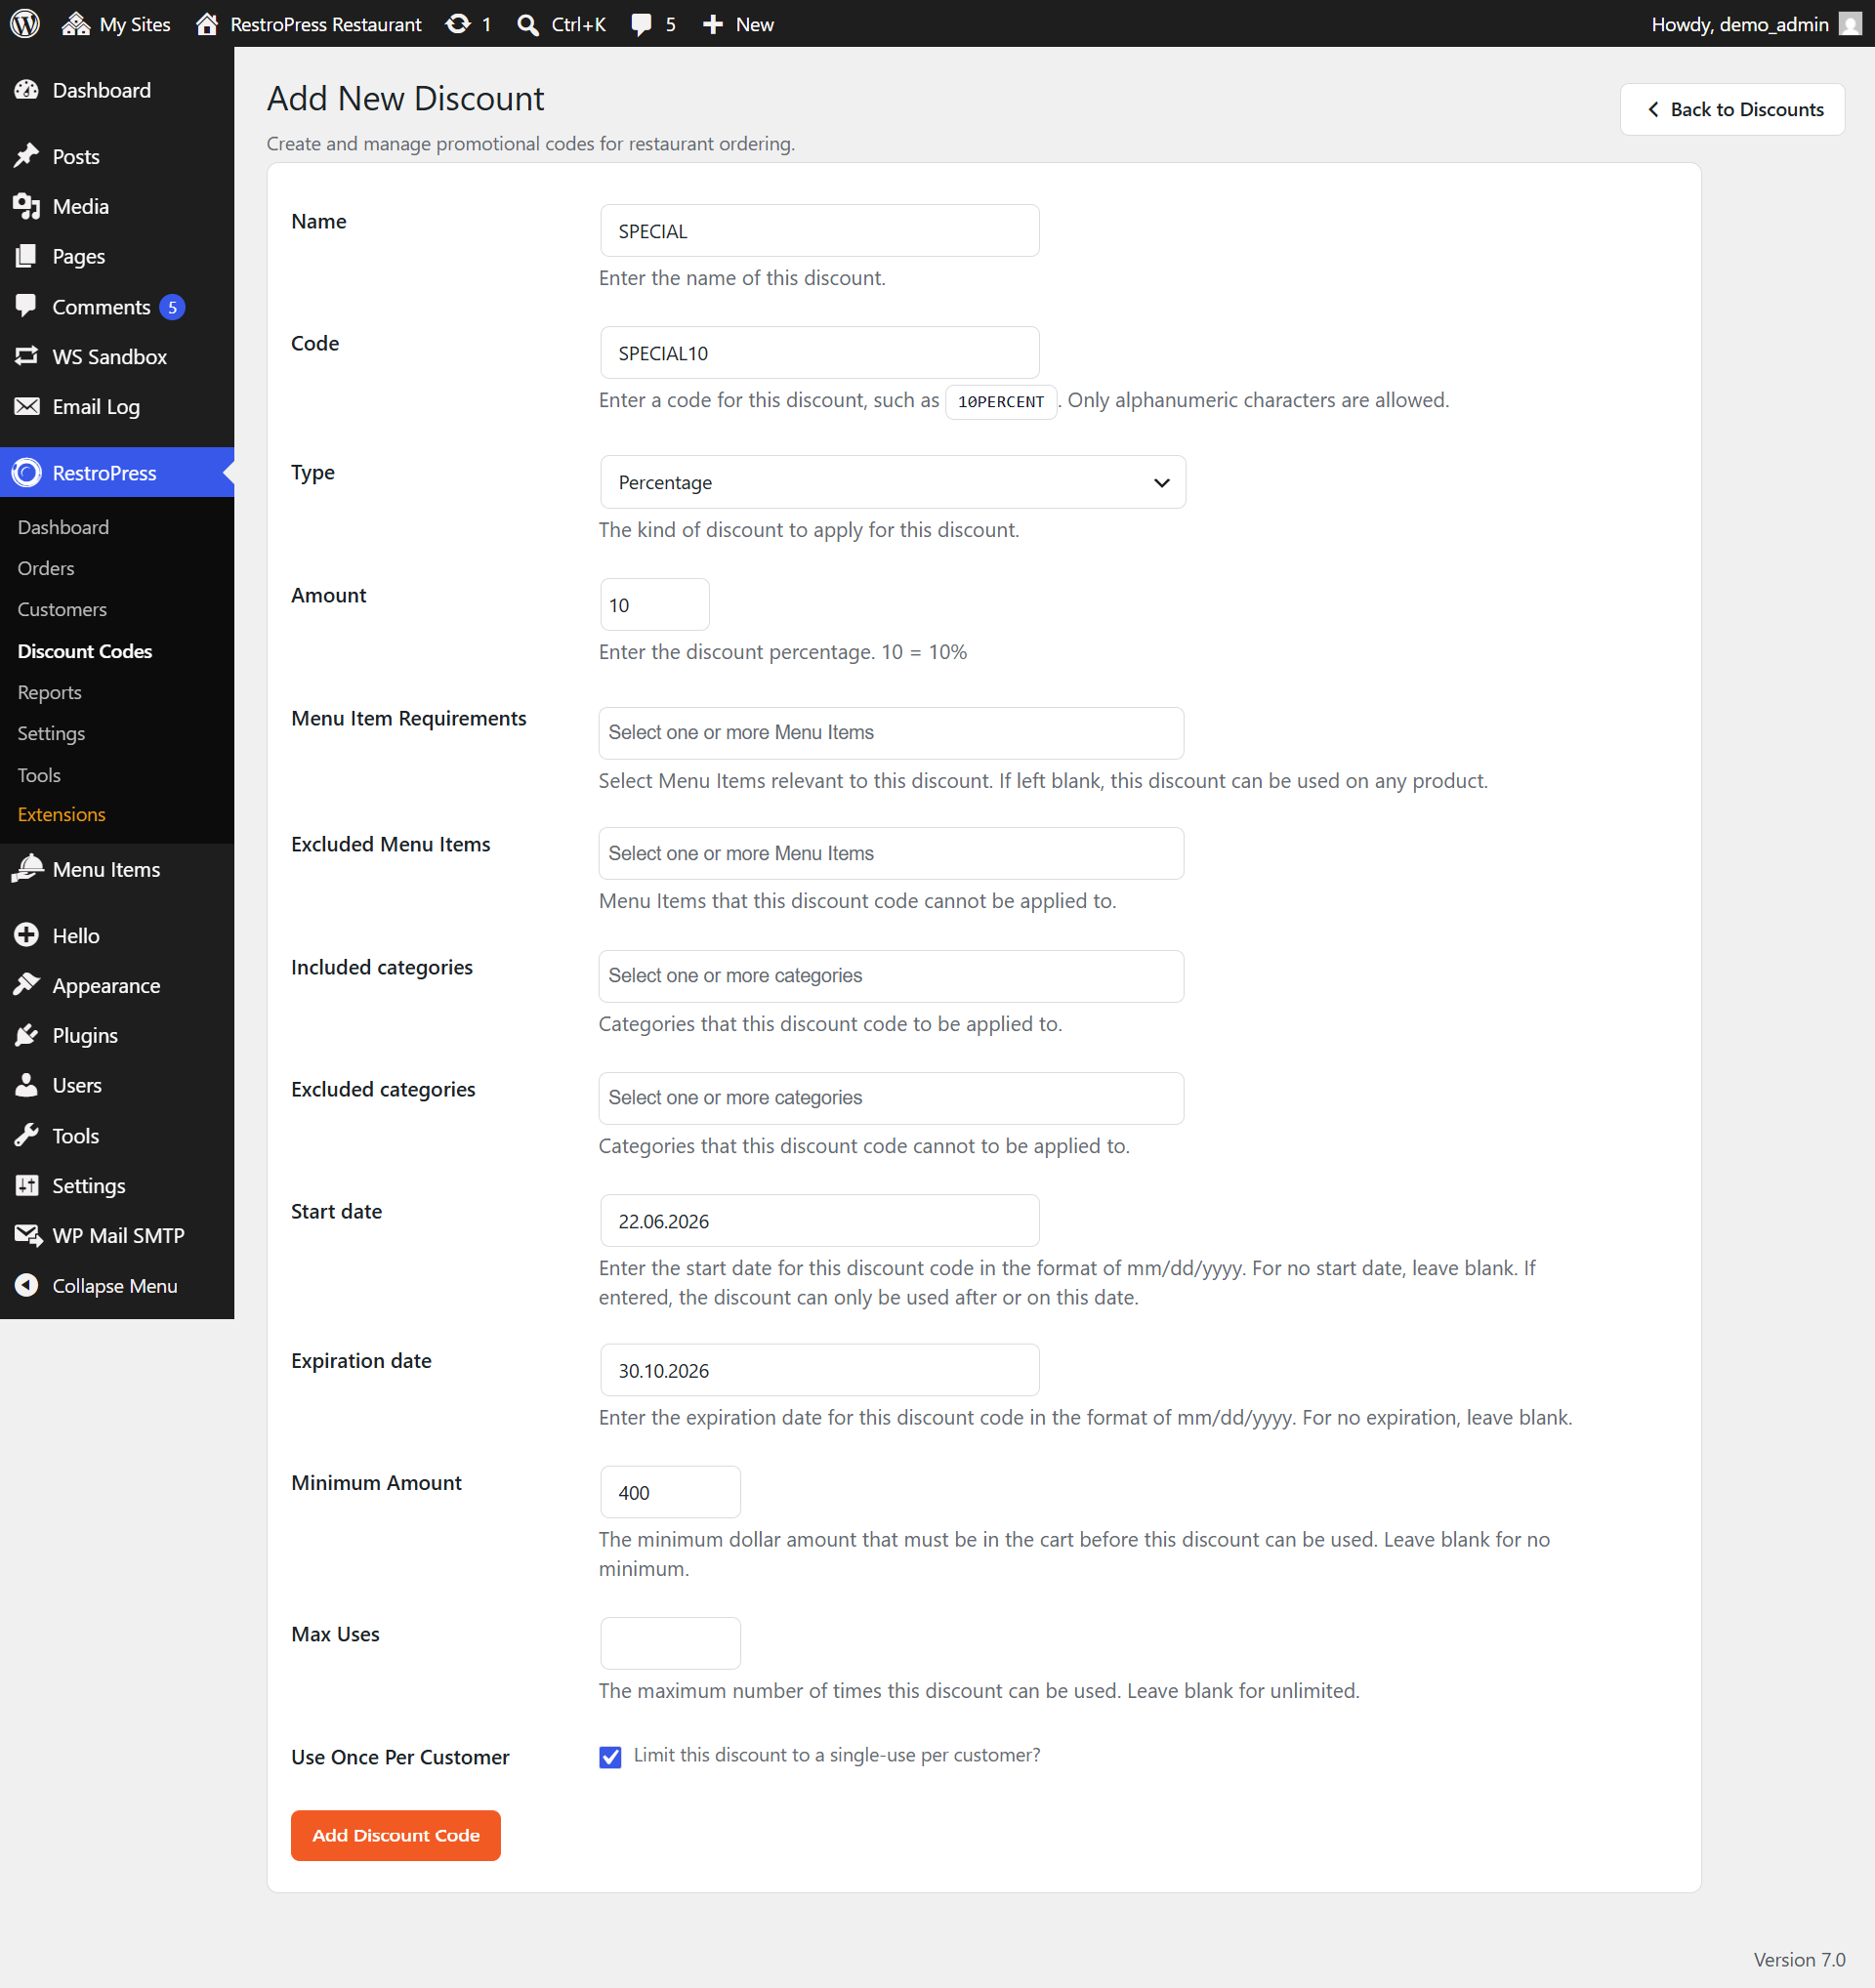
New discount codes can be created with required functionalities that include whether the discount will be applied to complete a purchase or to some specific extension.
Reports: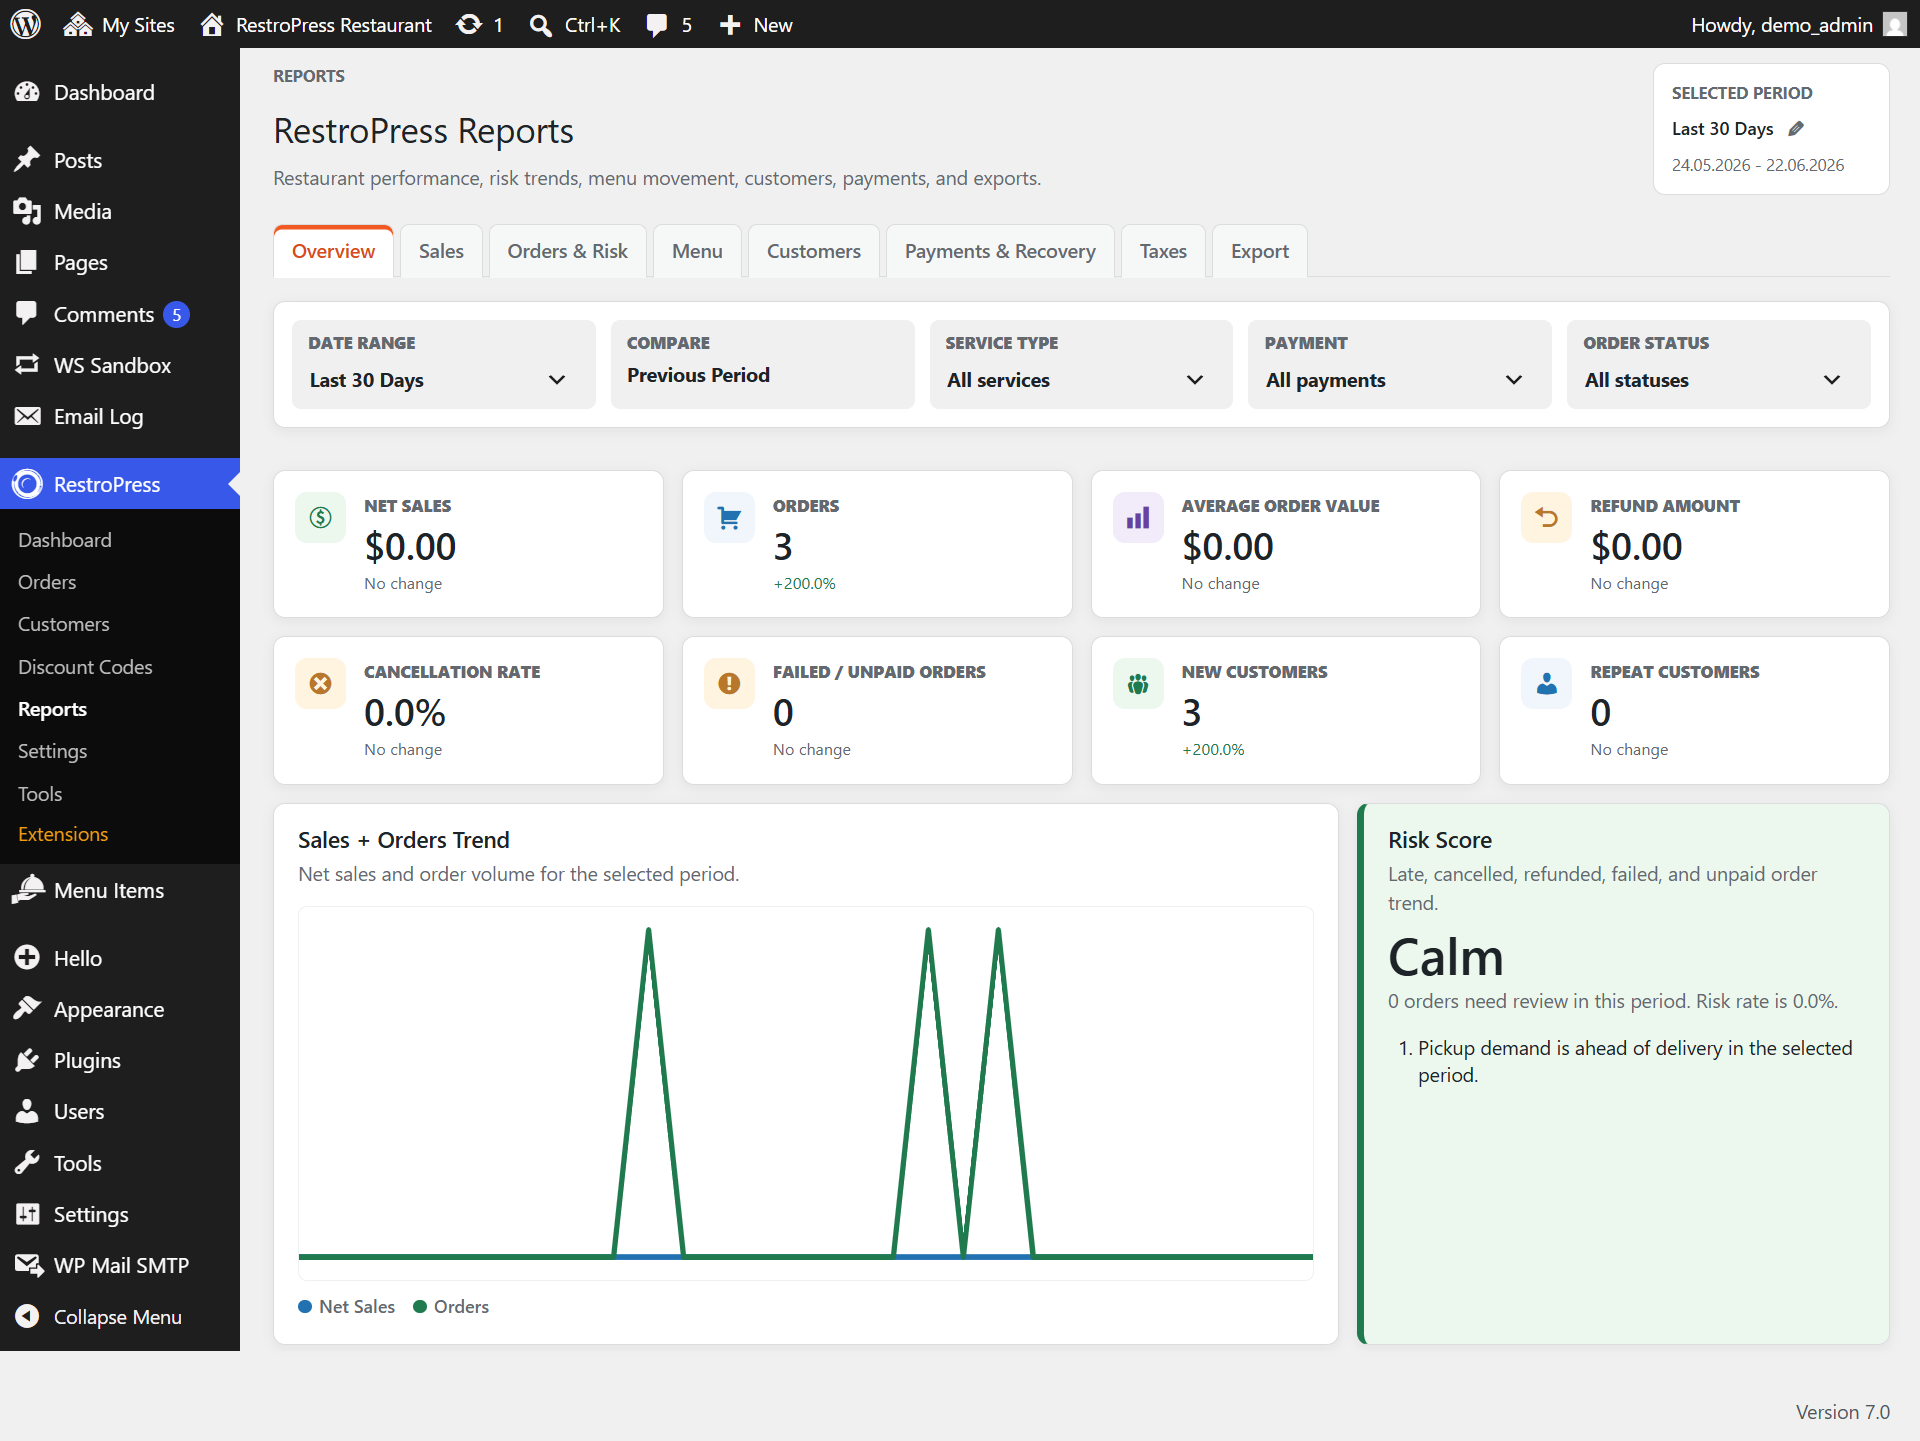
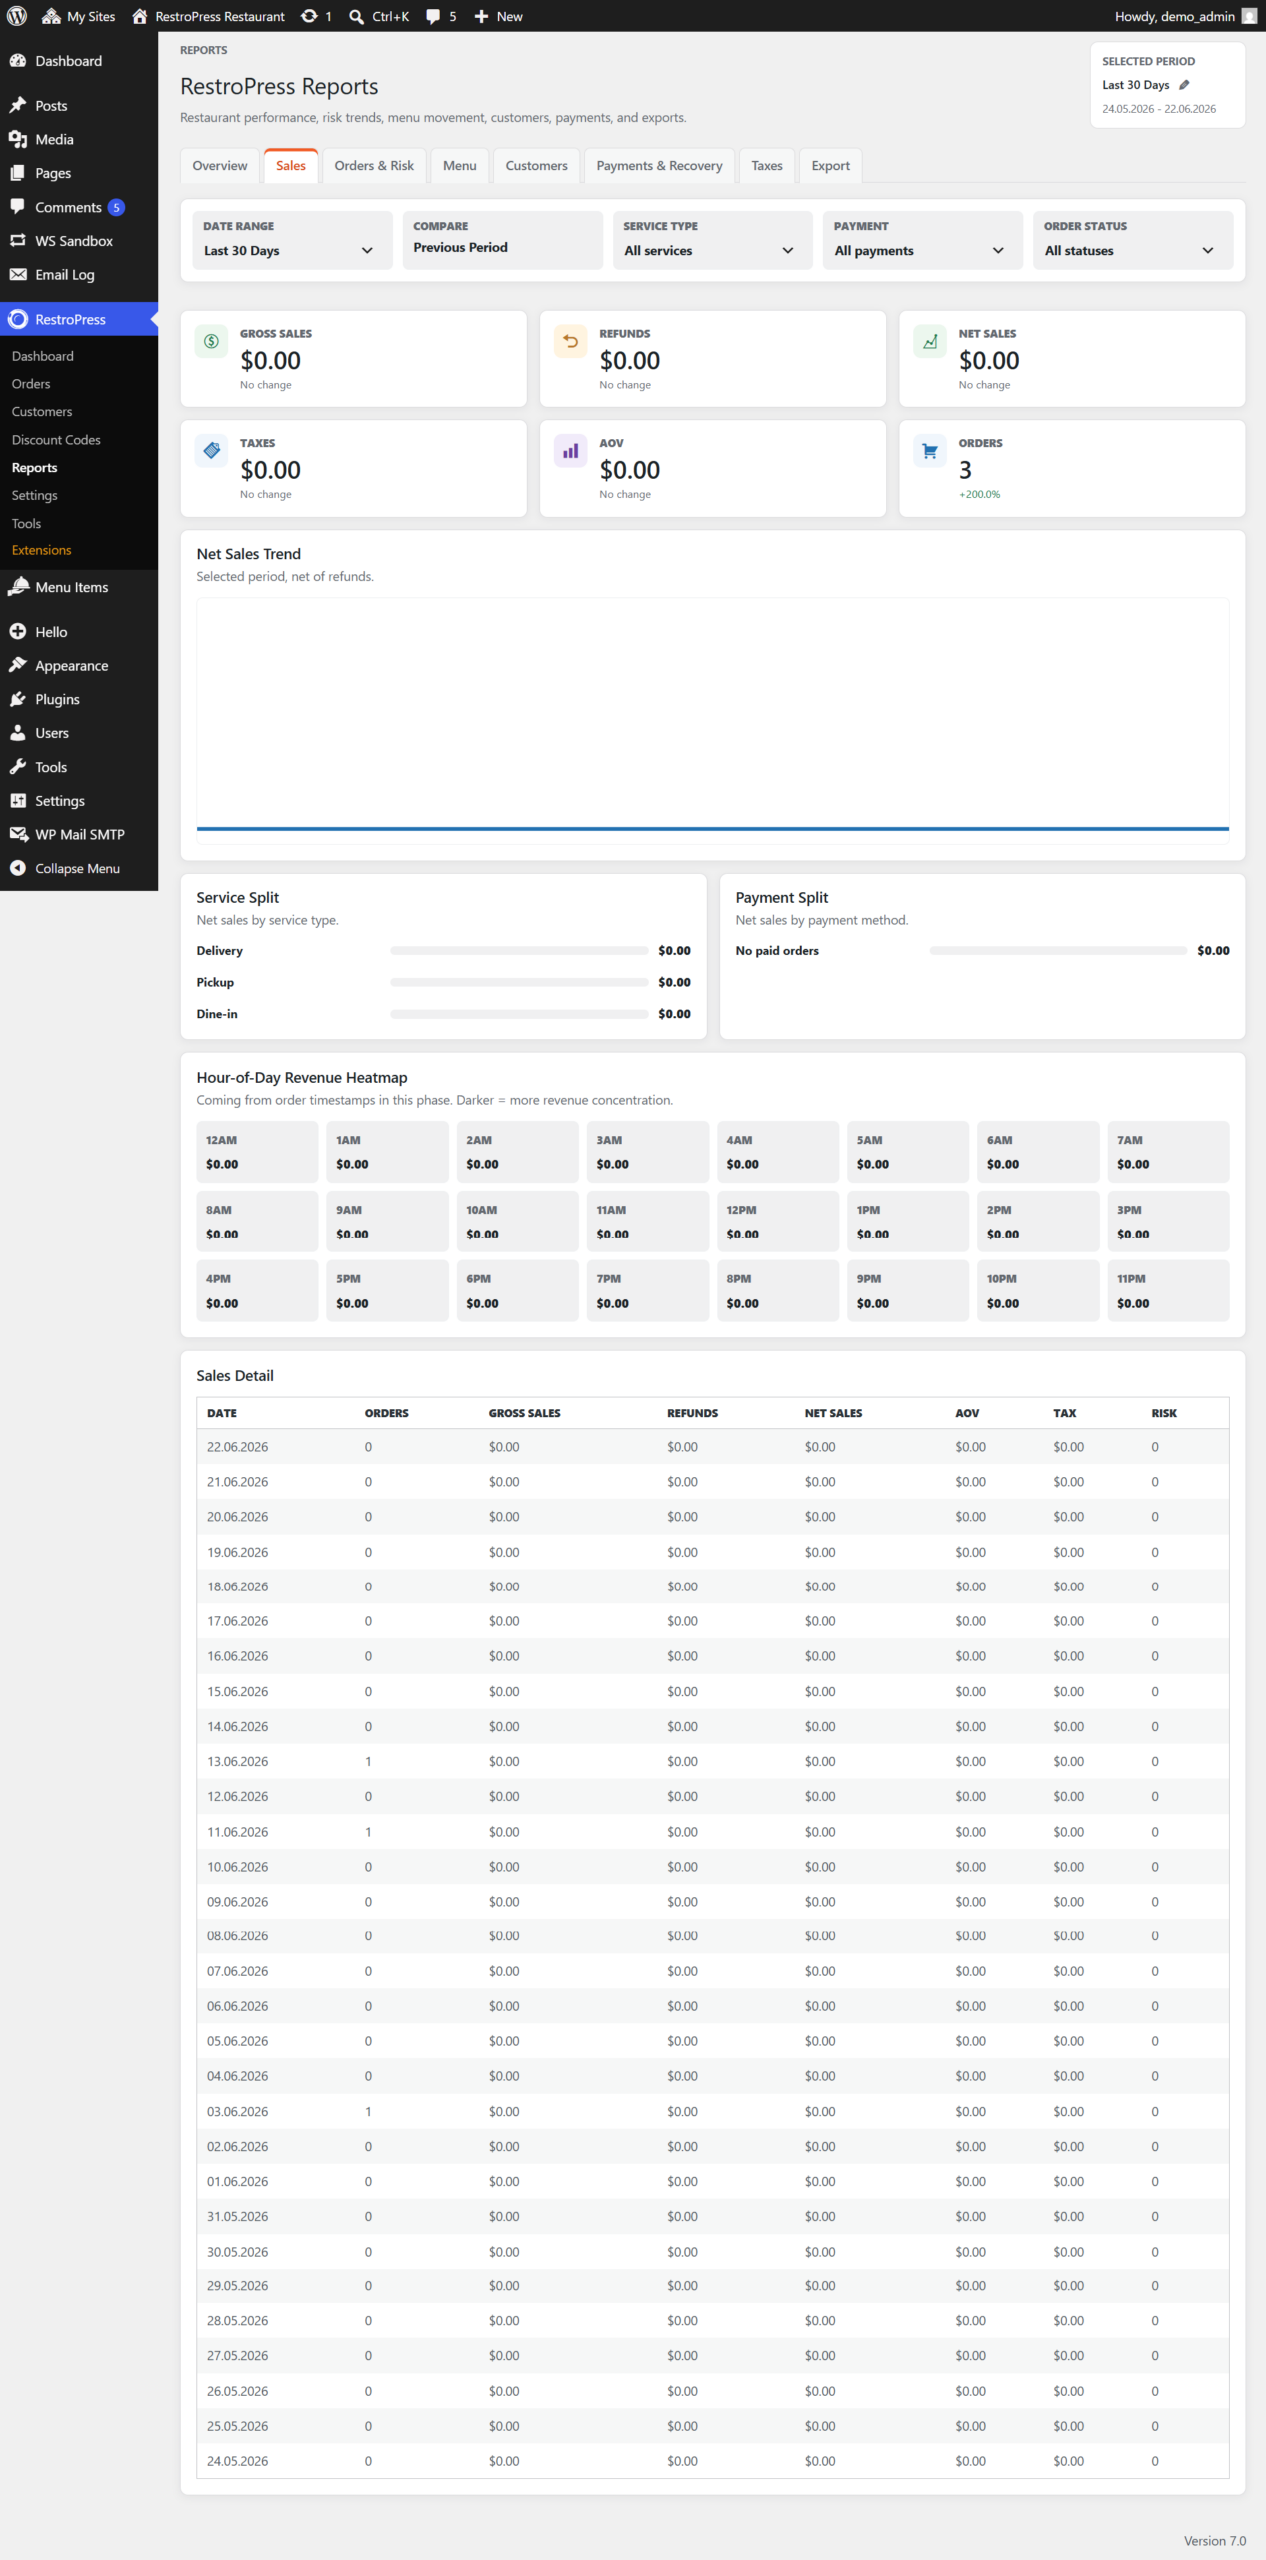
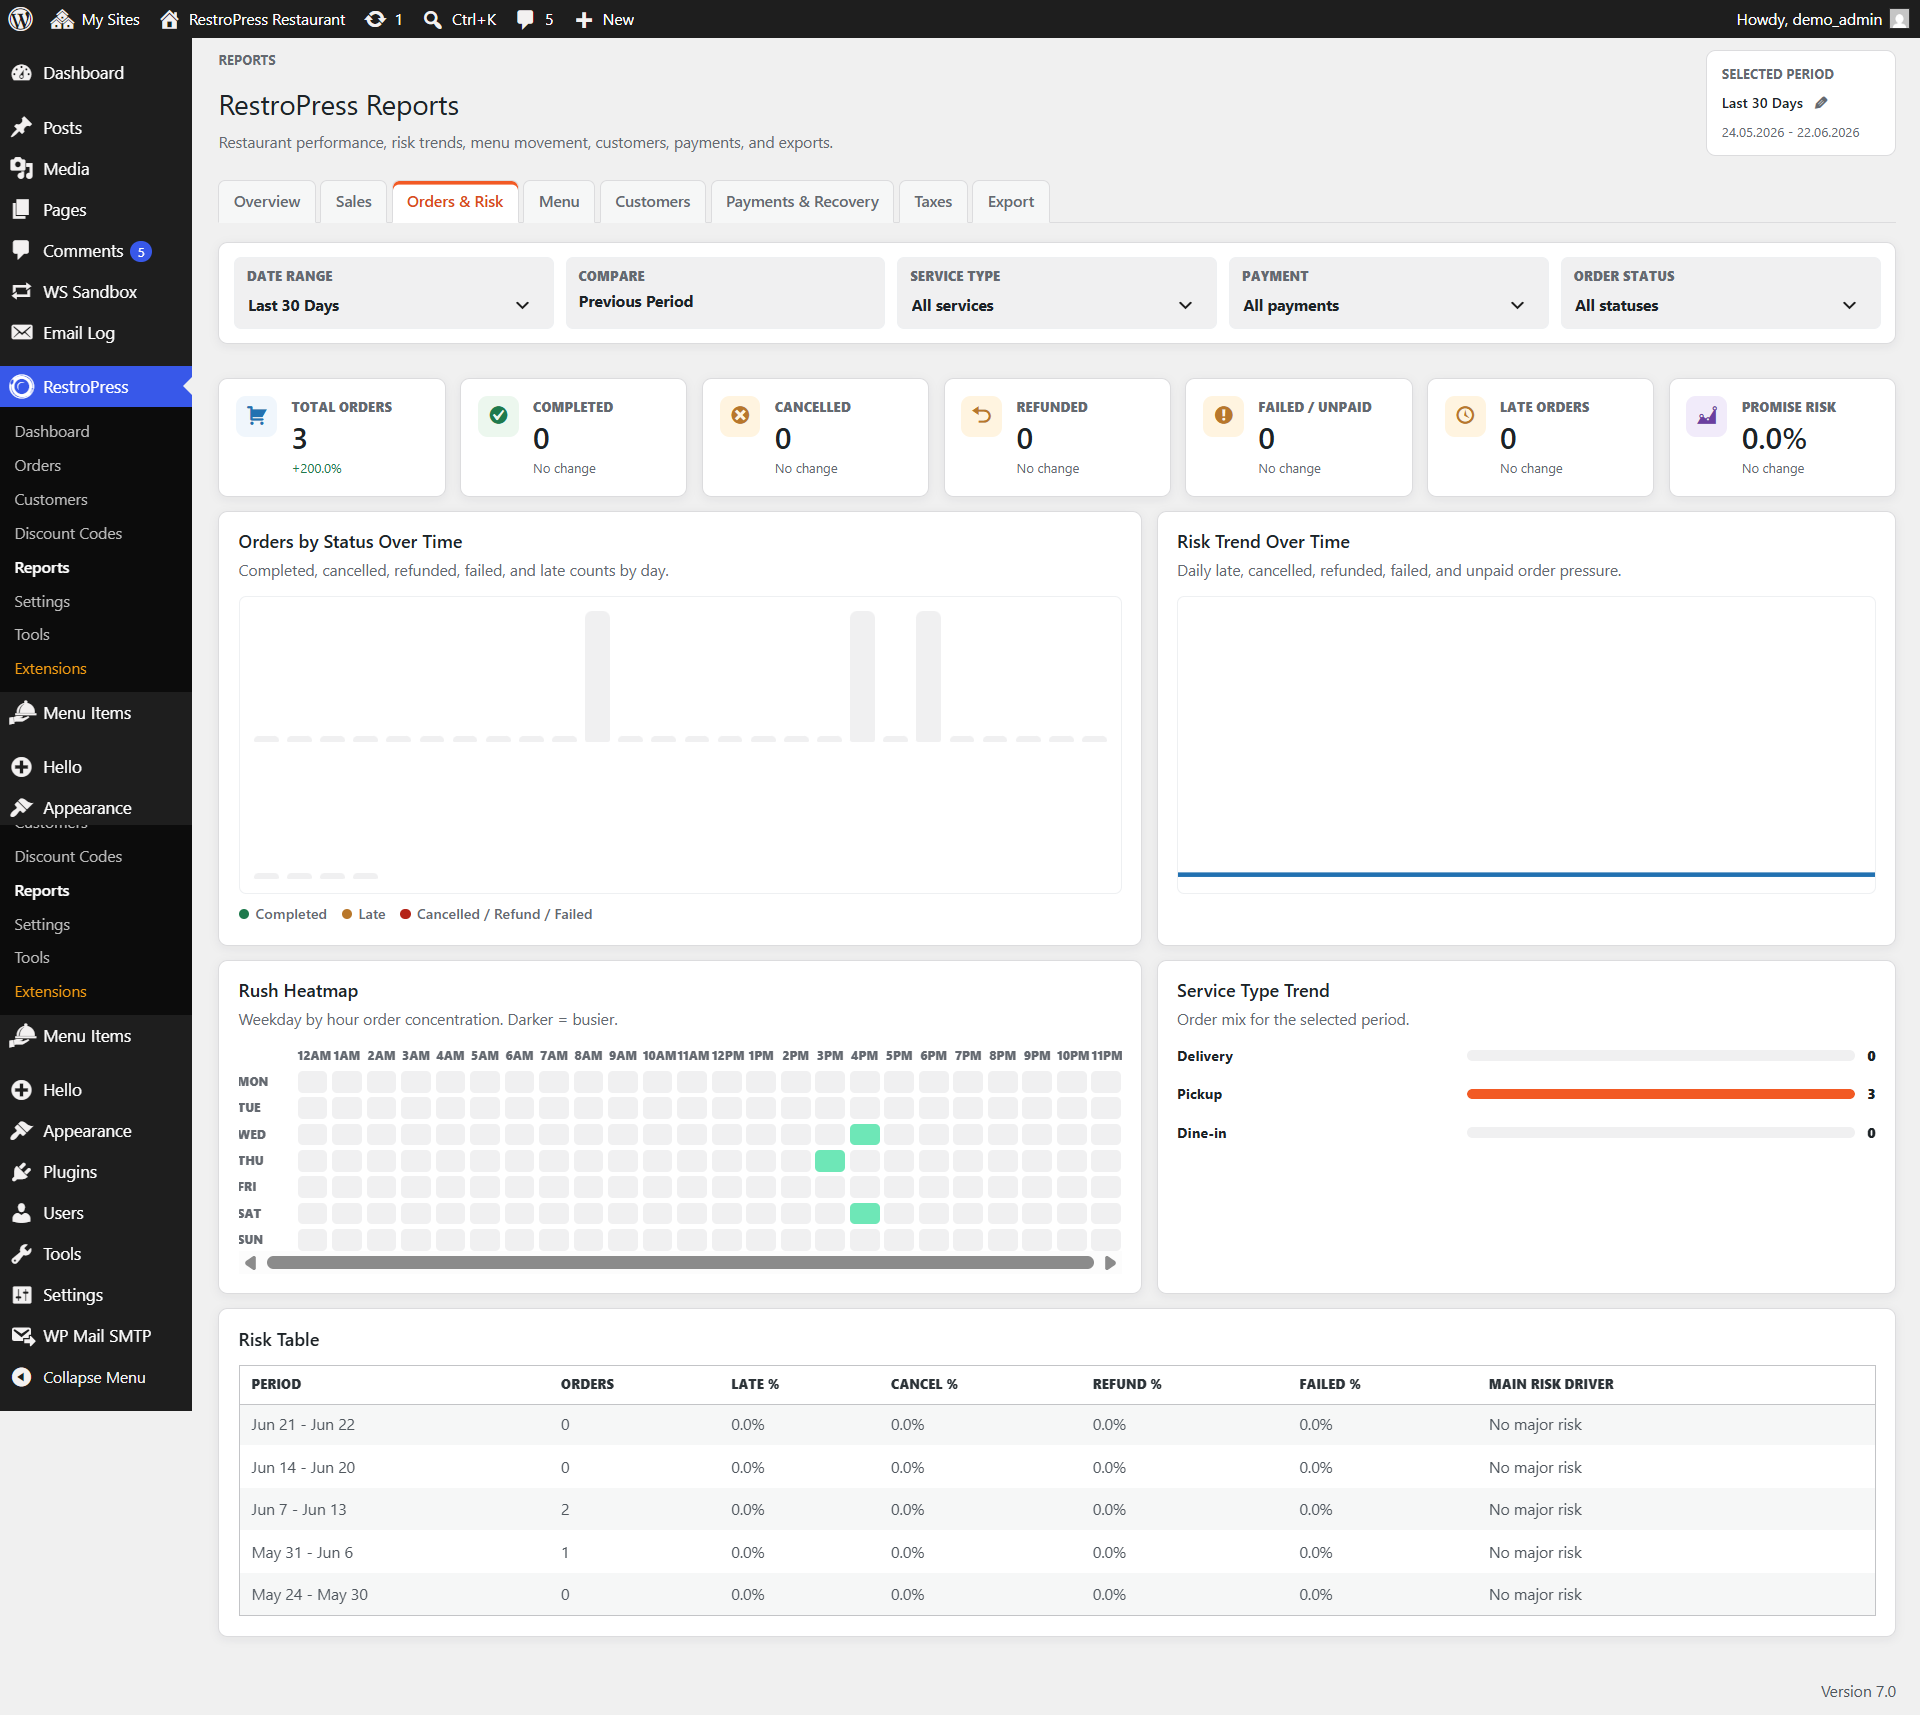
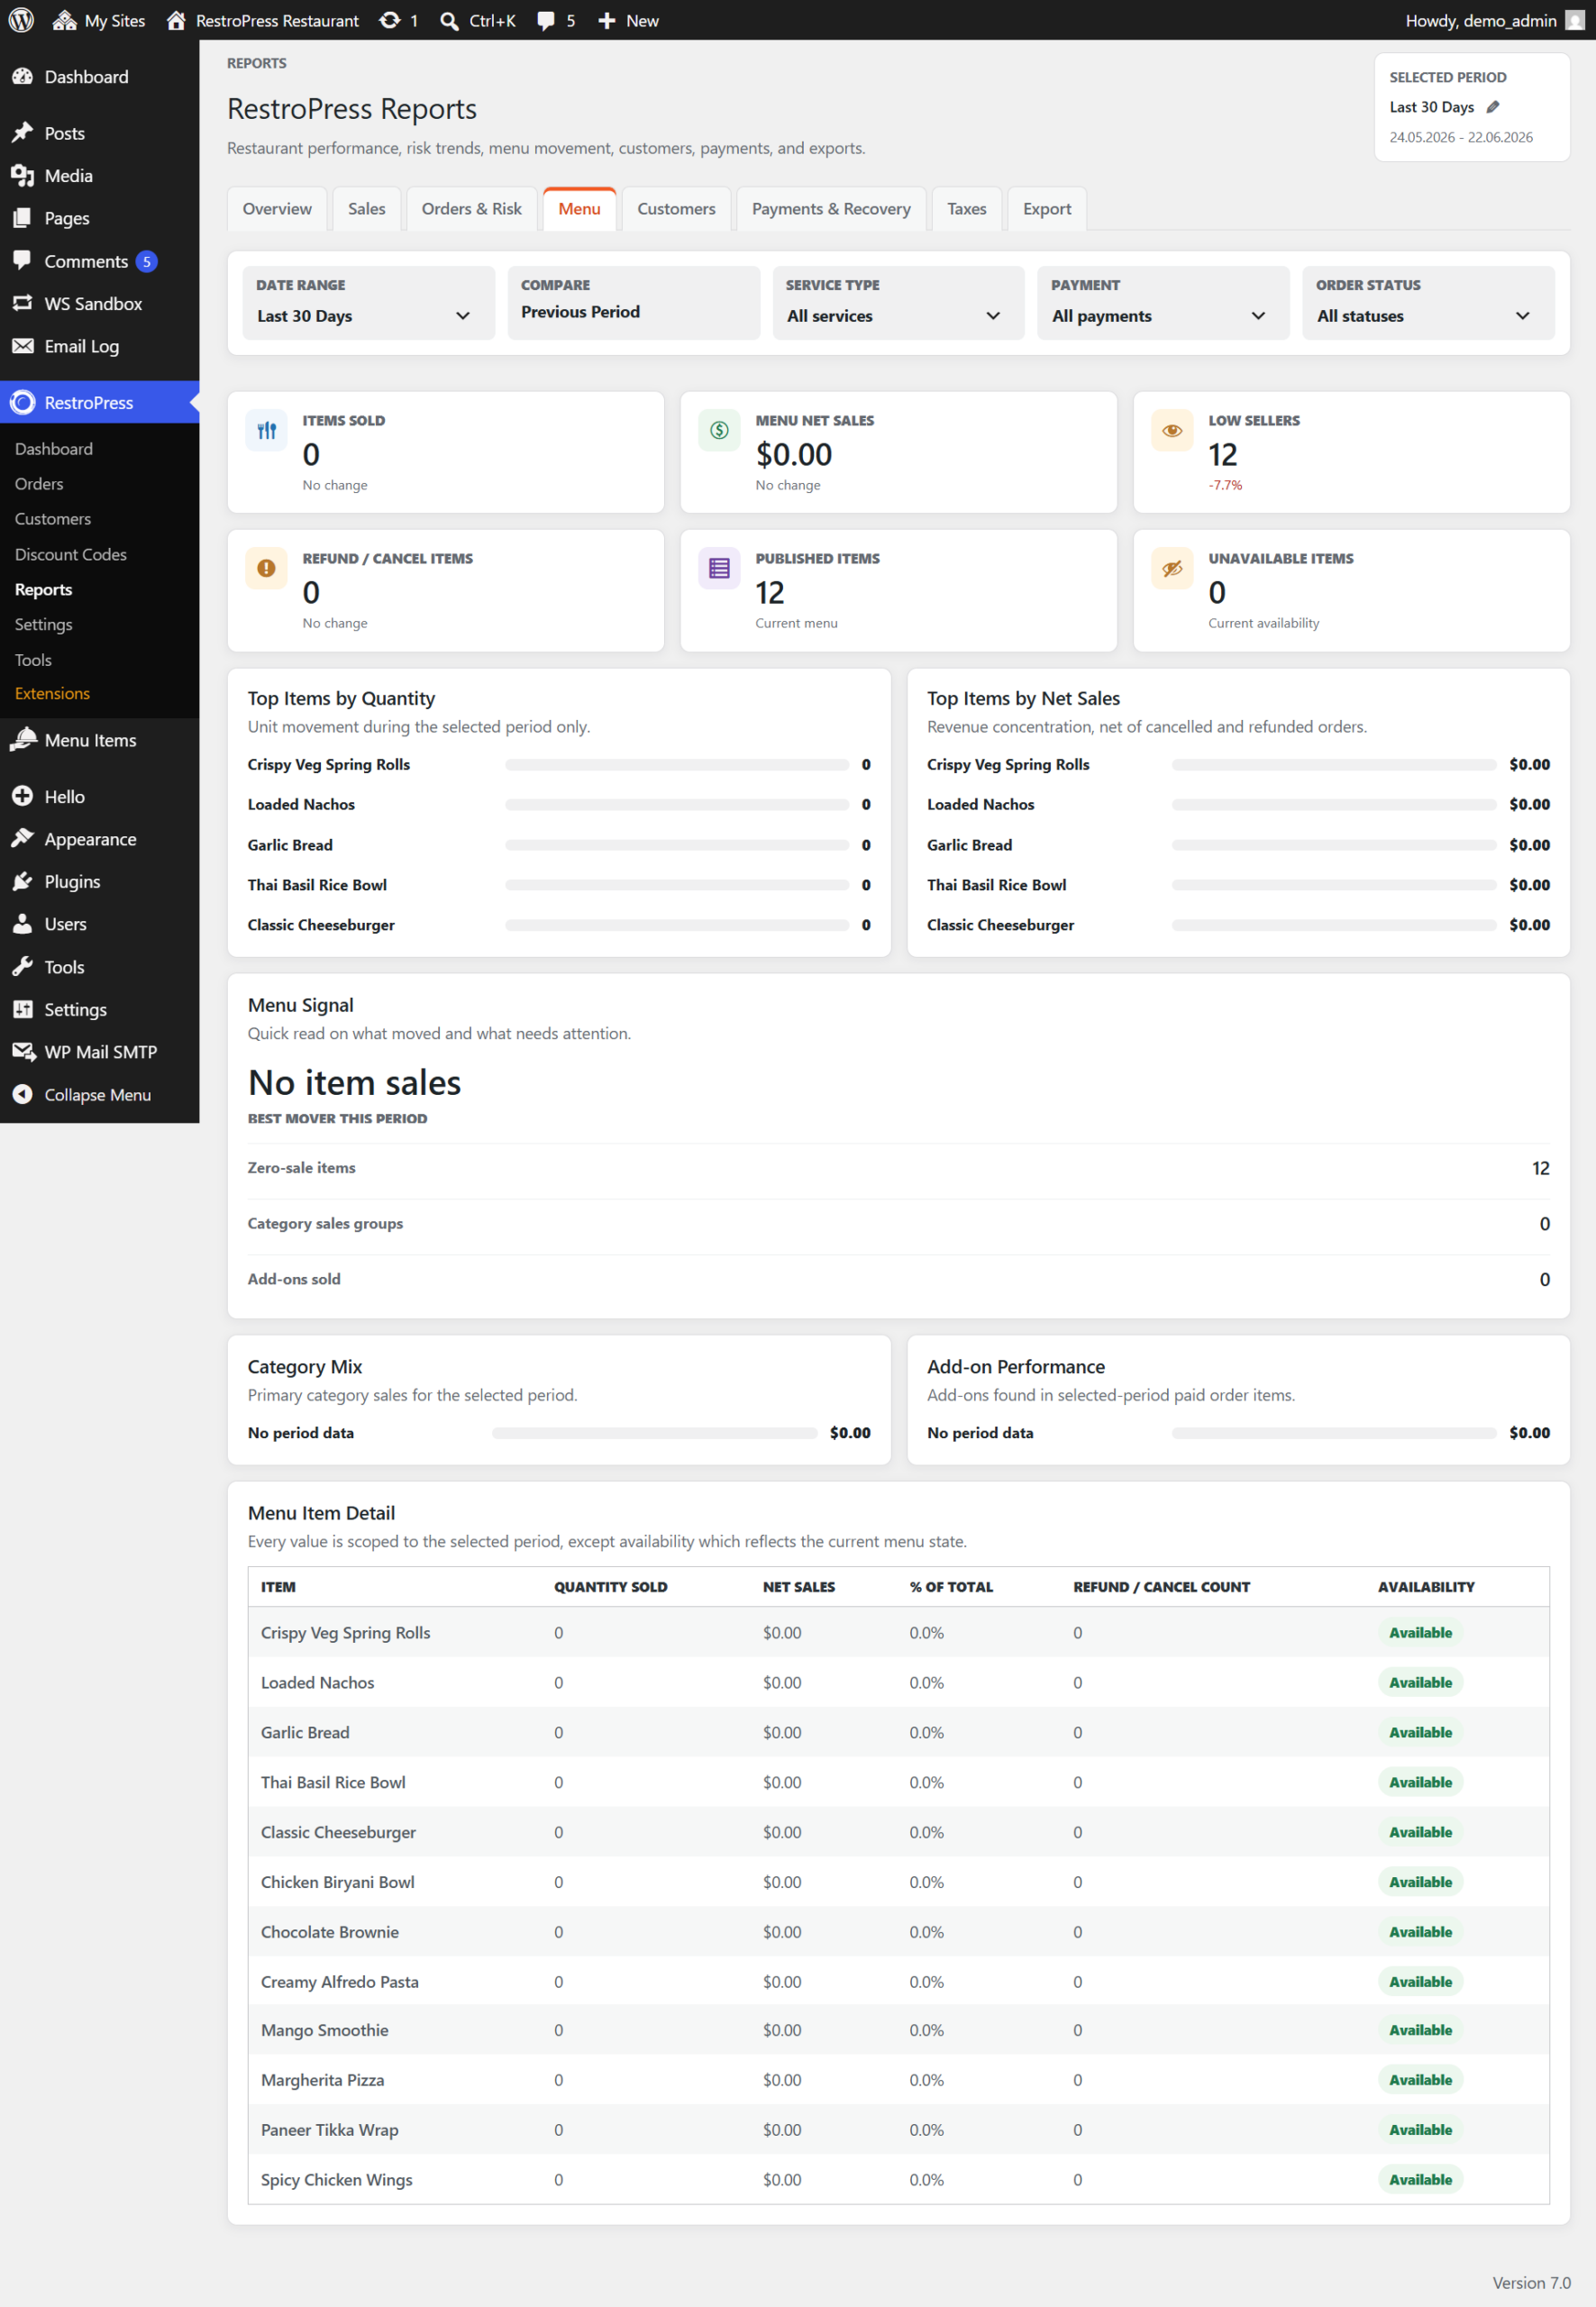
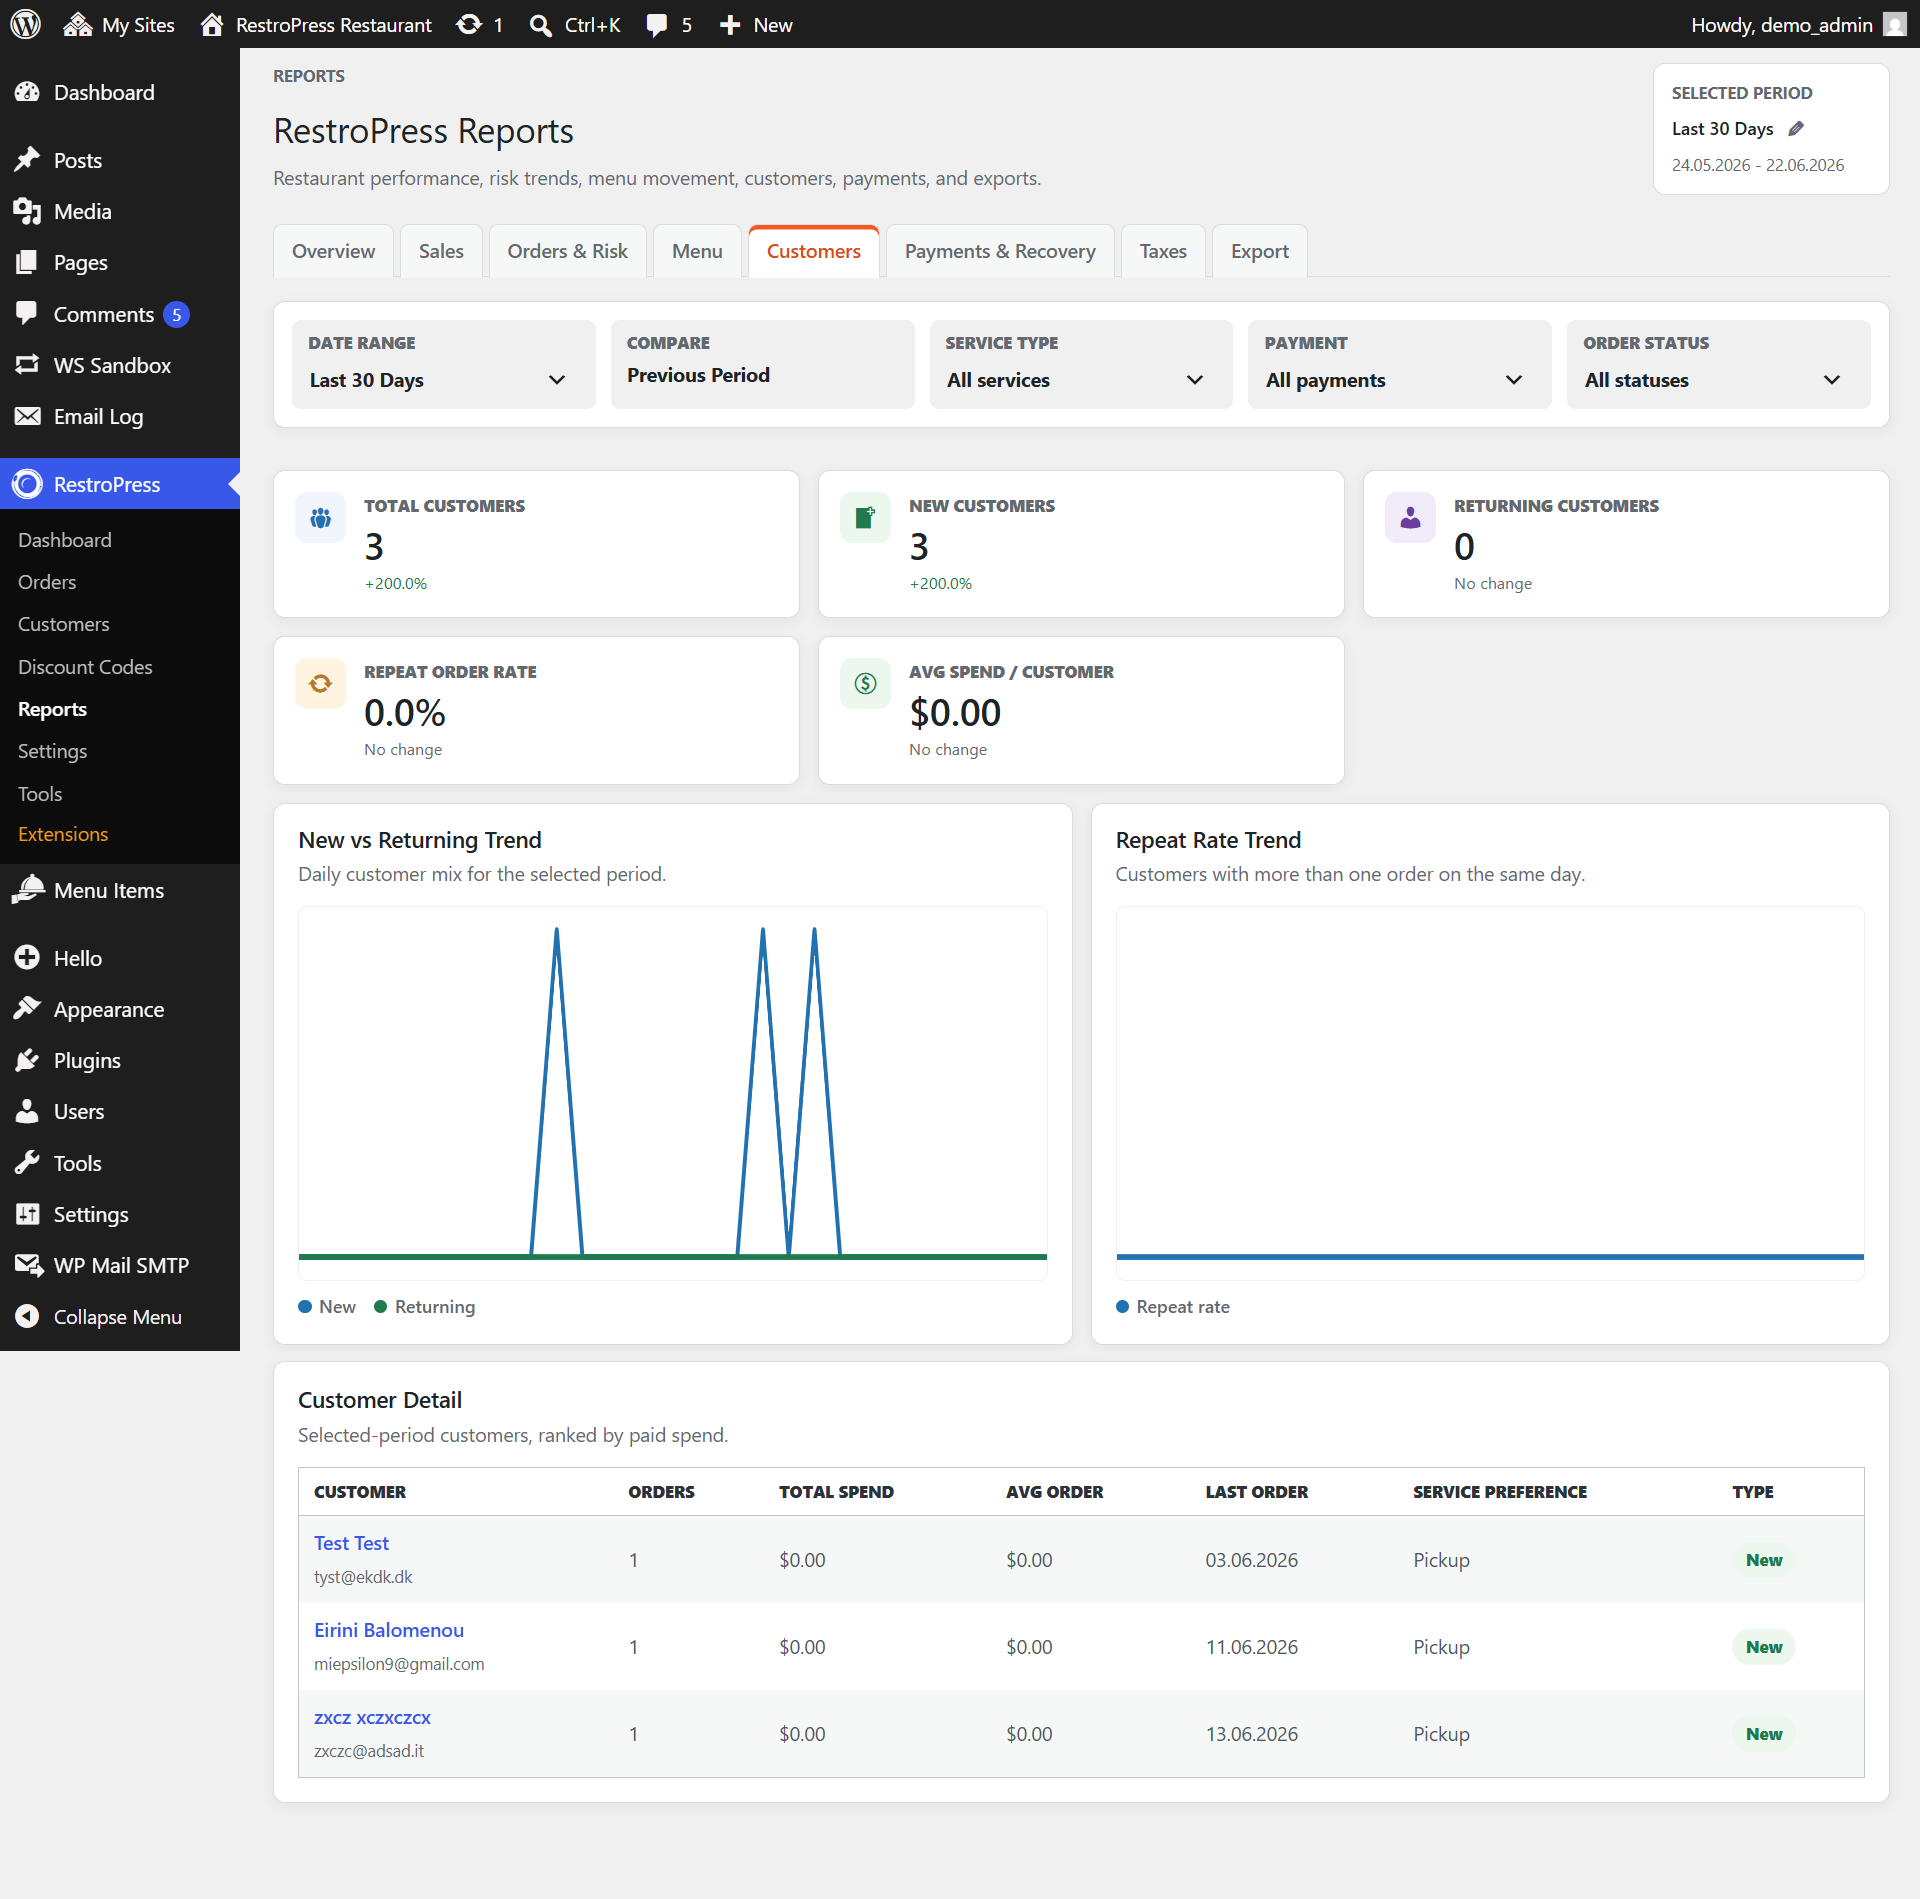
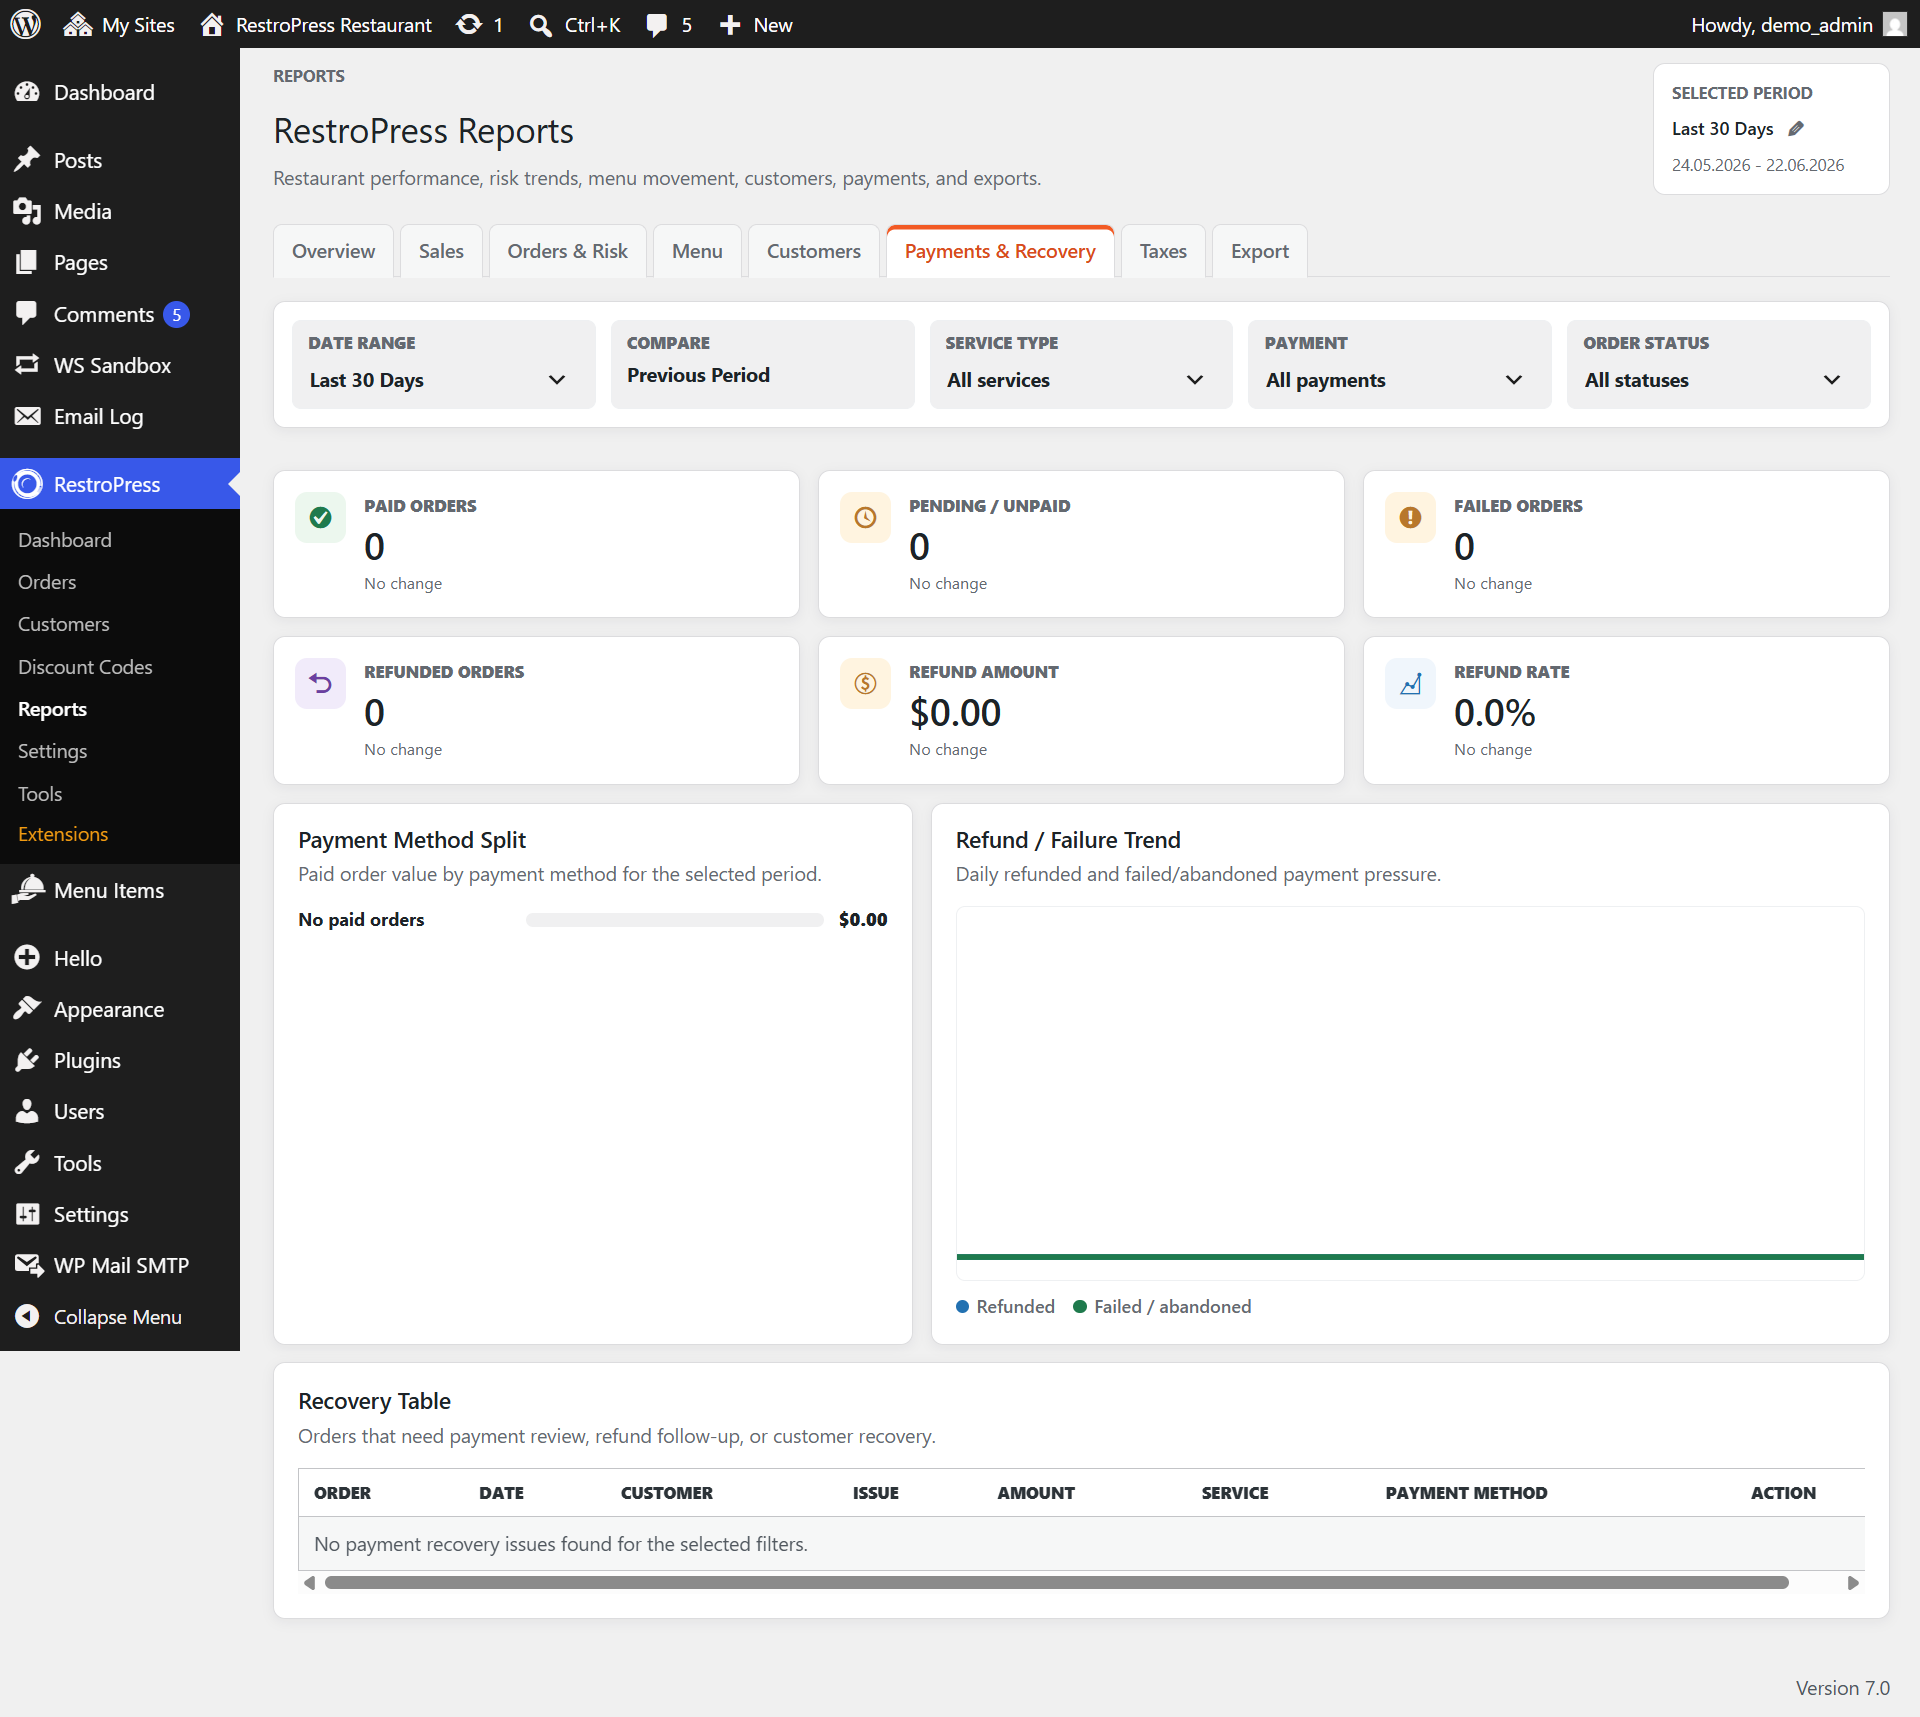
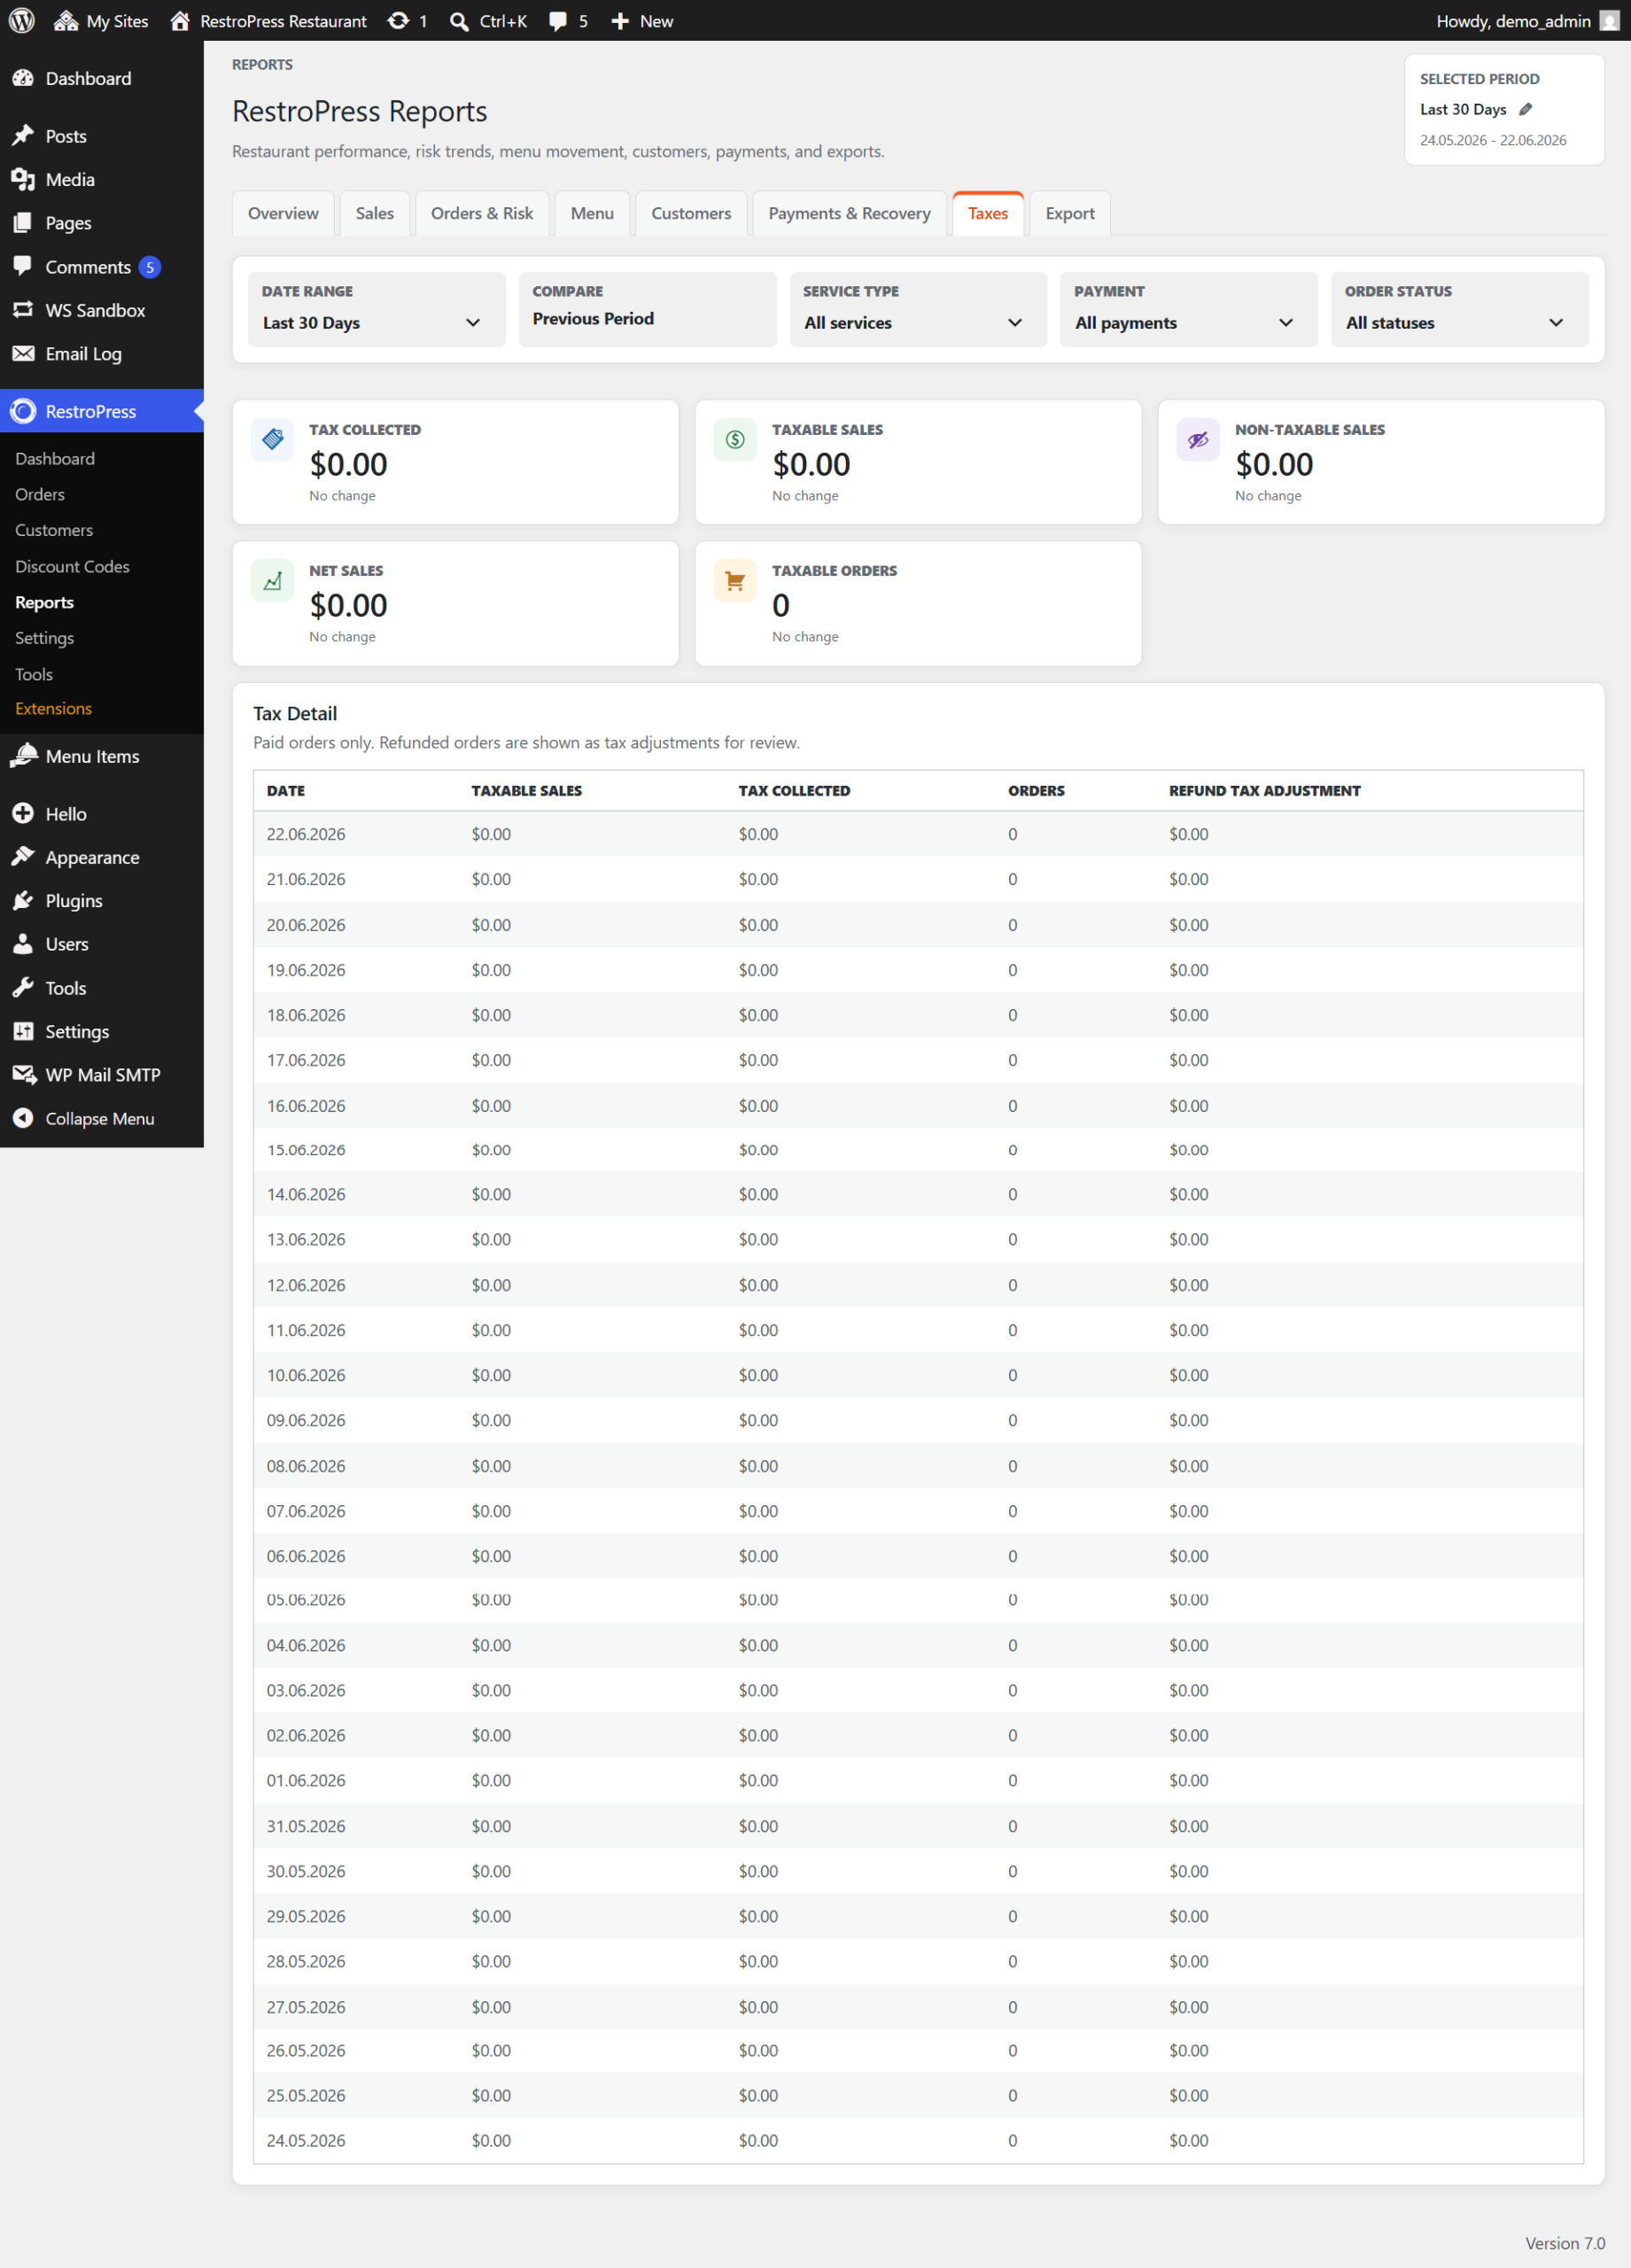
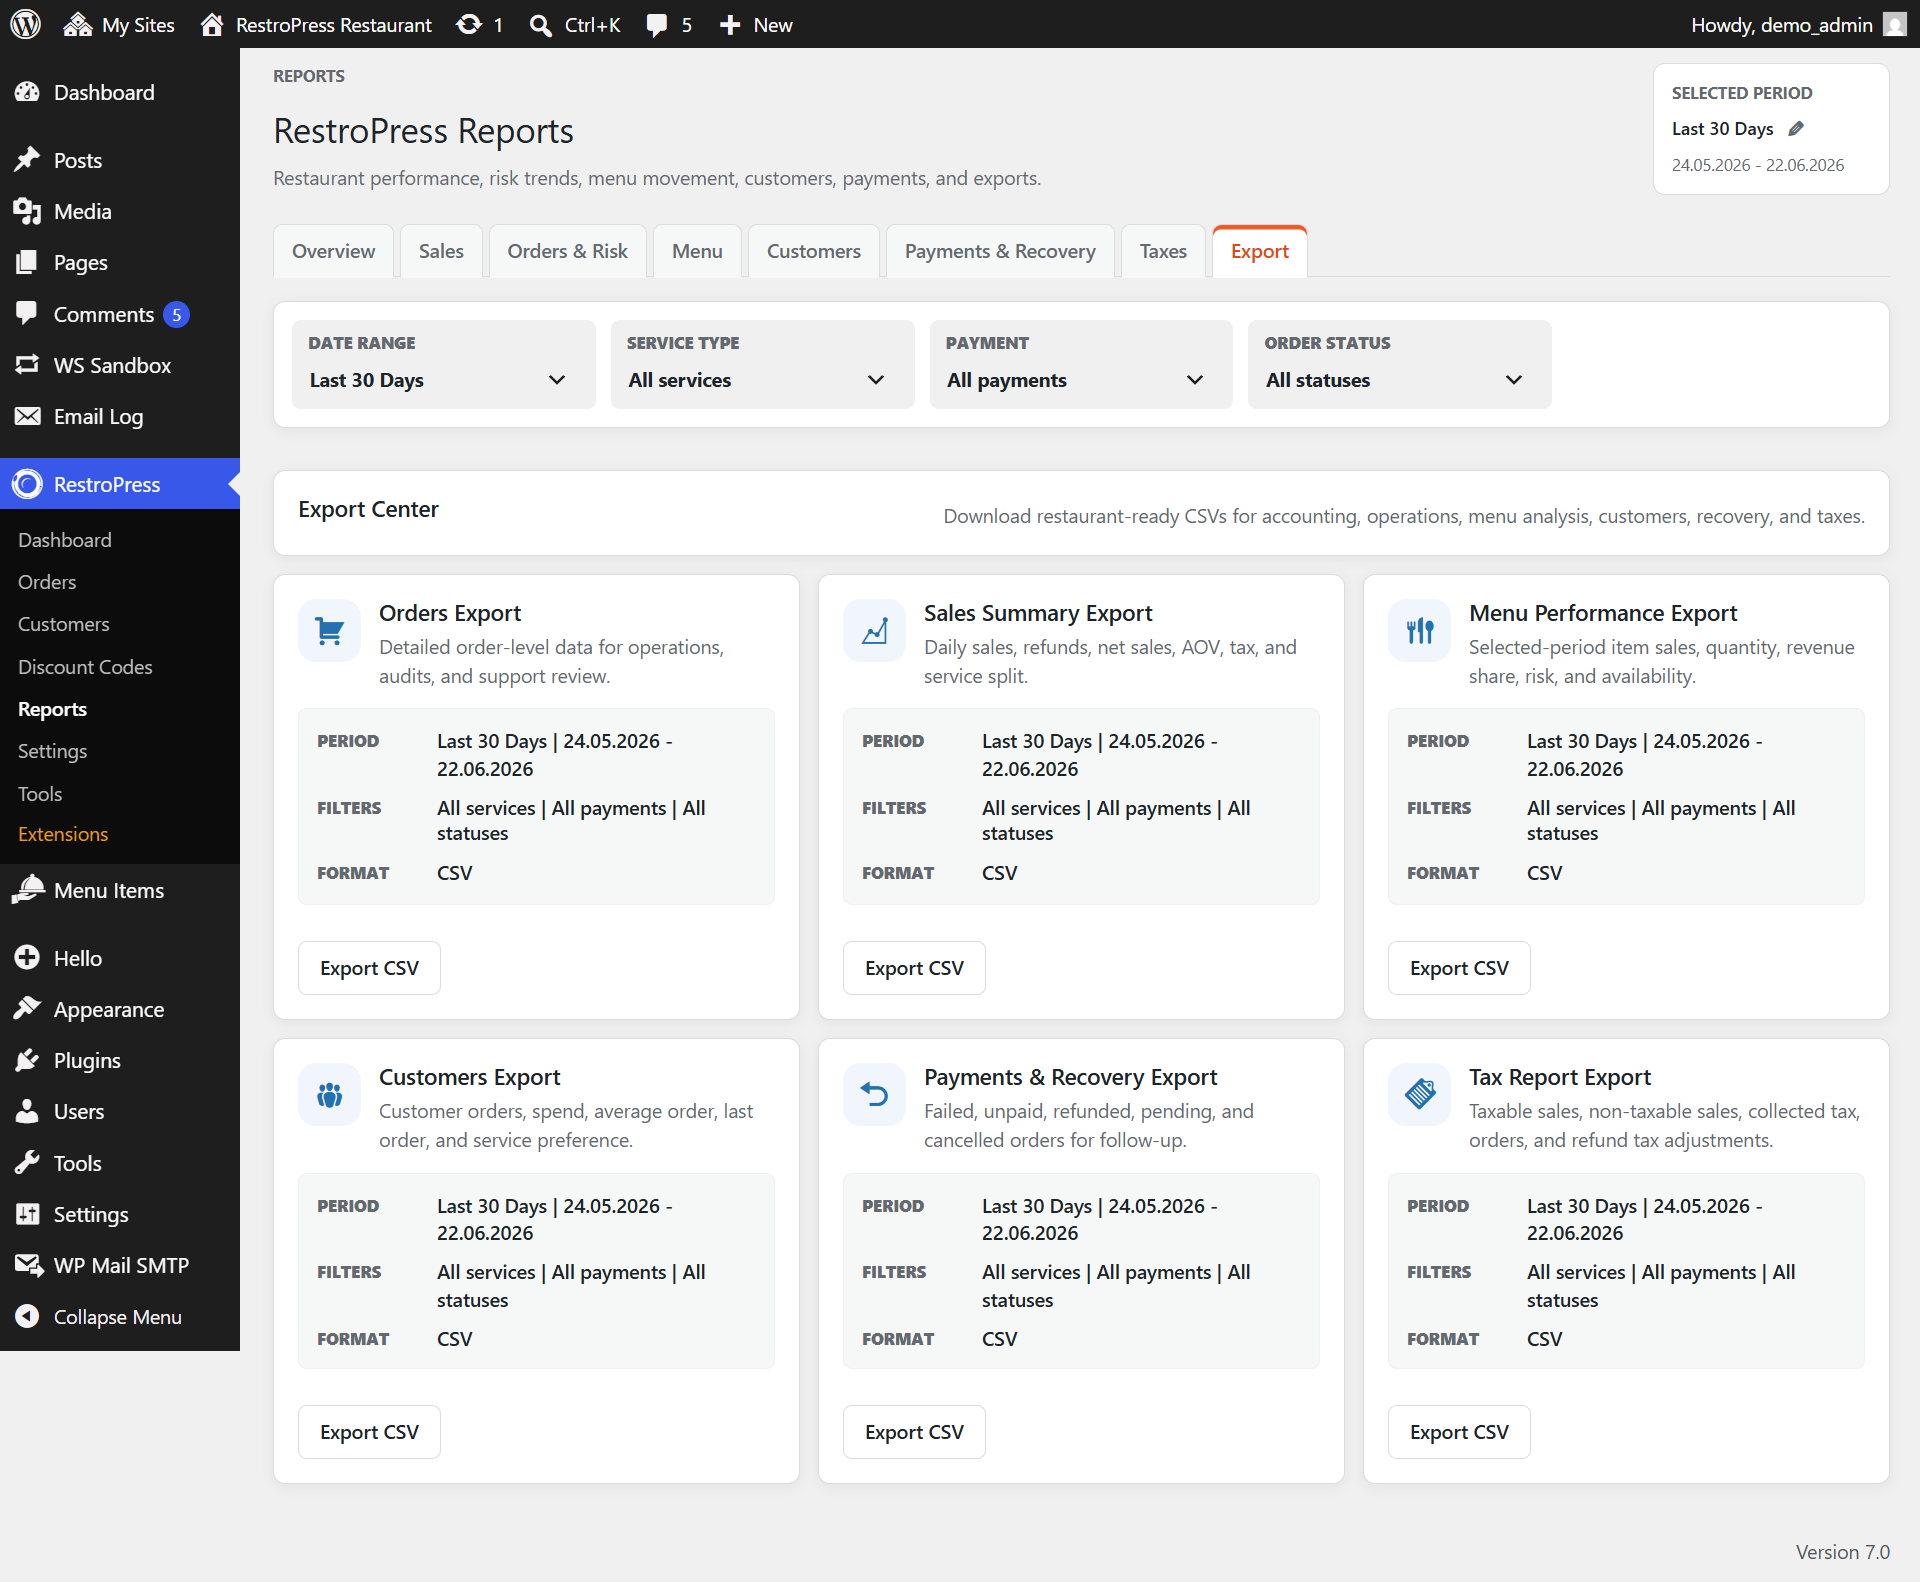
This option provides you with the total earnings and sales reports along with the export option for food items and customer data with order history.
Tools:
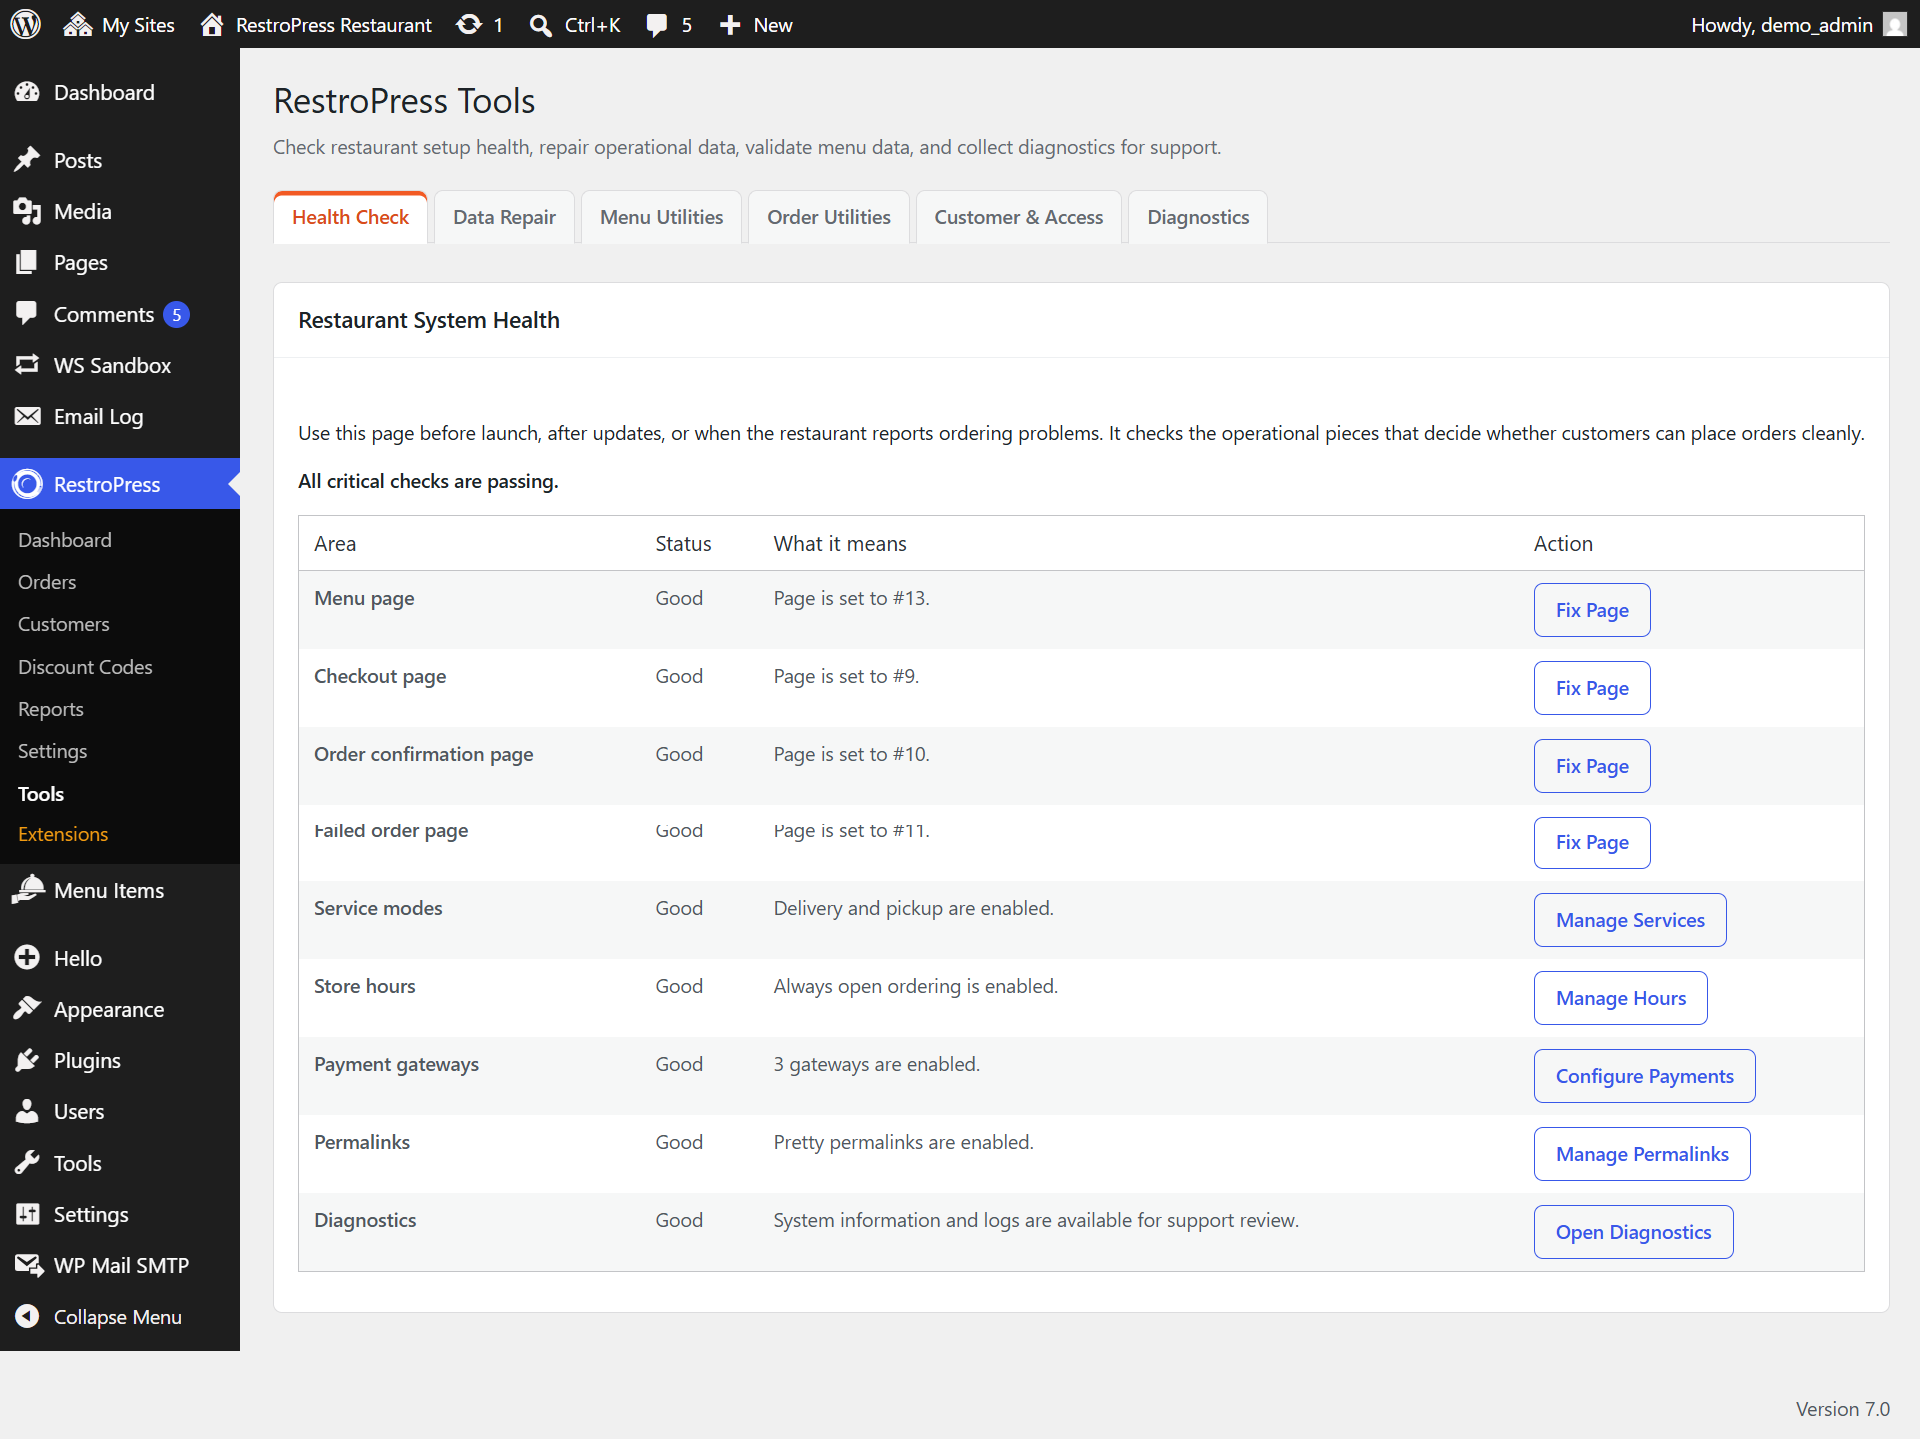
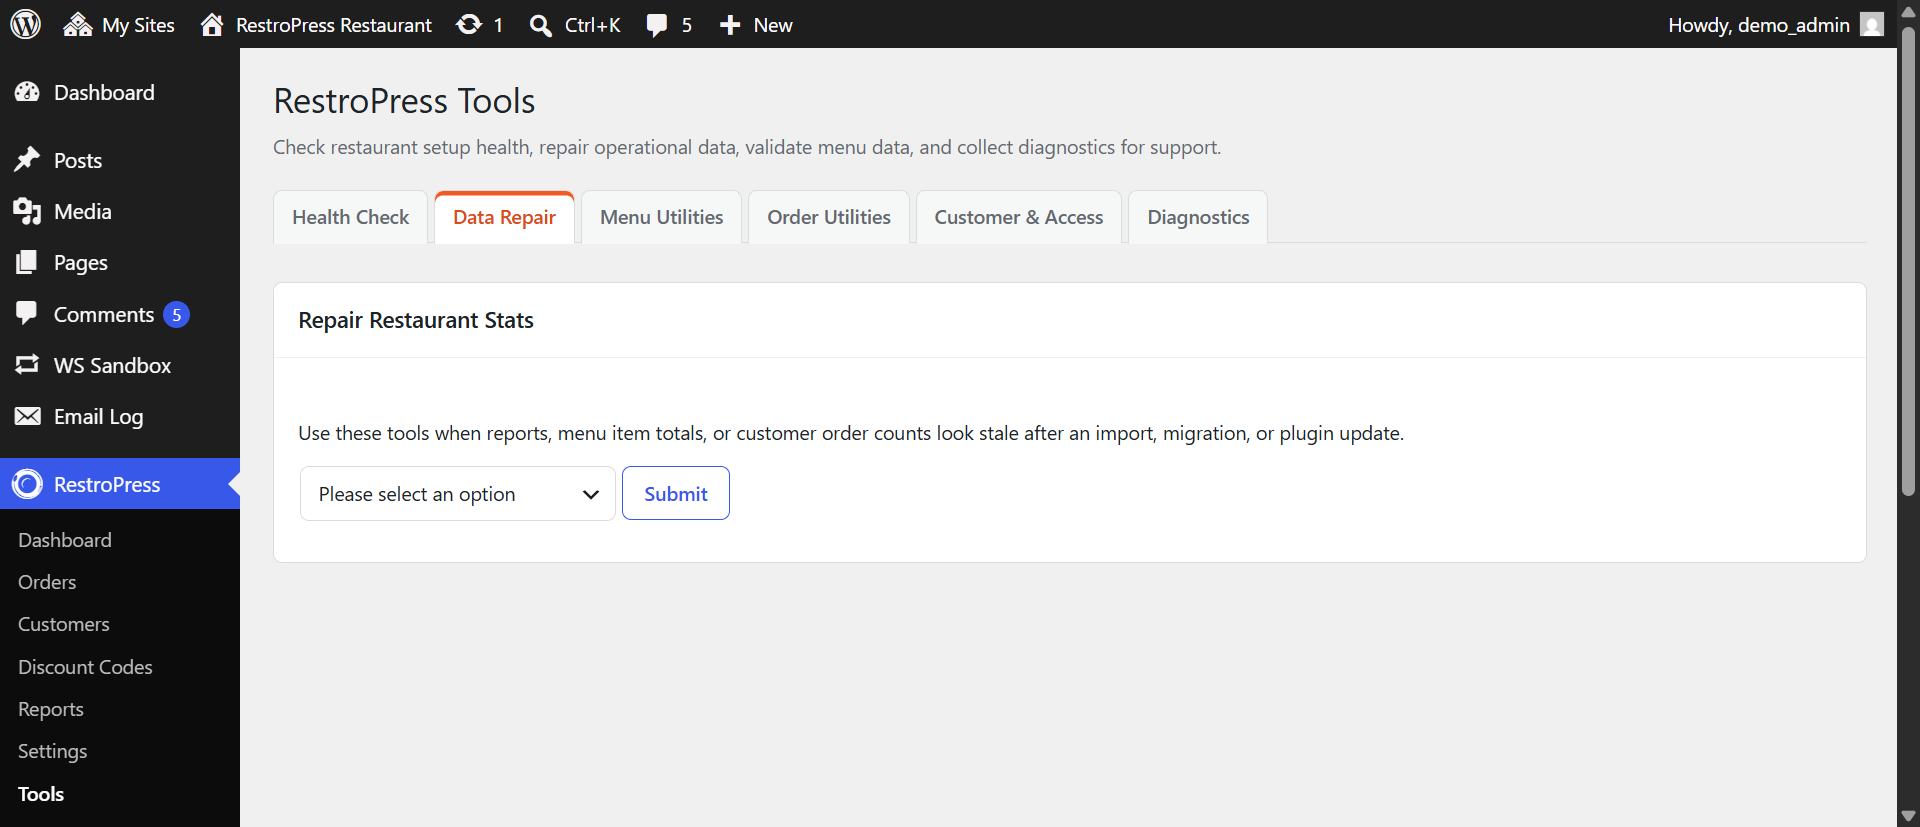
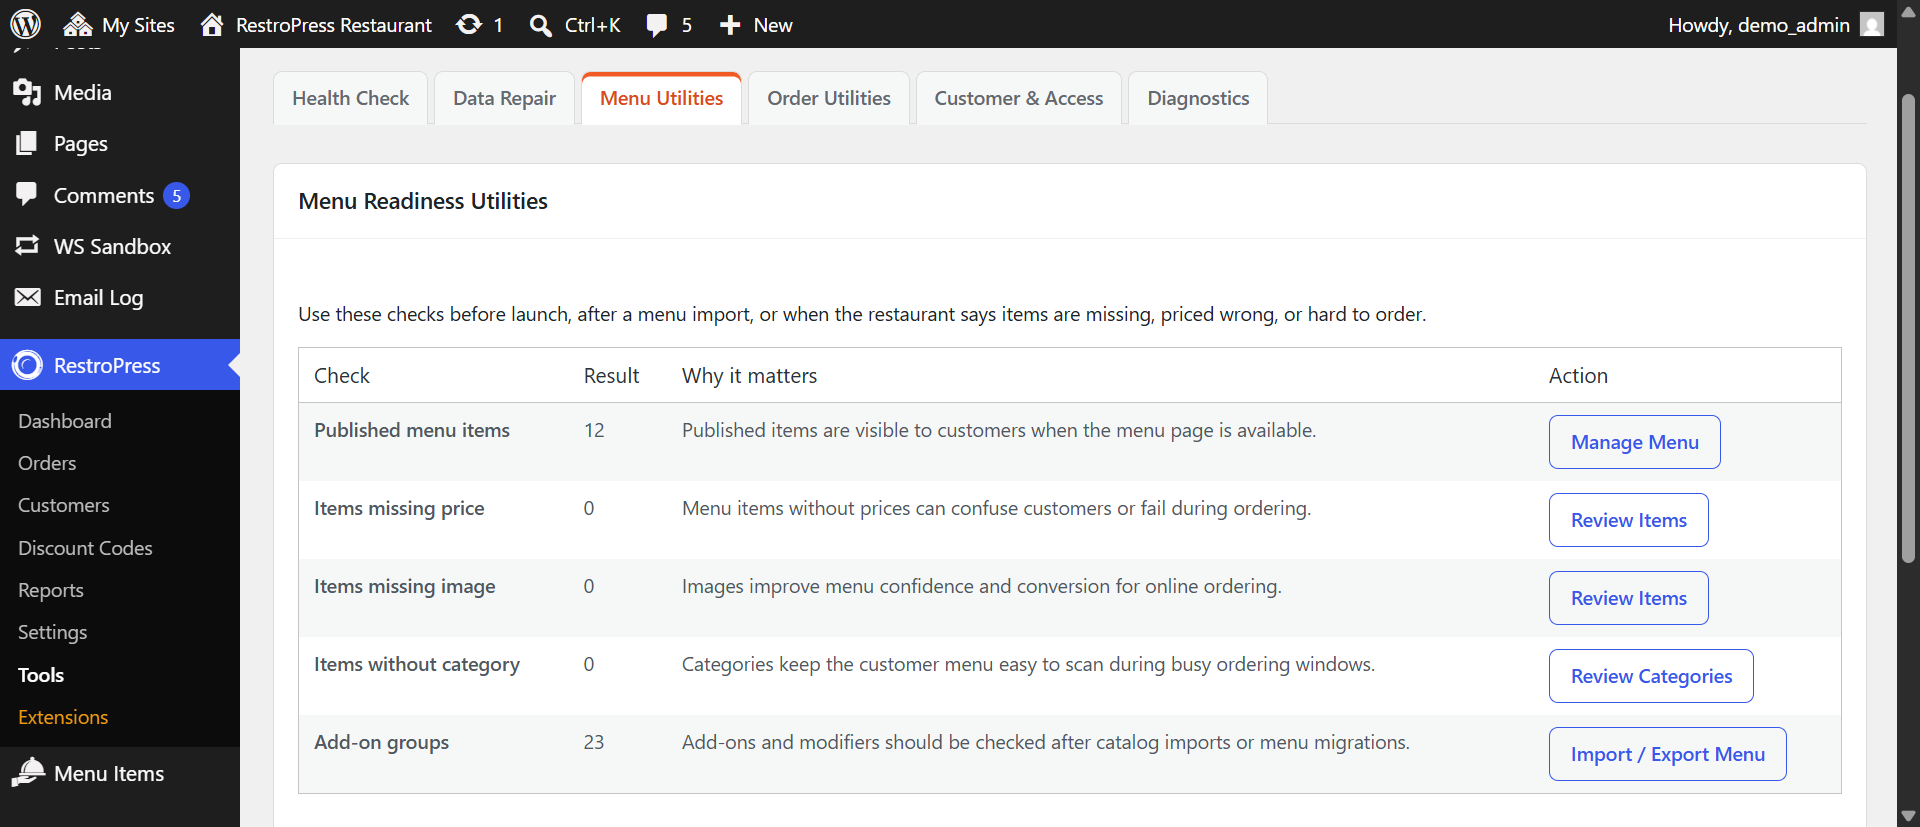
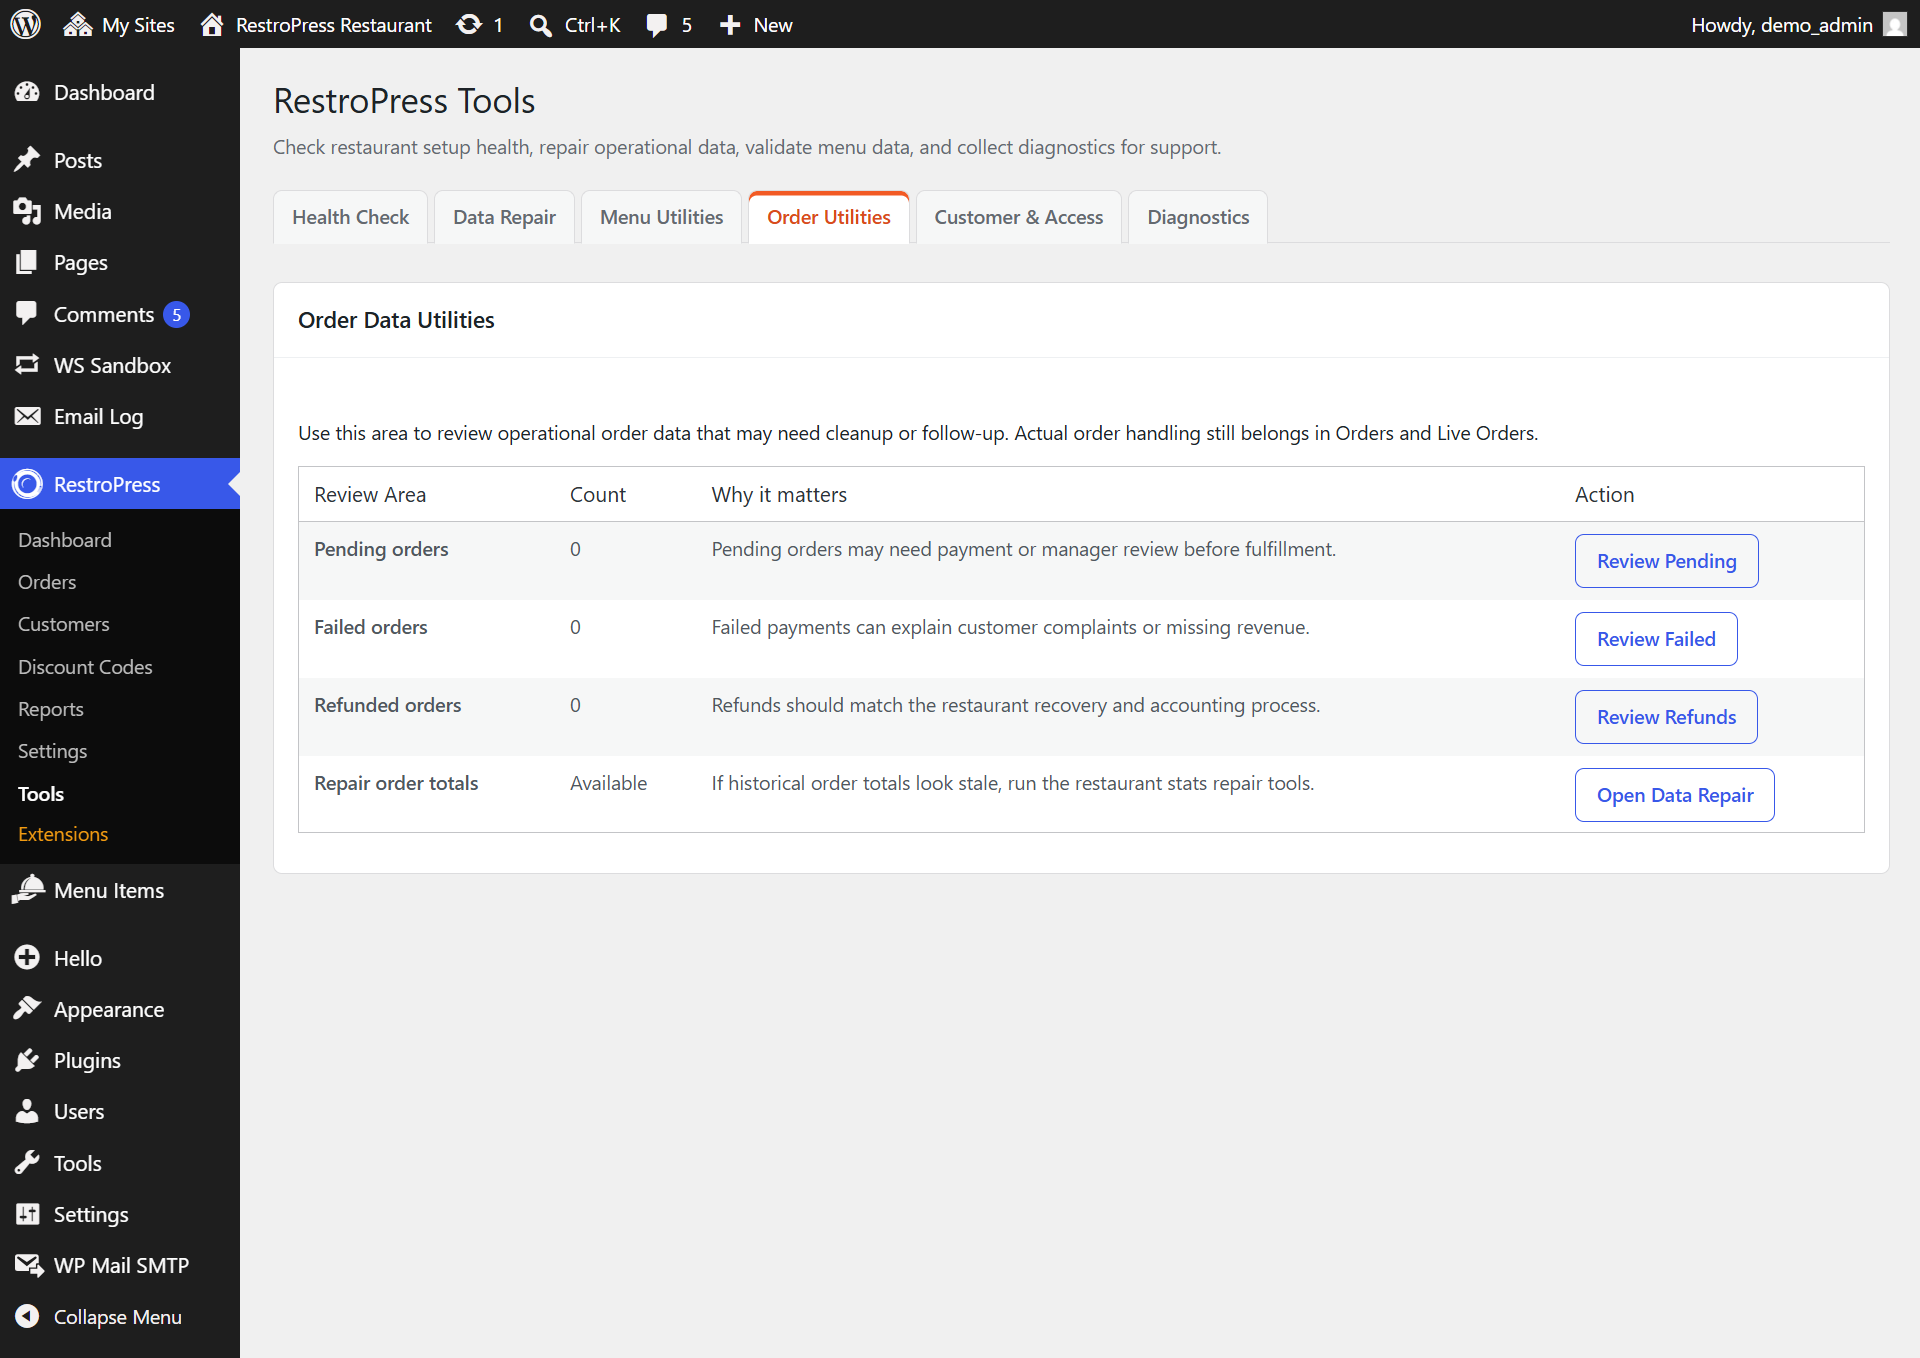
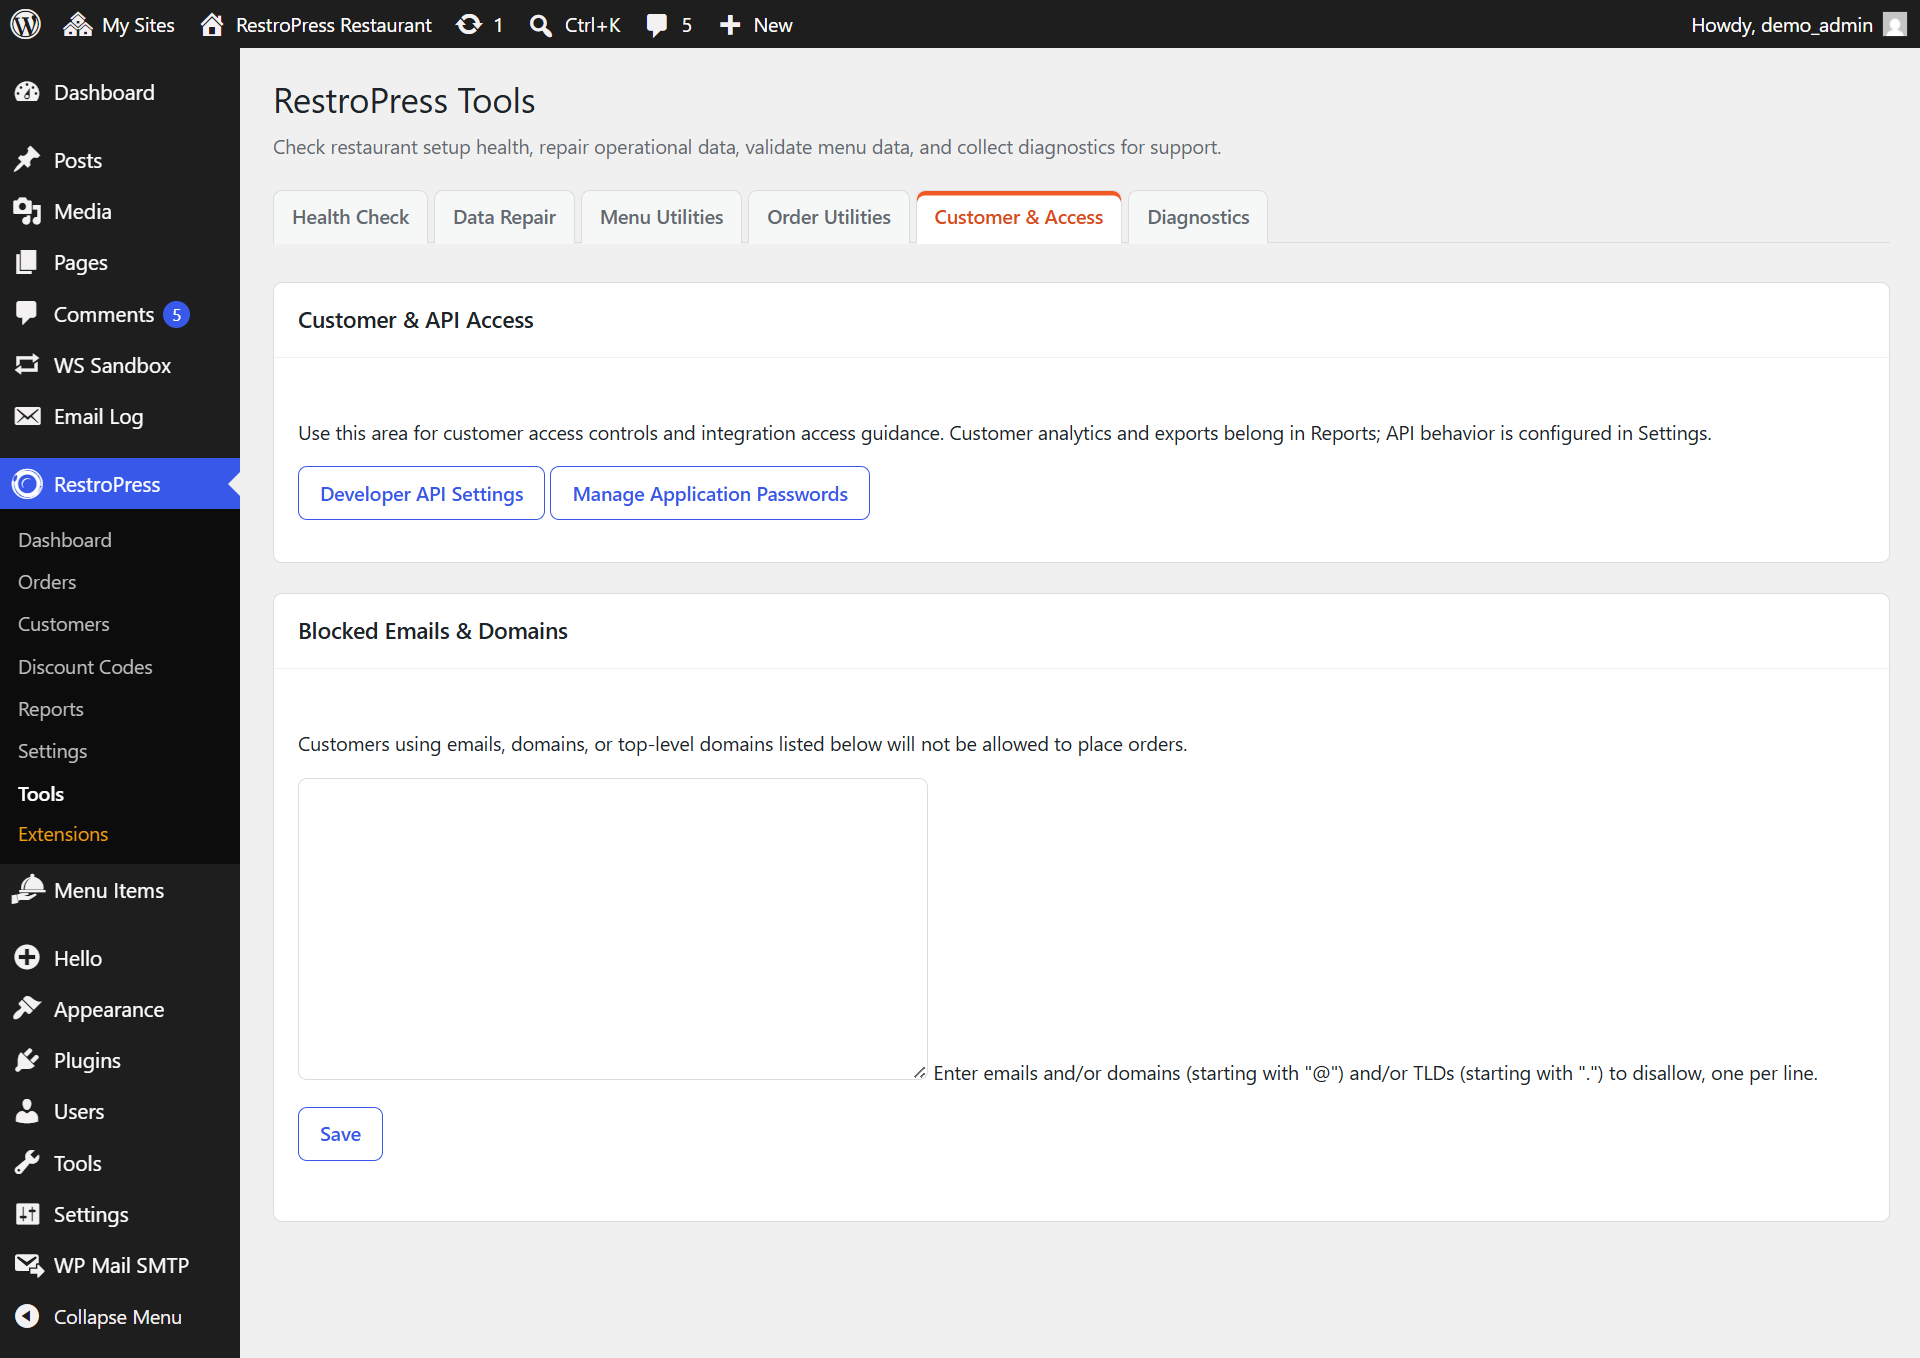
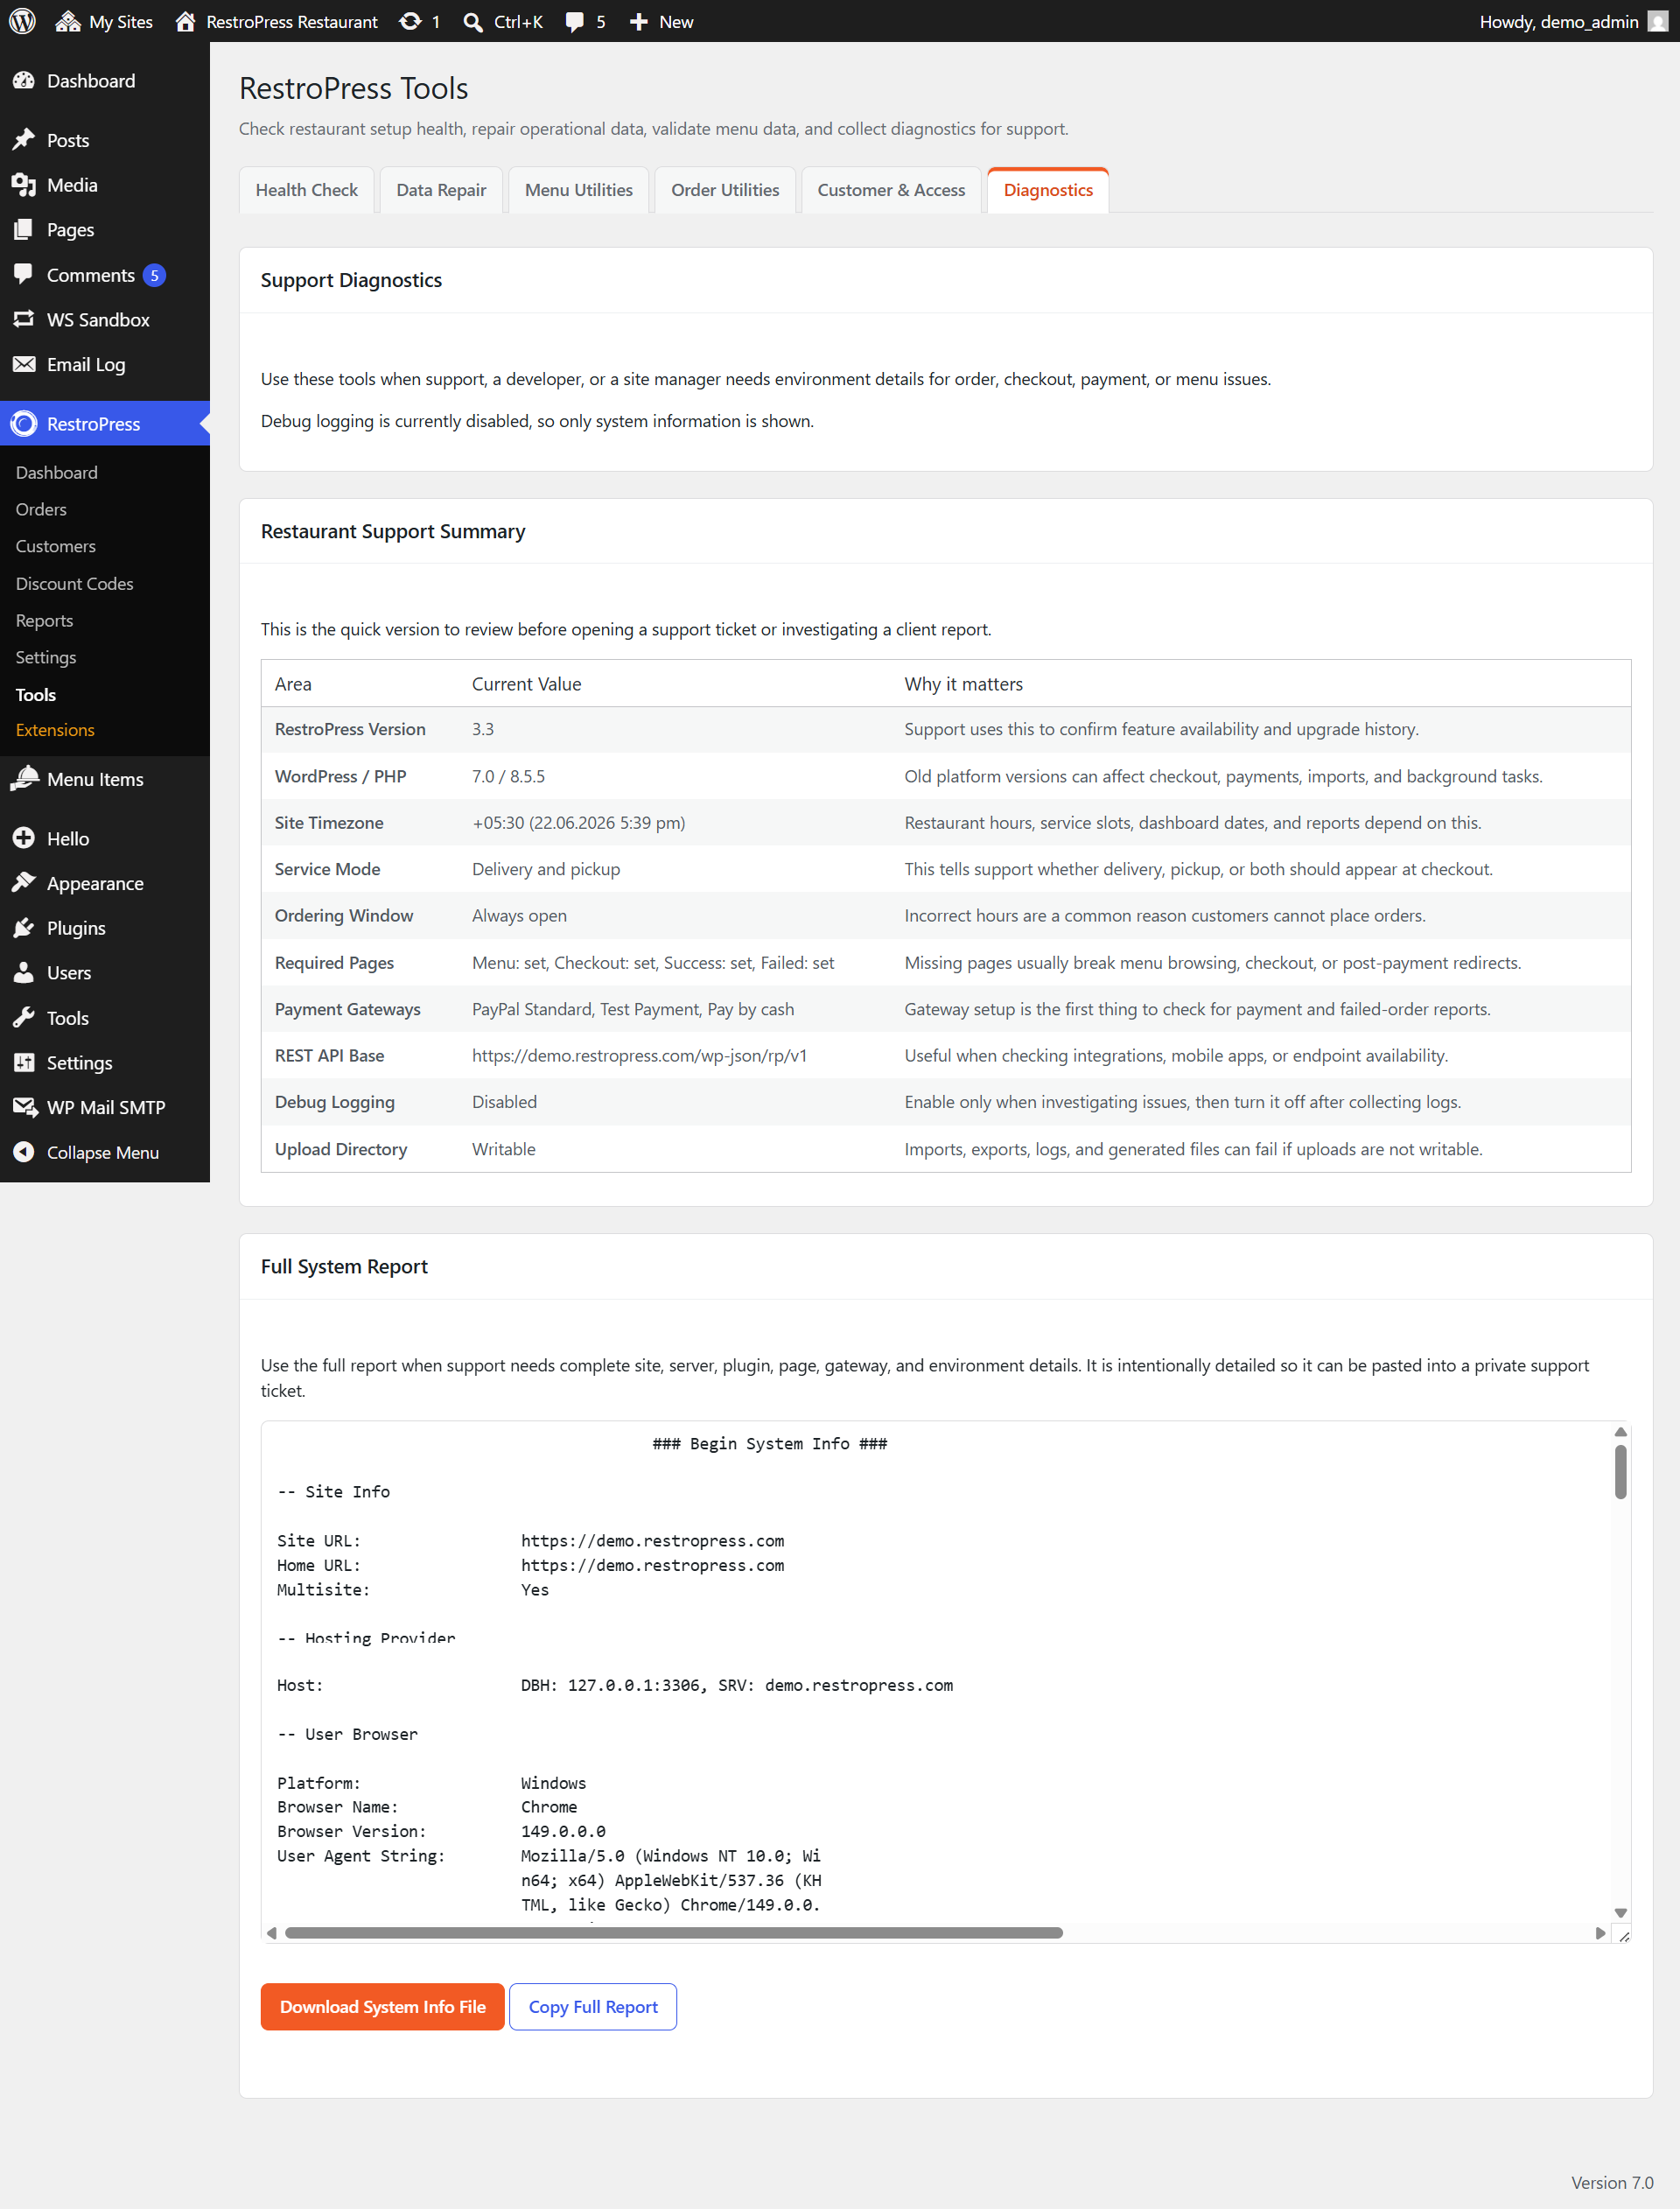
This option provides you with the option to reset and recount your website data.
Extensions: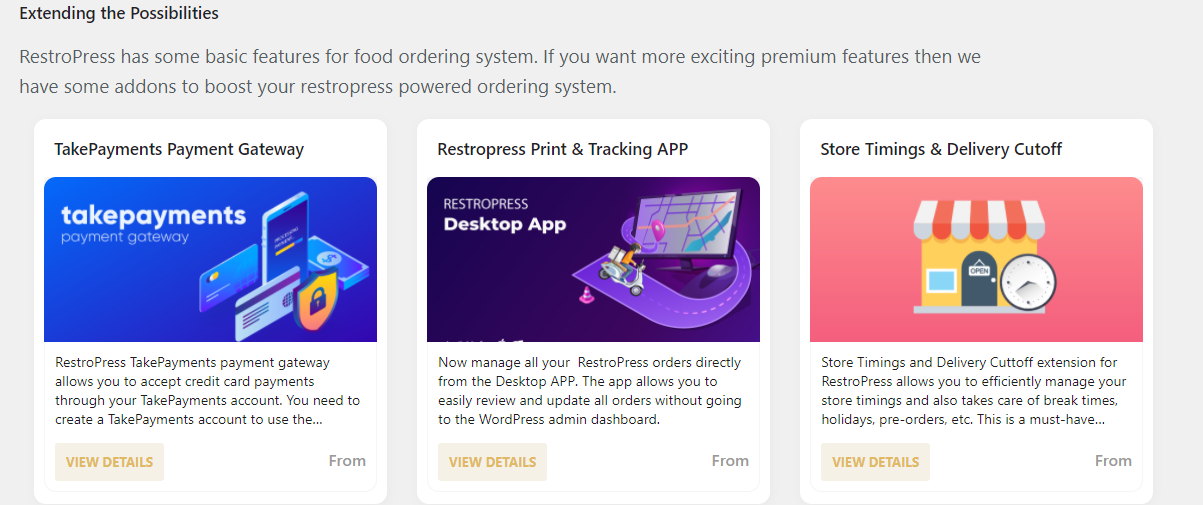
You will find the fields to enter the License keys of all the extensions under this option.